As the sun starts shining brighter, many of us can’t help but feel a sense of excitement and creativity as we think about giving our toes a fresh new look. Who hasn’t had that moment where they gaze at their newly painted toenails and felt a rush of joy? The idea of wearing bold, white polish during the summer months is particularly alluring, with the possibilities for creative designs seemingly endless. But what’s behind this trend, and how can we turn a simple manicure into a statement piece?
Milky Almond Elegance

There’s something serene about a milk-white manicure, evoking the feeling of sun-kissed days and effortless elegance. To achieve this look, start by building a strong foundation with a base coat, allowing it to dry completely before adding layers of creamy white polish. As each coat dries, apply another layer until you reach the desired level of opacity.
Finish off your at-home manicure by sealing everything in place with a topcoat, which not only adds shine but also provides protection against chipping and fading. The result is a glass-like finish that perfectly complements sun-bronzed skin. To get started, grab a base coat, a white polish reminiscent of alabaster shores, and a topcoat for an added layer of protection.
From there, it’s simply a matter of building up your manicure in thick, even layers, allowing each coat to dry before moving on to the next. The payoff is a classic look that’s perfect for hot summer months.
Bling-infused Pedicure
Imagine a whimsical fusion of celestial magic and modern flair, where the simplicity of a natural nail shape meets the drama of rhinestones that shimmer like stars on a summer night. The result is a pedicure design that defies gravity, elevating each toenail into a tiny, twinkling galaxy. This unique marriage of style and substance is achieved through a double-duty base and top coat that offers both shine and efficiency.
A high-quality white polish serves as the perfect canvas for your artistic expression, while the adhesive ensures that every rhinestone remains precisely placed throughout the season. To wear this design means to take control of each stone’s arrangement, imbuing your pedicure with a radiant brilliance that rivals the warmth of mid-summer sunshine.
Abstract Geometry

Imagine transcending to a realm where the boundaries of your toes are reimagined as an avant-garde canvas. Here, the striking contrast between black and white becomes a dynamic playground, exuding both whimsy and depth. These bold lines and patterns aren’t just decorative – they’re declarations of personal style, embracing the unconventional. It’s the perfect expression for those willing to take the leap and join the ranks of the fashionably fearless.
The foundation for this artful transformation lies in a primer that readies your nails for their new role. A crisp white polish serves as the neutral backdrop against which you can unleash your creativity. Meanwhile, a rich black polish provides the means to define your personal boundaries while instilling confidence and daringness. Your trusty companion in this artistic endeavor is the detail brush – the magic wand that brings your black and white vision to life.
With patience, imagination, and a steady hand, you’ll be able to weave a tale of contrasts that’s uniquely yours.
Colorful Accents on Classic White
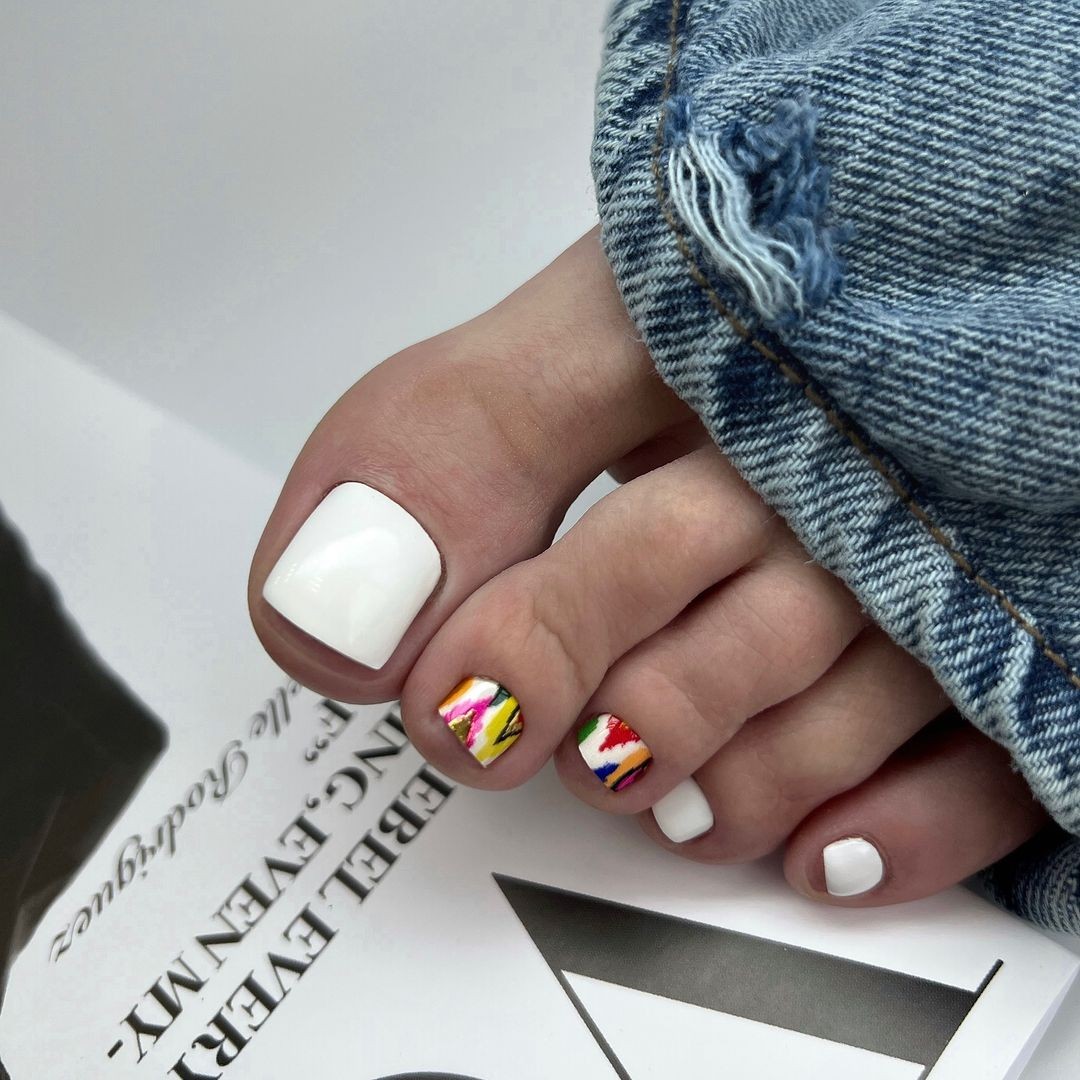
In a delightful juxtaposition, vibrant hues burst forth from the pristine canvas of white toes. This stylish combination features a crisp white base infused with playful, whimsical designs on the accent nails. The fusion of bright colors and white embodies the carefree essence of summer, perfect for pairing with distressed denim and effortless warm-weather outfits.
Credit: @ya.
sablina
To achieve this look, start by applying two layers of creamy white gel polish, allowing each layer to fully cure before moving on to the next. Then, using acrylic paints and a fine detail brush, bring your design to life with freehand artistry. Finally, seal everything in place with a no-wipe gel top coat for a smooth, long-lasting finish.
Sophisticated Monochrome Florals
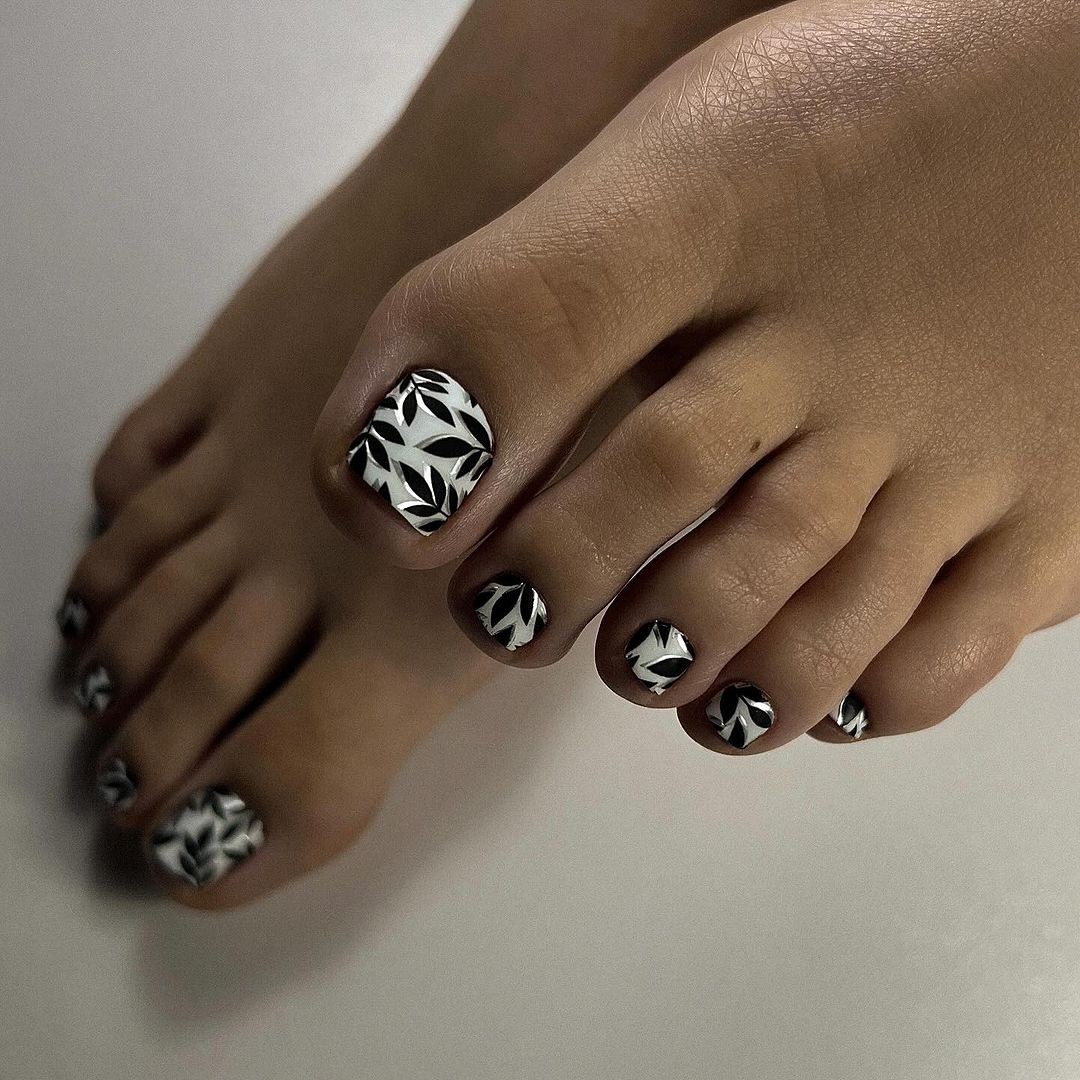
Elegance personified, this monochrome nail art design combines classic sophistication with modern flair. A delicate floral pattern unfolds against a crisp white background, imbuing the overall look with an artistic charm that’s perfect for warm summer nights. This versatile design effortlessly transitions from casual cotton dresses to formal attire, thanks to its clean lines and monochromatic color palette.
The star of this show is opaque white polish, boasting high pigmentation for a fully opaque finish. Adding depth and dimension are black polish or a nail art pen, used to create intricate flower patterns with precision.
To bring this sophisticated look to your own fingertips, begin by applying a solid white base coat and allowing it to dry completely. Next, employ steady hands to sketch out the floral design using black polish or a nail art pen.
Finally, top off the look with a matte clear top coat for an edgy yet refined finish.
Stone-Inspired Elegance
The natural elegance of stone veins is reimagined in this unique summer white toenail design, blending smooth gloss with intricate marbling. Each nail’s design is a one-of-a-kind masterpiece, evoking the polished beauty of marble and the artistry of nature itself. The earthy charm of this look is further enhanced by the use of natural stone-inspired motifs. To achieve this stunning effect, start by applying a durable white gel polish as a base coat for added shine.
Next, you’ll need black and grey polishes to create the marbled design. A thin nail art brush or dotting tool will come in handy for adding fine vein-like lines that give the illusion of natural stone. To begin your DIY marbling adventure, start with a white polish base and let it dry until it’s still tacky. Then, add small amounts of black and grey polish and gently swirl them together using your chosen brush or dotting tool.
The result will be a beautiful, unique marbled effect that’s reminiscent of the natural world. Finally, seal everything in place with a glossy top coat to give your design added depth and dimension.
Abstract Pop on White
In this abstract nail art design, bold black shapes and vibrant splashes of mustard on a crisp white canvas create a lively expression of artistic skill. Each nail becomes a miniature masterpiece, as if summer spirits have left their mark. The design’s organic feel is achieved through spontaneous patterns that seem to emerge effortlessly. To bring this abstract artistry to life, start with a pure white gel polish base coat for a flawless finish.
Then, unleash your creativity using black and mustard-colored paints, applying bold strokes in one smooth motion. For added precision, fine detail brushes can be used to add freehand touches. Finally, seal the design with a high-gloss gel top coat to protect it from fading and give it a radiant sheen that will last. Begin by curing the white base coat before moving on to the creative process. With bold strokes and a willingness to take risks, bring your inner artist to life.
Once you’ve completed the design, finish it off with a glossy top coat for a lasting impact that’s more than just a regular polish.
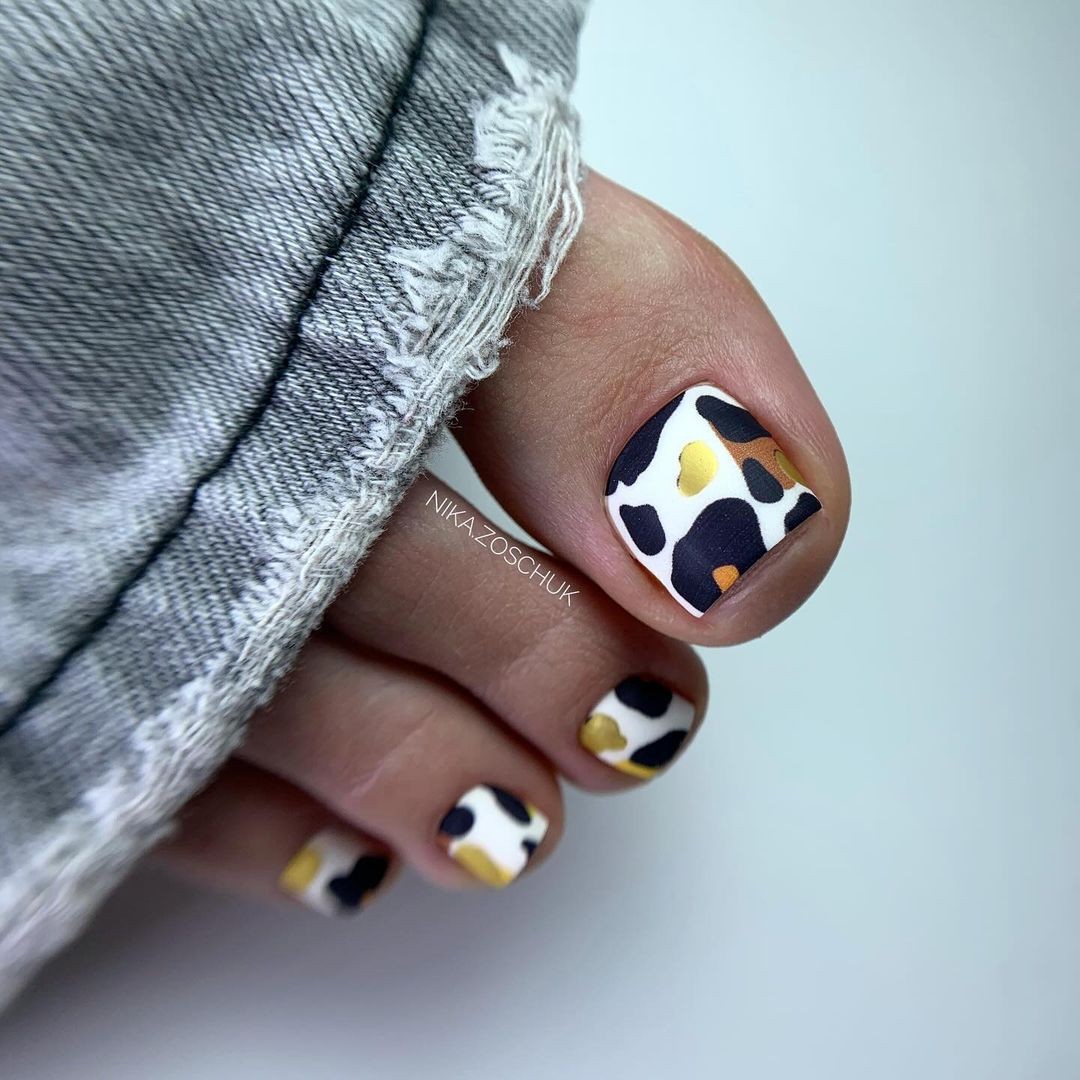
Wild Leopard Print

The leopard print nail design embodies the thrill of wilderness, a timeless allure that’s always in style. It can be effortlessly paired with gold tones during summer, boasting natural elements that add a touch of sophistication. This daring look is all about embracing adventure and freedom, every move a testament to living life on the edge.
The sandy beige base coat provides a warm canvas for the design, while the black polish expertly defines the leopard’s distinctive features.
A golden glow is achieved by applying the metallic polish, adding depth and dimension to the overall look.
To achieve this wild and wonderful design, start by applying a coat of beige nail polish and dotting it with golden accents. Use black polish to outline each spot, creating a signature look that requires both steady hands and an imaginative mind-set.
Subtle Lace Elegance
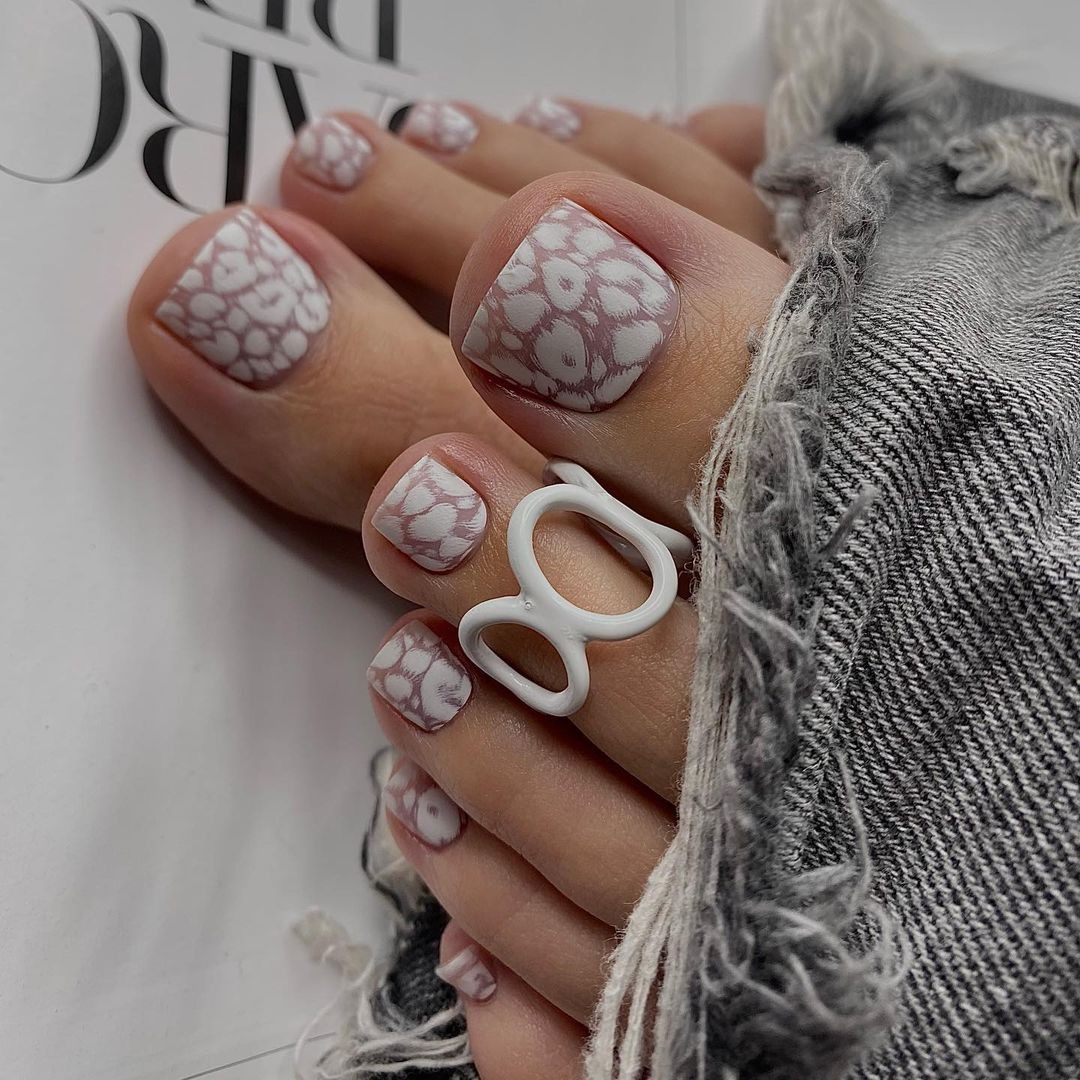
Imagine a soft whisper of elegance, where delicate lace patterns dance against a pure white backdrop, transporting you to a world of refined summer charm and whimsical garden parties. This design is intentionally crafted for those who appreciate the subtlety of lace as fabric, its intricacies woven with sophistication and poise. A canvas of creamy milk-colored gel polish sets the stage, while a grey nail polish or stamping set brings forth the delicate strokes reminiscent of lace’s complexity.
To complete the illusion, a mattifying topcoat adds a tactile quality, much like the texture of real lace. To recreate this look at home, start by painting your nails with white gel polish from base to tip. Next, apply grey nail polish using a stamping kit or freehand drawing, carefully crafting the lace-inspired design. Finish off the look by sealing it all in with a matte topcoat, allowing the texture of the design to shine through.
Zebra Stripes with a Glittery Twist
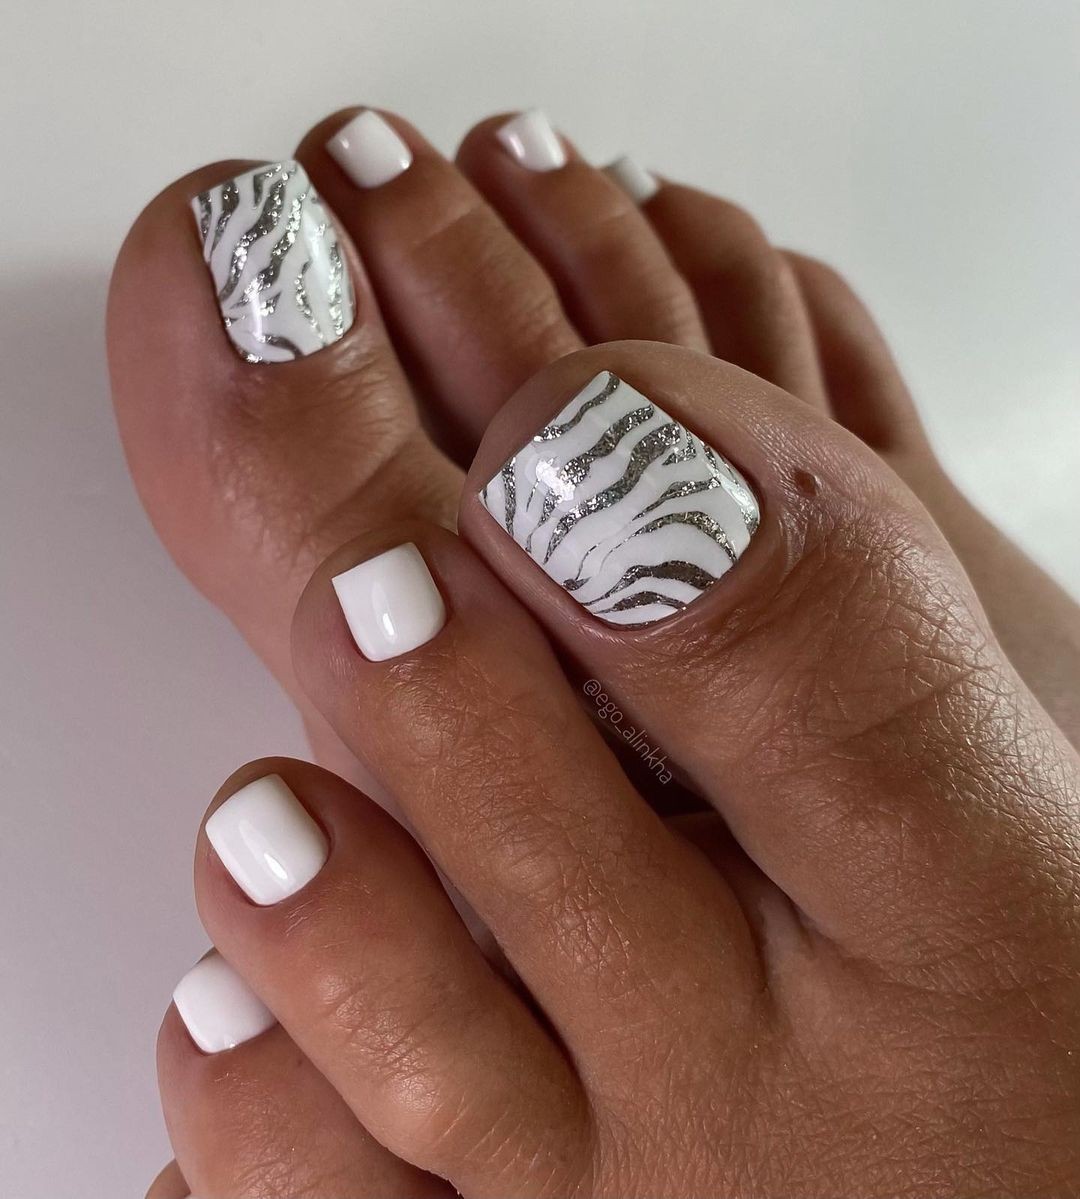
Immerse yourself in the unbridled elegance of the savannah as zebra-inspired stripes transform your summer style into a true masterpiece. The intricate patterns on the accent nails are elevated by silver glitter tracing the stripes, resulting in a dazzling finish that seamlessly blends timeless sophistication with modern glamour. This captivating design is ideal for sizzling hot days and starry nights alike.
To bring this look to life, begin by applying a single layer of clear white polish as a base coat, allowing it to dry completely before moving on to the next step. Use black nail polish to create striking vertical (or horizontal) stripes across each finger, leaving space between them for a subtle reveal of your natural nail color. Once the black polish is fully dry, apply silver glitter over select areas to add an extra layer of sophistication and shine.
Finally, seal your design with a fast-drying top coat to ensure long-lasting protection against the wear and tear of daily activities.
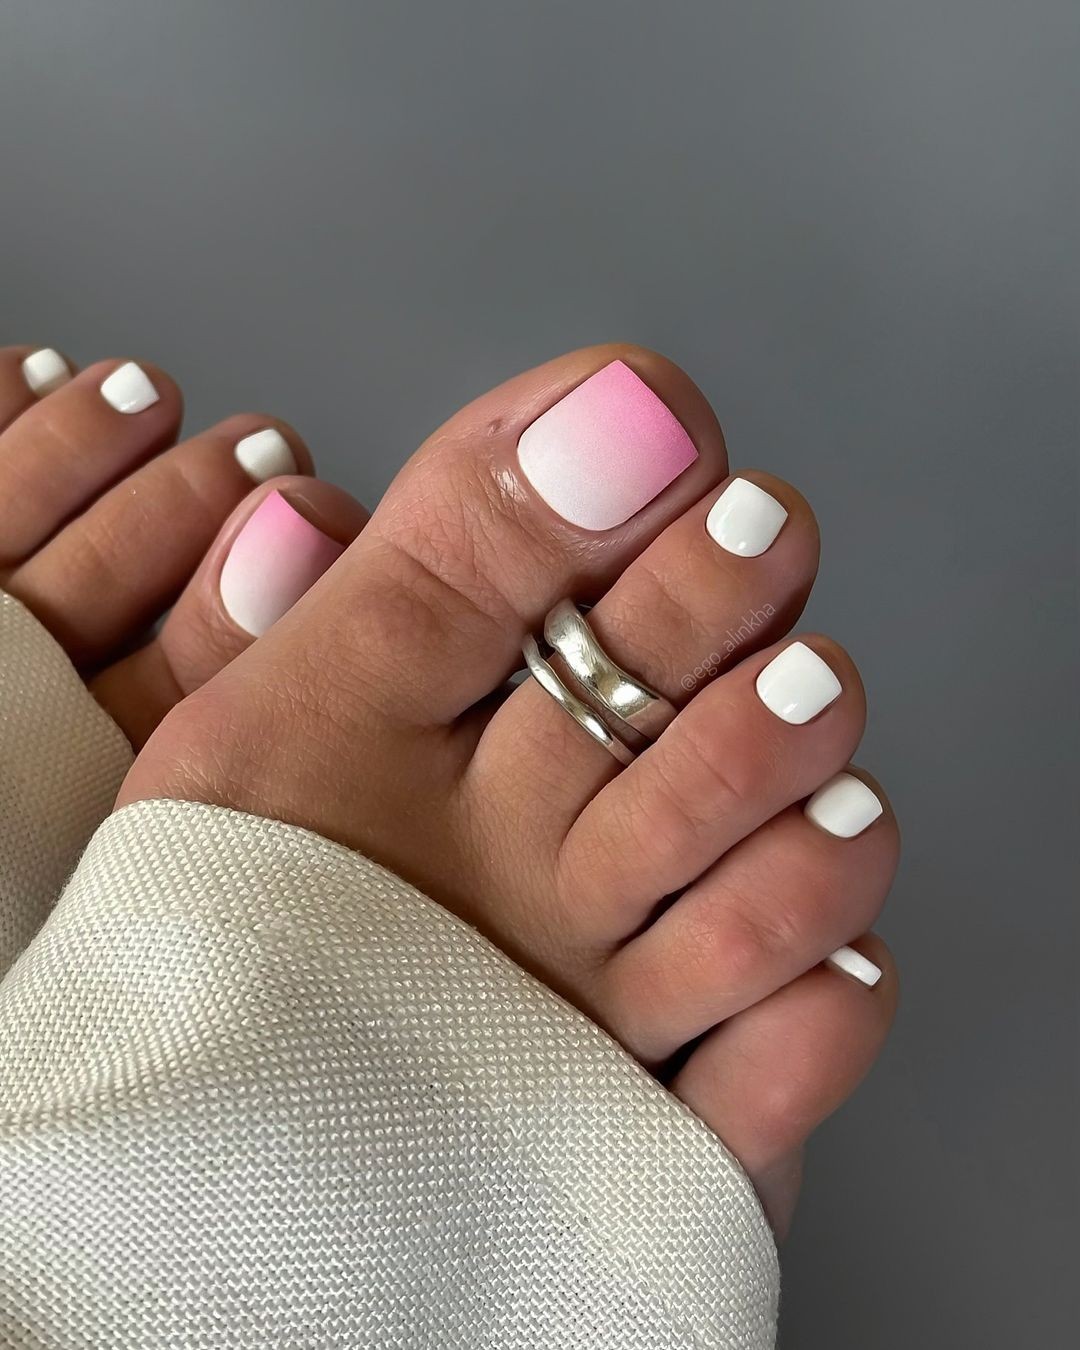
Wavy Pink and White Delight
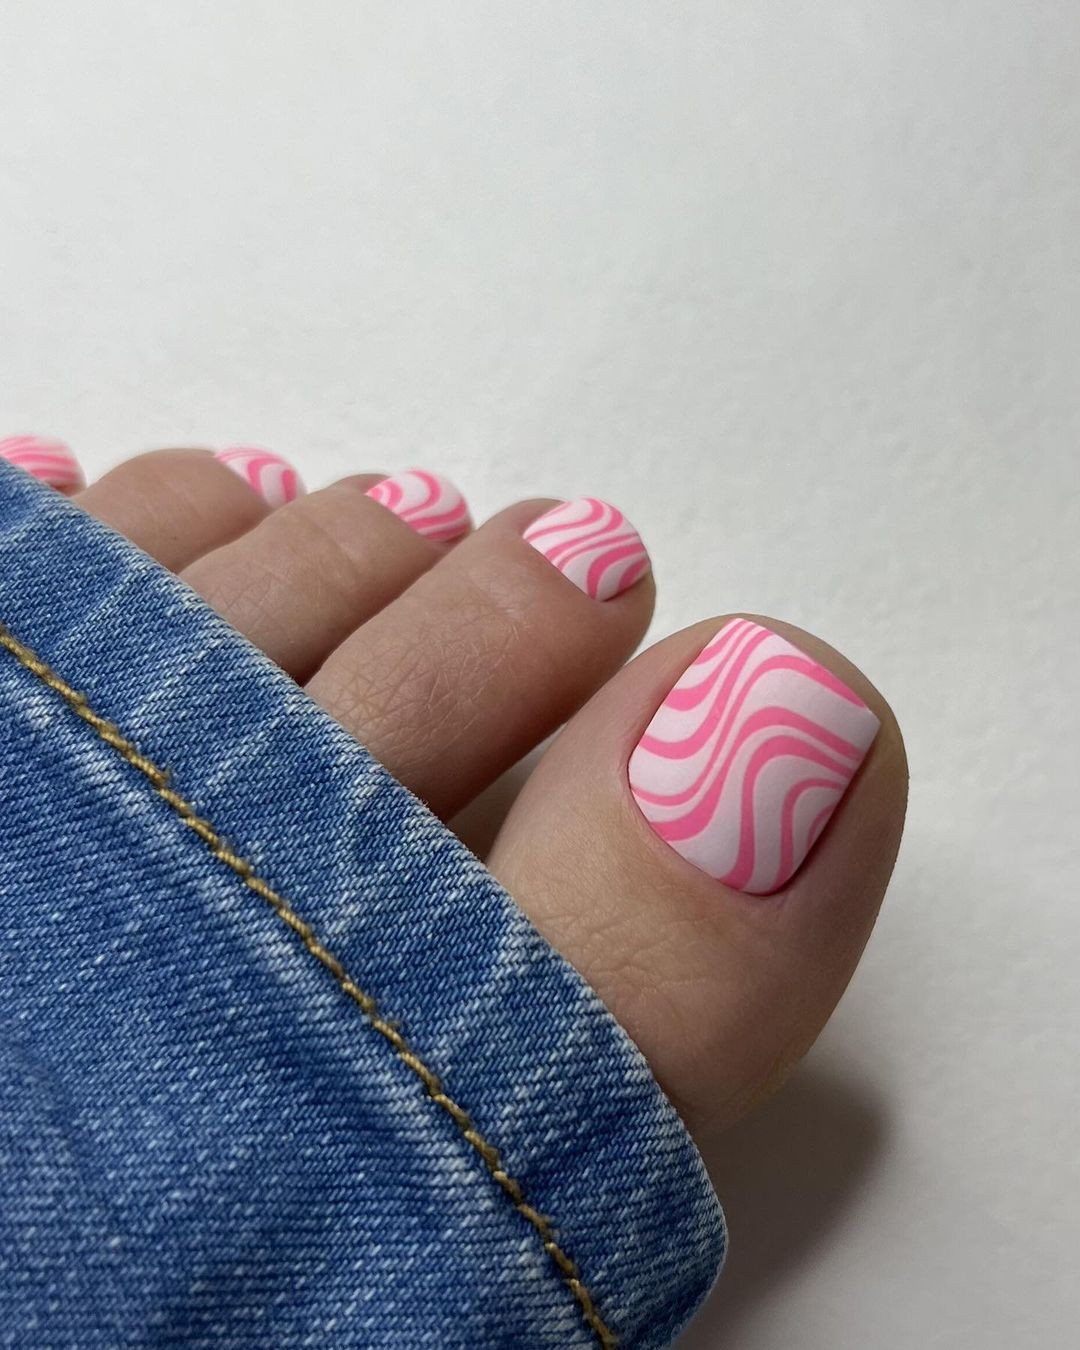
Step into the whimsical world of cotton candy skies and let your nails become an extension of that sweet serenity. This design is perfect for those who adore white with a touch of color, as it effortlessly blends playful and calming elements, reminiscent of the gentle lapping and pulling back of waves on a sun-kissed beach where laughter and sunshine fill the air. To achieve this look, begin by applying a pure white base coat to create a clean canvas.
Next, use light-colored pink varnish to paint undulating lines that mimic the soft undulations of cotton candy skies at dusk. For added precision, employ a thin brush or striping tool to produce exact shapes of waves. Finally, top it all off with a shiny top coat to give your nails a radiant finish that shines like the summer sun on water as the waves do too. To begin, pick up your base coat in white paint and let it dry.
Then, using a fine brush or striping tool, create wavy lines with the pink polish. Make sure to allow some interweaving at certain points where the lines merge together softly. Once you’re satisfied with your design, seal everything in place with topcoat.
Geometric Honeycomb
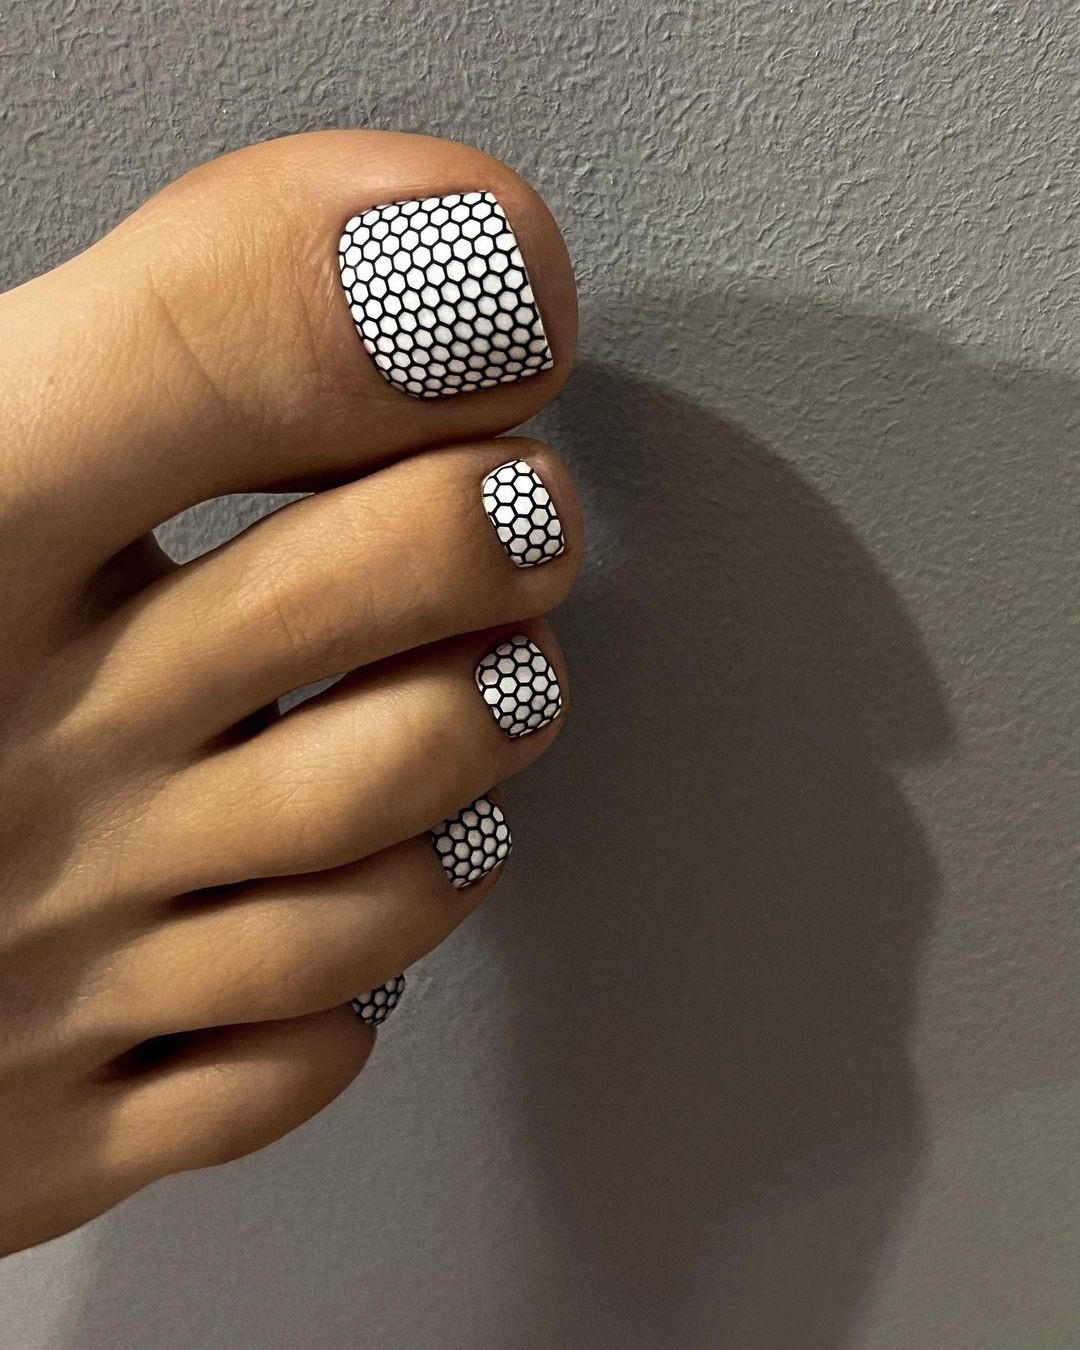
Emulating nature’s intricate beauty in a modern take on the classic honeycomb design, this geometric nail art combines precision and style. The crisp white base serves as the perfect canvas for the black hexagons that are carefully crafted to resemble the intricate patterns found in bee hives. This timeless look is just as at home in a professional setting as it is in a casual gathering. To achieve this look, start by applying a solid white polish to your nails.
Once dry, use a black nail pen to create the geometric honeycomb design. Precision is key here, so take your time and focus on creating even, symmetrical hexagons. Finally, seal everything off with a clear top coat to protect your handiwork and add a touch of shine.
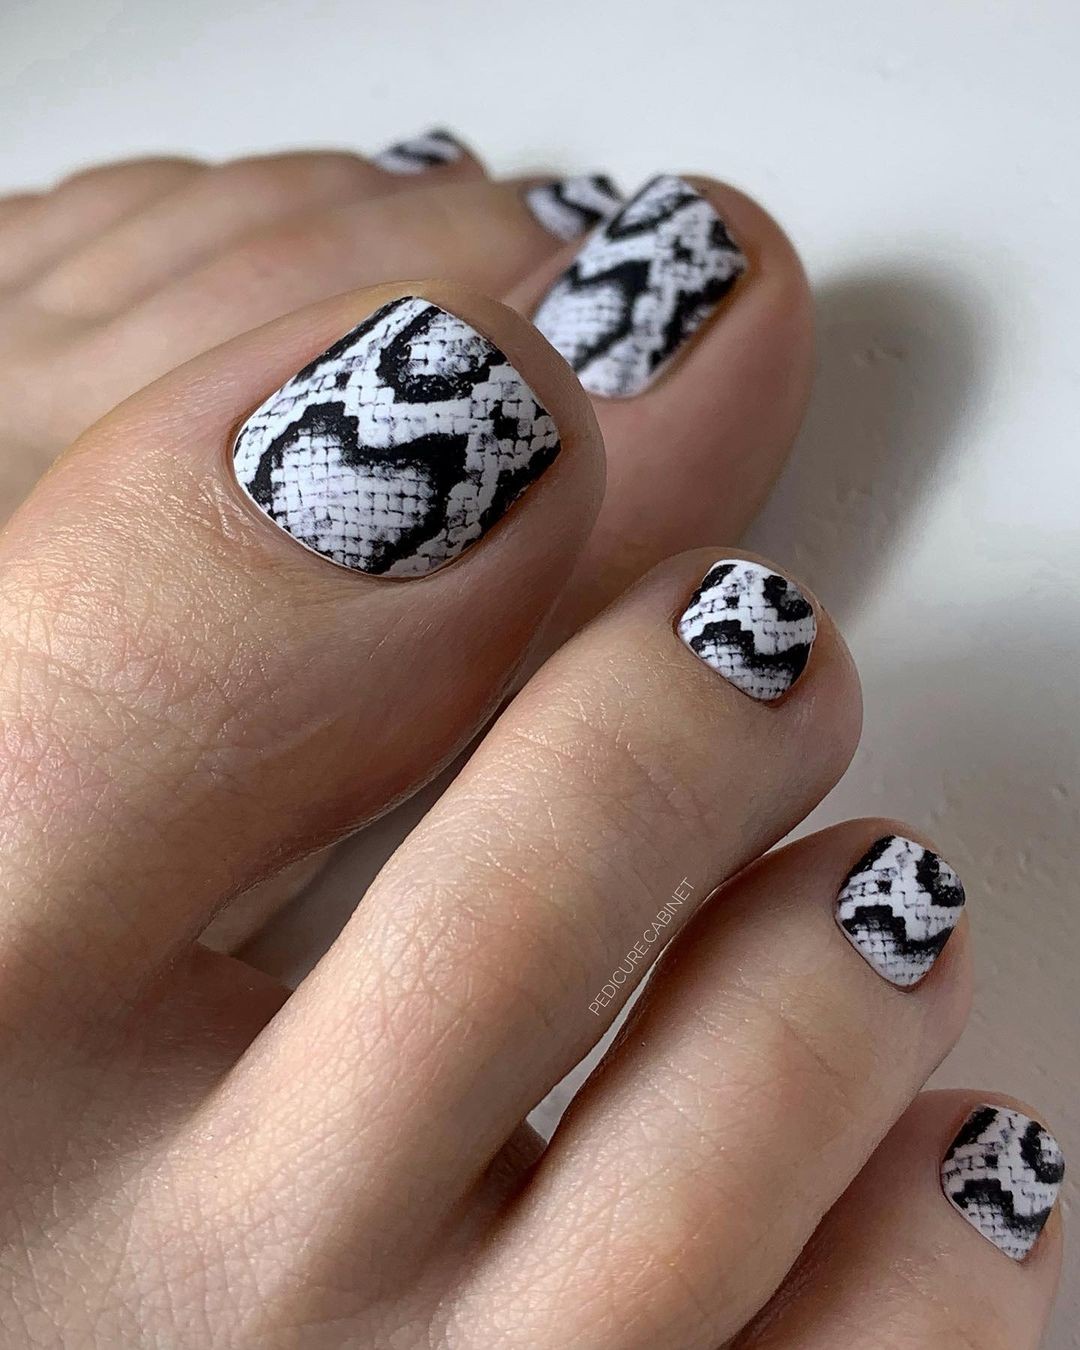
Intricate Crochet Delicacy
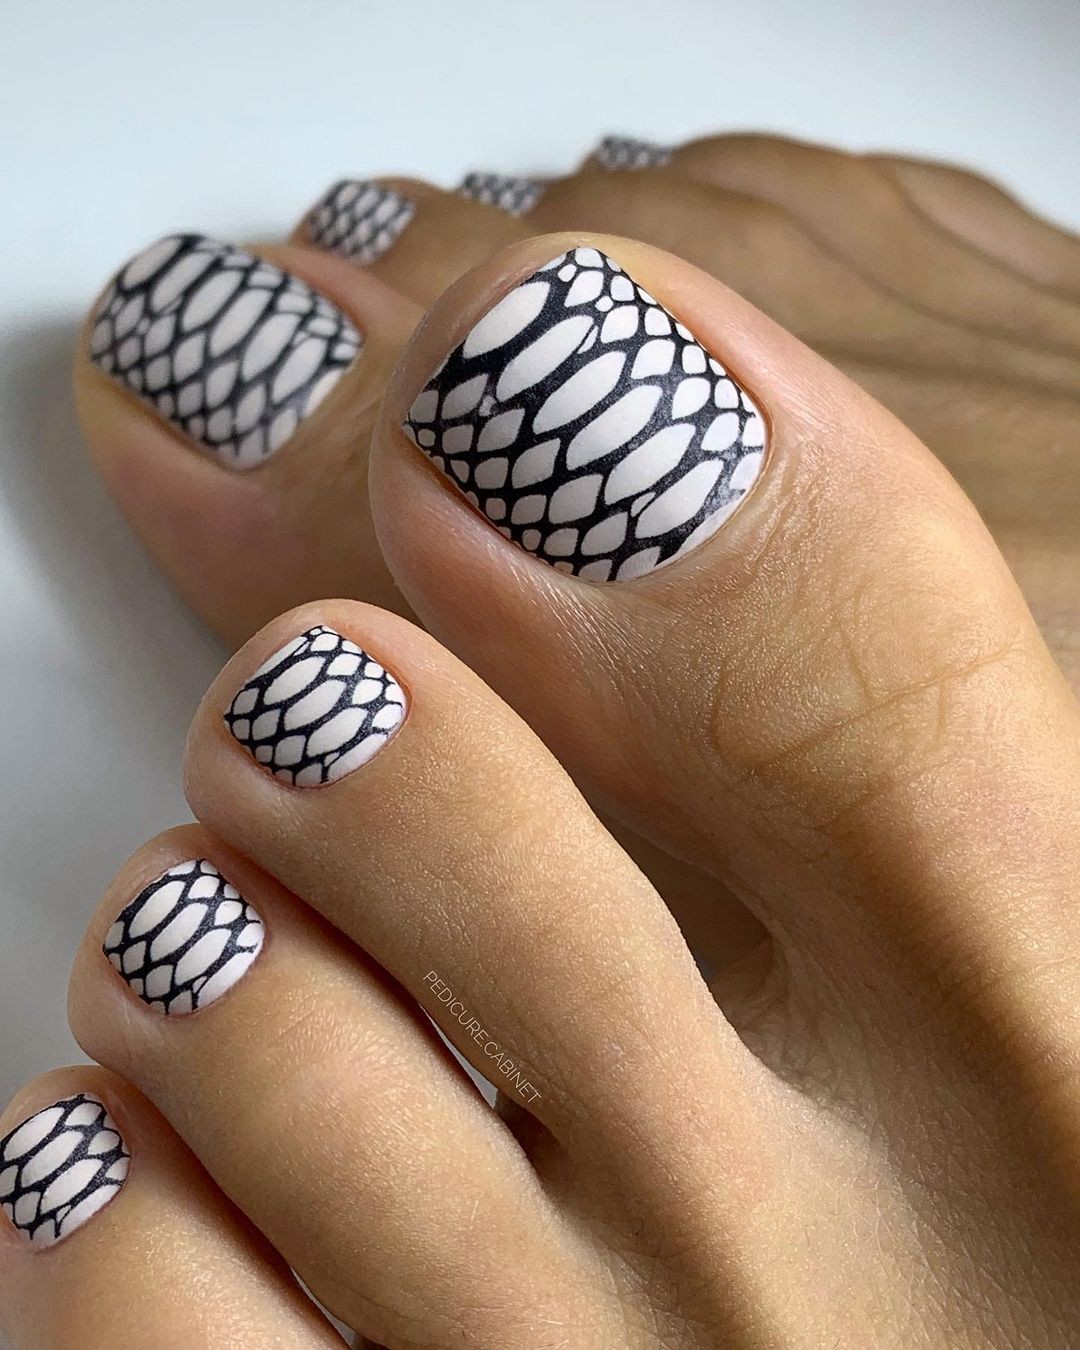
Elevate your toe game by incorporating intricate nail art designs reminiscent of crocheted masterpieces. The striking combination of black and white hues creates a sophisticated display on the nails, perfect for those who appreciate beauty in all its forms. This lace-like pattern demands attention to detail, making it an ideal choice for those who value precision and craftsmanship. To achieve this stunning look, start by applying a clean white base coat to provide a crisp canvas for your design.
Once dry, use a black pen to meticulously paint the crochet-inspired patterns, paying close attention to every curve and joint. Don’t rush – take the time to ensure each detail is perfect, just like a skilled artisan. Finish off the look with a high-gloss topcoat that will not only add protection but also give your design an added layer of shine, mirroring the clarity of glass.
Blue Leopard Chic
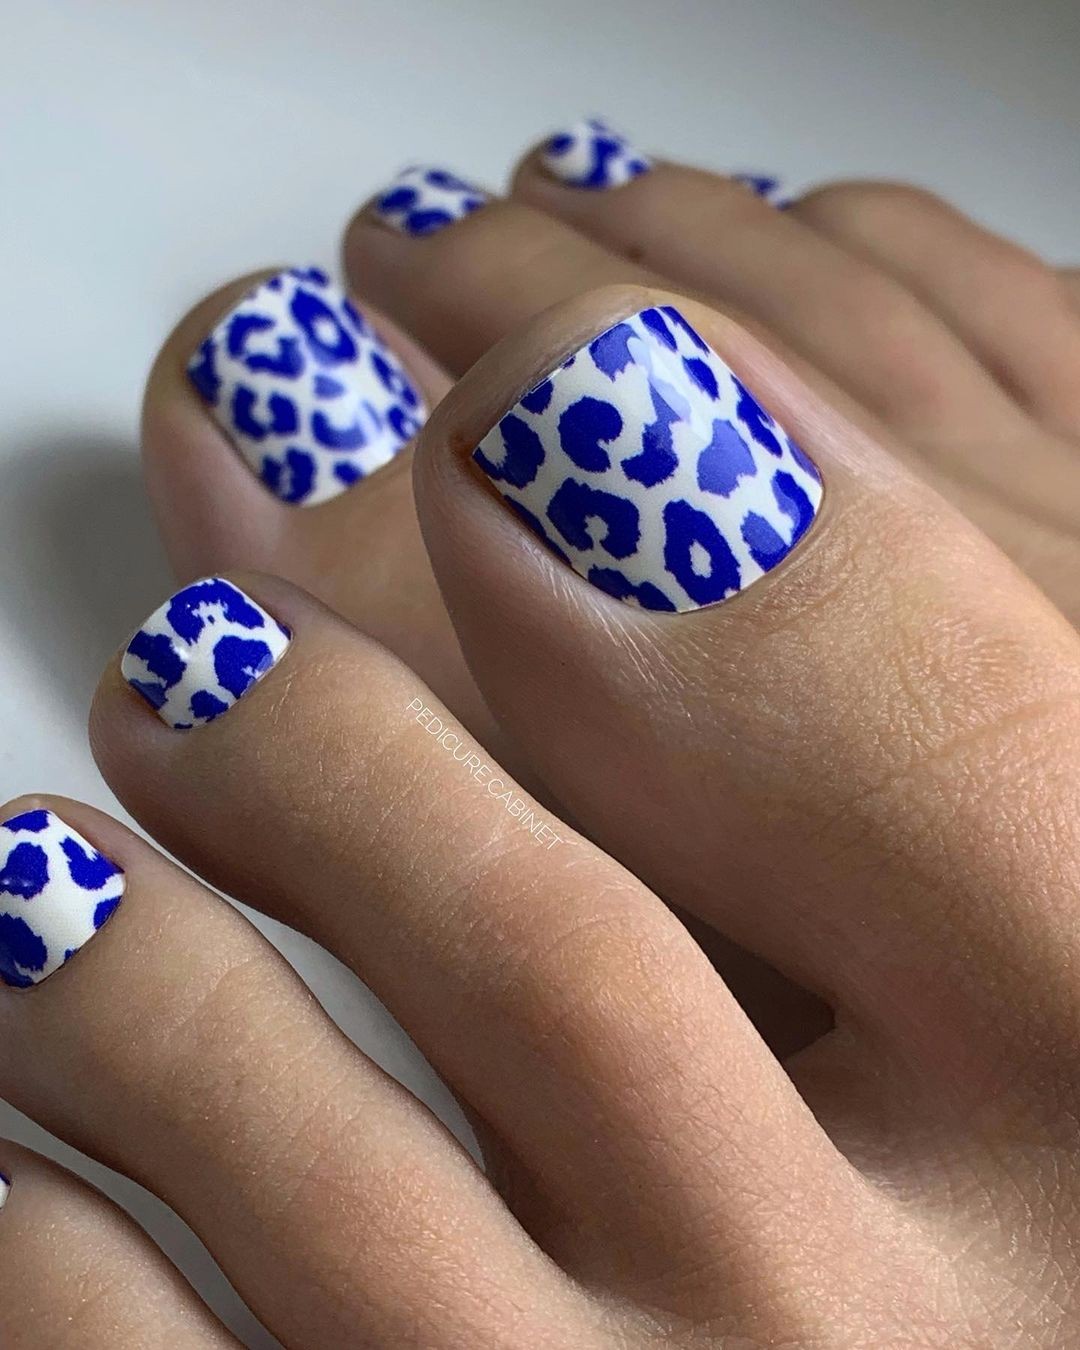
Transform your nails into a fashion masterpiece by embracing bold, daring designs. The contrasting combination of bright blue spots on a crisp white background evokes the spirit of adventure and confidence. This statement-making look is perfect for those who dare to be different in their approach to fashion. To achieve this eye-catching design, start with a pure white base coat, then use a vibrant blue polish to create subtle yet striking spots.
A slim brush or dotting tool can be used to add delicate details that bring the leopard print to life. Remember, imperfection is beauty, so don’t stress about achieving perfection. Once you’ve created your masterpiece, secure it with a protective top coat to ensure the design remains vibrant and lasting. With this look, you’re guaranteed to turn heads and make a statement.
Graffiti Art Explosion
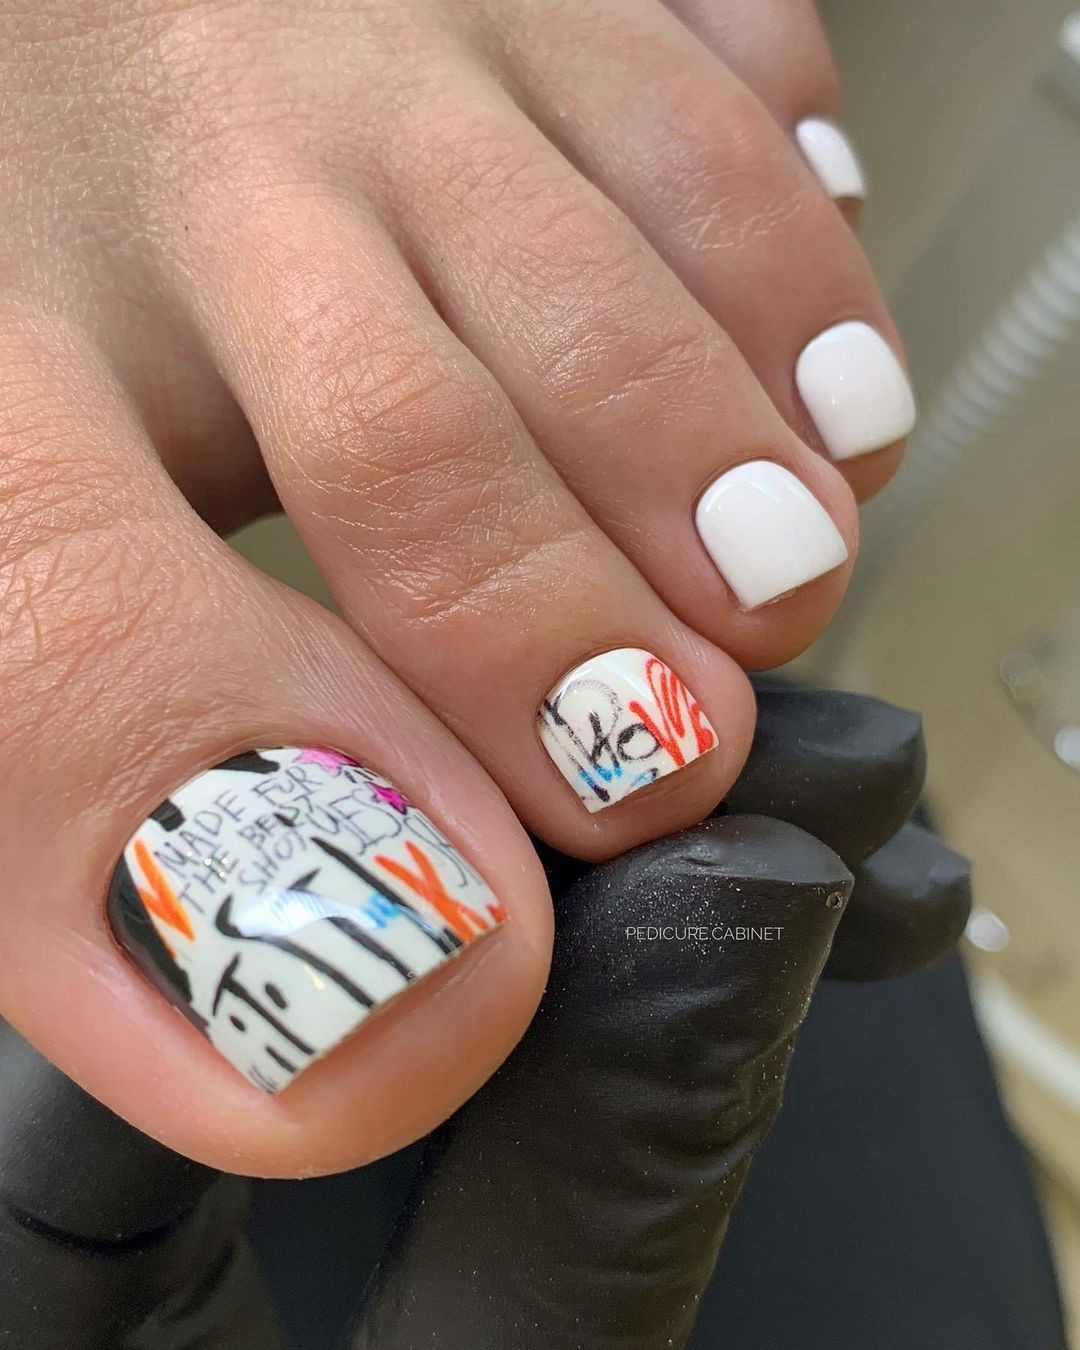
This bold design embodies the essence of urban art, with vibrant graffiti text and pops of color that leap out against a crisp white backdrop. It’s an edgy yet playful aesthetic that exudes the lively spirit of street art, reflecting your individuality and courage with every step. The story of self-expression is etched onto your fingertips.
The foundation for this look starts with a clean slate – a stark white polish serving as the cityscape canvas.
From there, unleash your creativity with various nail art pens, using them to add bold graffiti details that tell your own unique story. Finish it off with a clear top coat to seal in your artistic masterpiece and ensure it remains wearable for days to come.
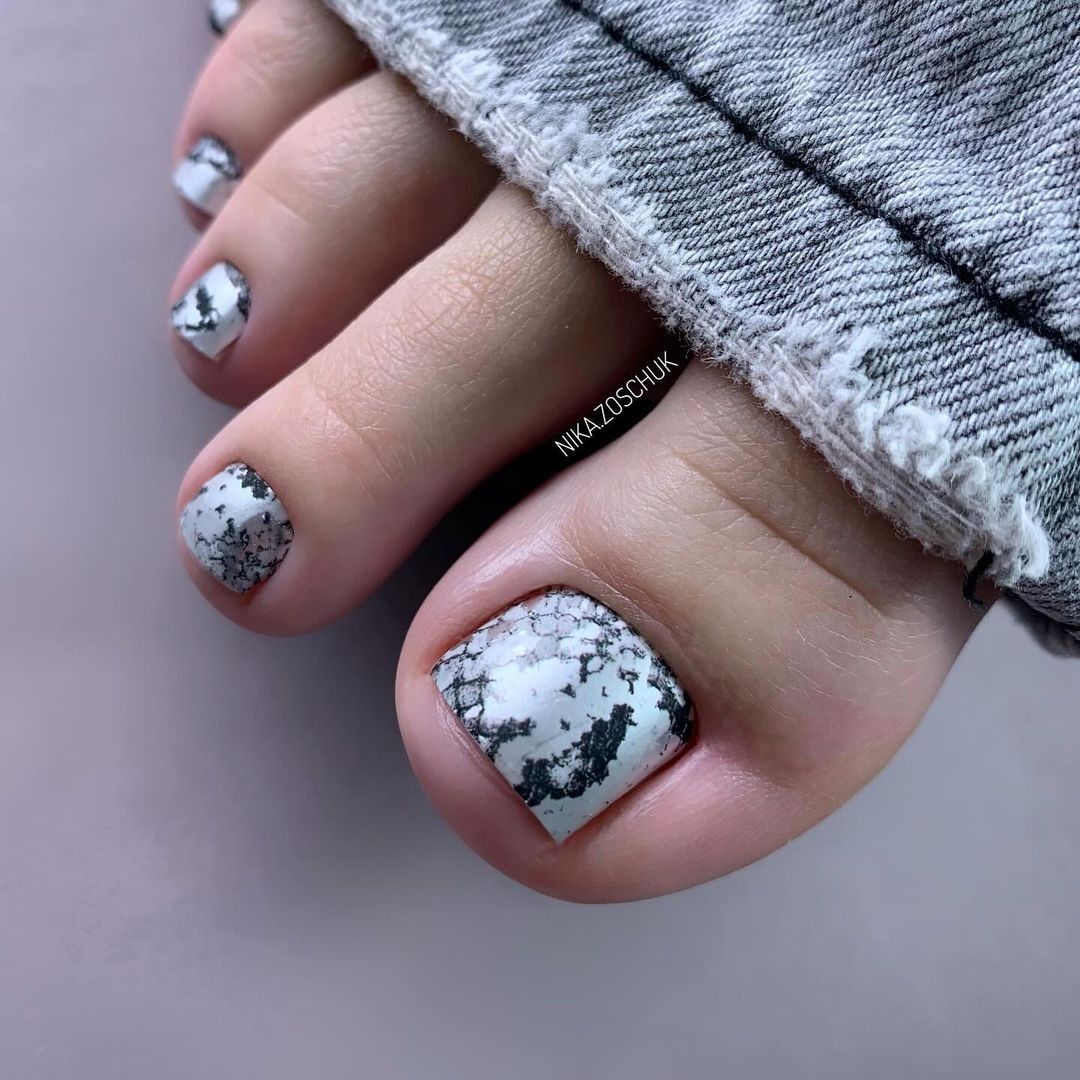
Abstract Monochrome Mosaic
Transform your toes into mini masterpieces by embracing a captivating mosaic design. The combination of gray tones and intricate cracked lines creates a visually striking surface that is both sharp and sophisticated. This creative endeavor pays tribute to the beauty found in simplicity, celebrating the refinement that arises from humble beginnings.
Credit: @pedicure. cabinet
To achieve this unique look, begin with a bright white polish as a clean base coat.
Next, use black and gray polishes to create the mosaic effect, employing delicate abstract lines drawn with a thin brush. As the final touch, apply a glossy top coat to seal in the design and leave your nails smooth and radiant.
Follow these steps: Start by applying the white base coat, then gradually add crackled lines using gray and black polishes, taking care not to overpower the overall effect. Finally, complete the look with a glossy top coat for added protection and shine.
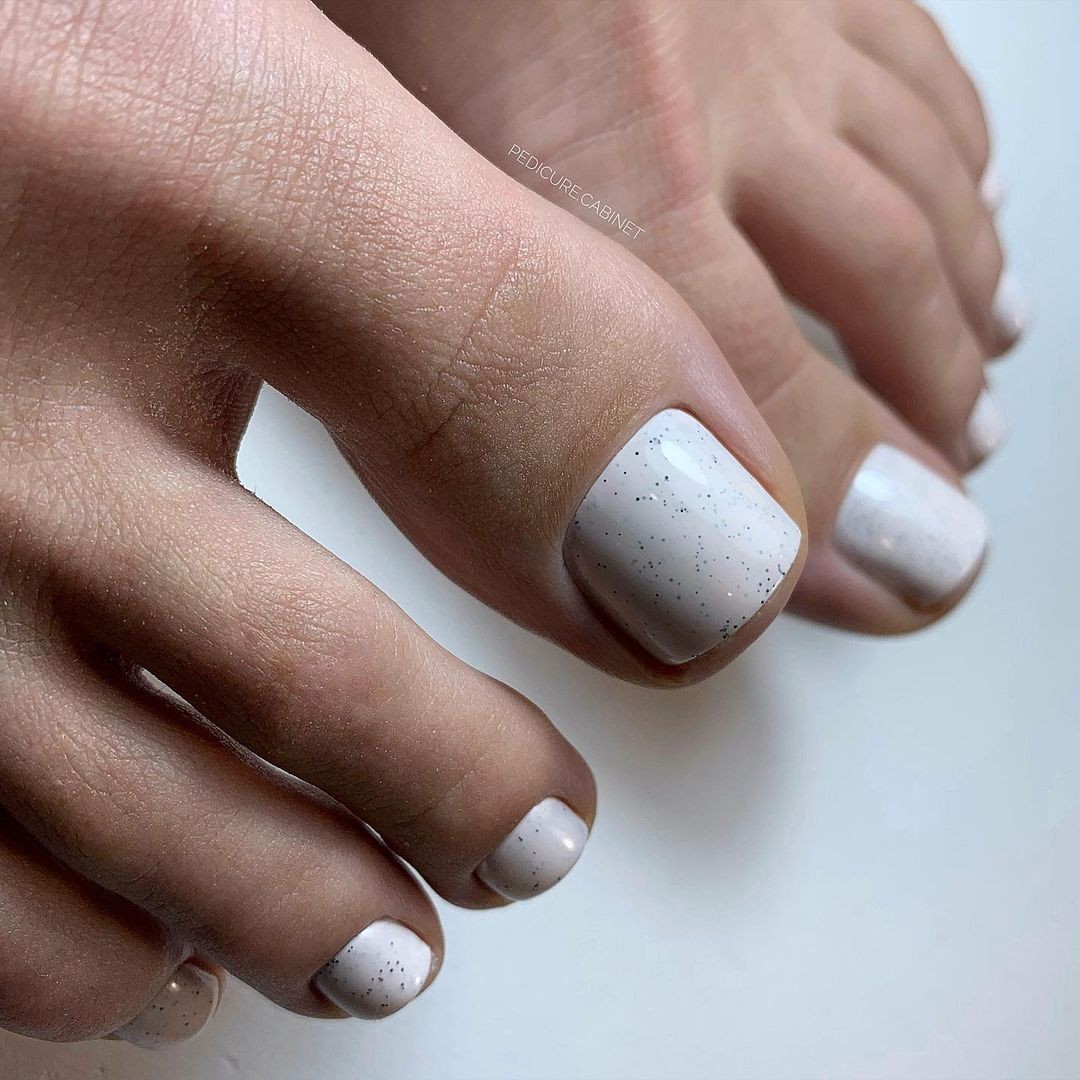
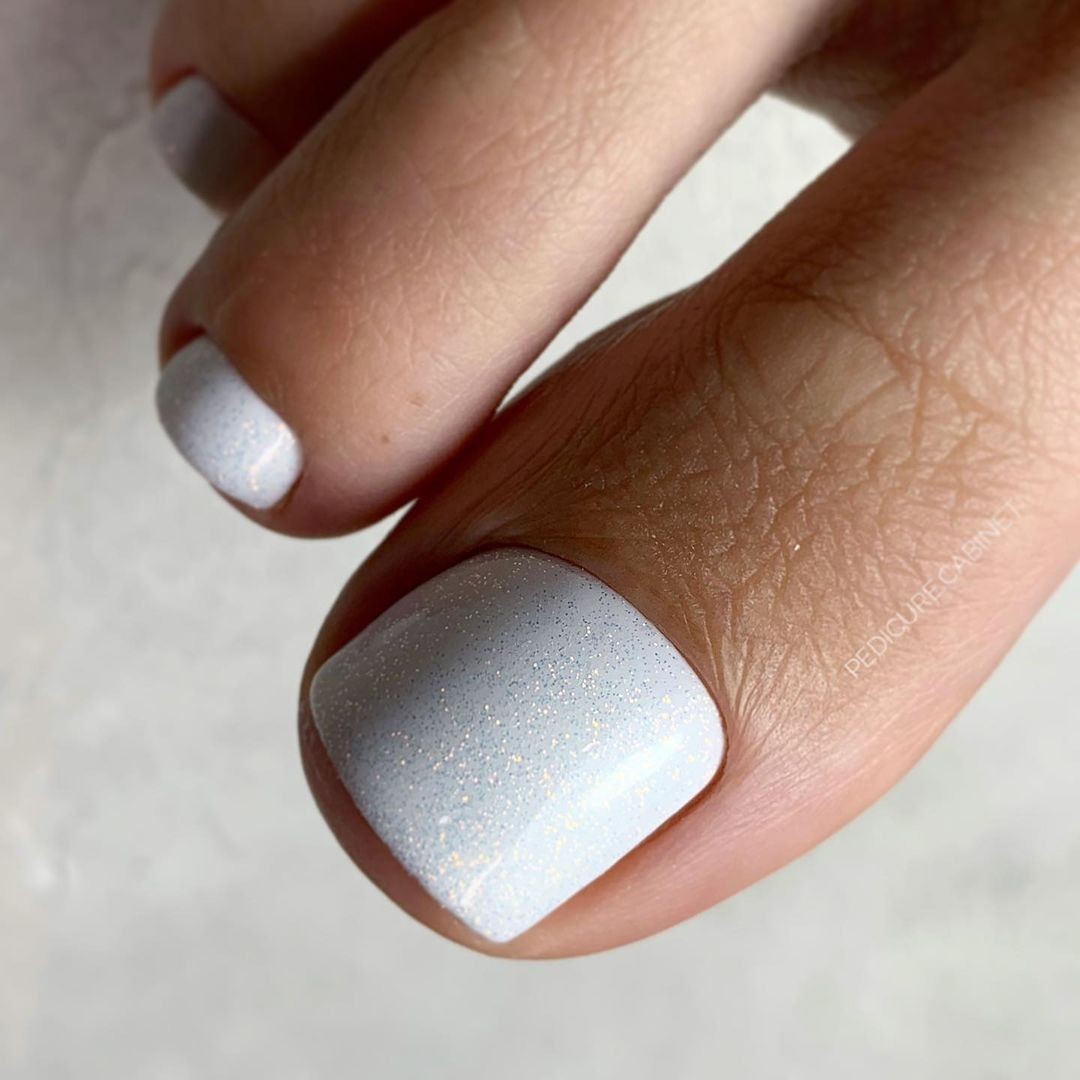
Speckled Galaxy
Embrace the celestial magic of a starry night sky with this out-of-this-world manicure design. It’s an ode to those who carry the universe within them, celebrating their eternal connection to the mysteries above. As you gaze up at the stars, remember that every tiny detail is a reminder of your place in the grand scheme. For this intergalactic masterpiece, begin by applying a base coat of white polish, serving as the canvas for the cosmic artwork to come.
Next, use a sponge to delicately pat on a mixture of black and gray micro-glitters, recreating the twinkling effect of stars against the dark night sky. The result is a mesmerizing speckled pattern that seems to shift and shimmer like the constellations above. Finally, seal your masterpiece with a top coat, imbuing your nails with an otherworldly luster reminiscent of celestial bodies shining bright in the vast expanse of space.
Starstruck Accents
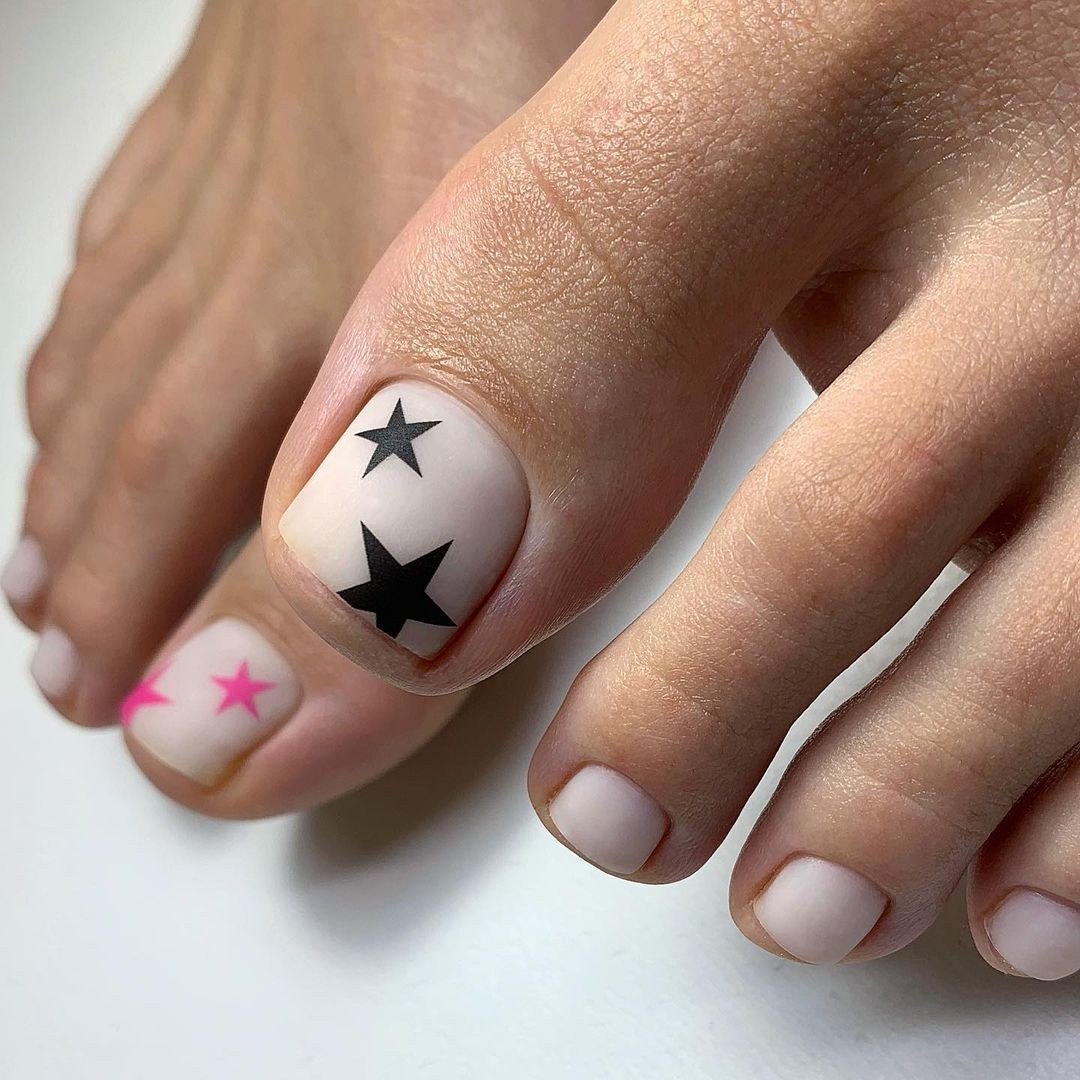
Imagine adorning your nails with constellations that can transport you through the vast expanse of the Milky Way. A mesmerizing design that captures the whimsical charm of stargazing on a warm summer evening, as black stars twinkle against a soft, milky backdrop. This celestial wonder is achieved by combining two essential components: a delicate transparent base and star-shaped accents in black polish or stick-ons.
To recreate this enchanting design at home, start with a milky white polish that serves as the perfect canvas for your artistic expression. Next, apply black stars or use tweezers to place stickers, ensuring they’re evenly distributed across the nail. For an added touch of magic, top it all off with a coat of clear polish to seal in the sparkle and make the stars shine like diamonds against the night sky.
Alternatively, you can create your own starry accents on a white translucent base, mimicking nature’s unpredictable beauty by scattering black stars randomly across the nail. Finally, finish the look with a top coat to preserve the design and ensure it sparkles brightly under the stars.
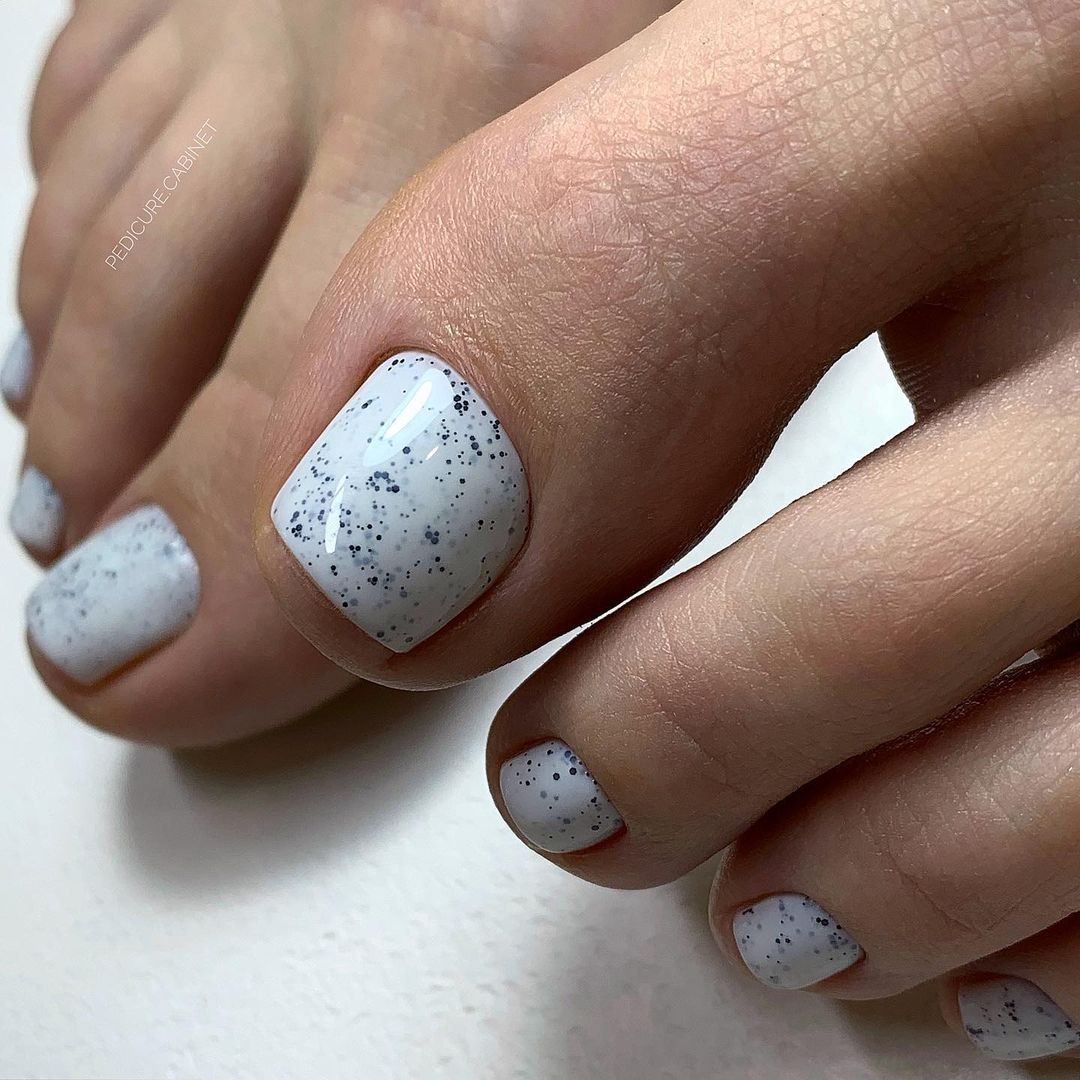
Speckled Serenity
Imagine a delicate flower, freshly awakened by the gentle morning mist. This design embodies the essence of understated elegance, where subtle nuances transform an ordinary look into something extraordinary. The soft, whisper-like texture of this gel polish is reminiscent of morning dew-kissed petals, with tiny speckles adding a touch of sophistication. To achieve this look, start by applying a base coat of plain white gel polish.
Next, scatter either black micro-glitter or use a dotting tool to create intricate patterns across your nails. Finally, seal everything in place with a shiny top coat, not only adding luster but also ensuring a long-lasting and protected finish.
Shimmering Frost
Imagine wrapping your nails in a soft, snowy blanket that glistens like a thousand tiny icicles on a warm summer day. This enchanting polish design brings together the coolness of winter and the warmth of summer, perfect for those who crave a touch of wonder. The combination of creamy white base polish, silver and iridescent micro-glitters, and a sponge applicator creates a frosted effect that’s simply irresistible.
The key to achieving this look is to apply the glitters evenly using a sponge, allowing for a dispersed application that captures the essence of frost settling on your nails. To ensure a smooth and durable finish, top it off with a layer of clear top coat, perfect for surviving even the longest summer days.
Kiwi Kiss
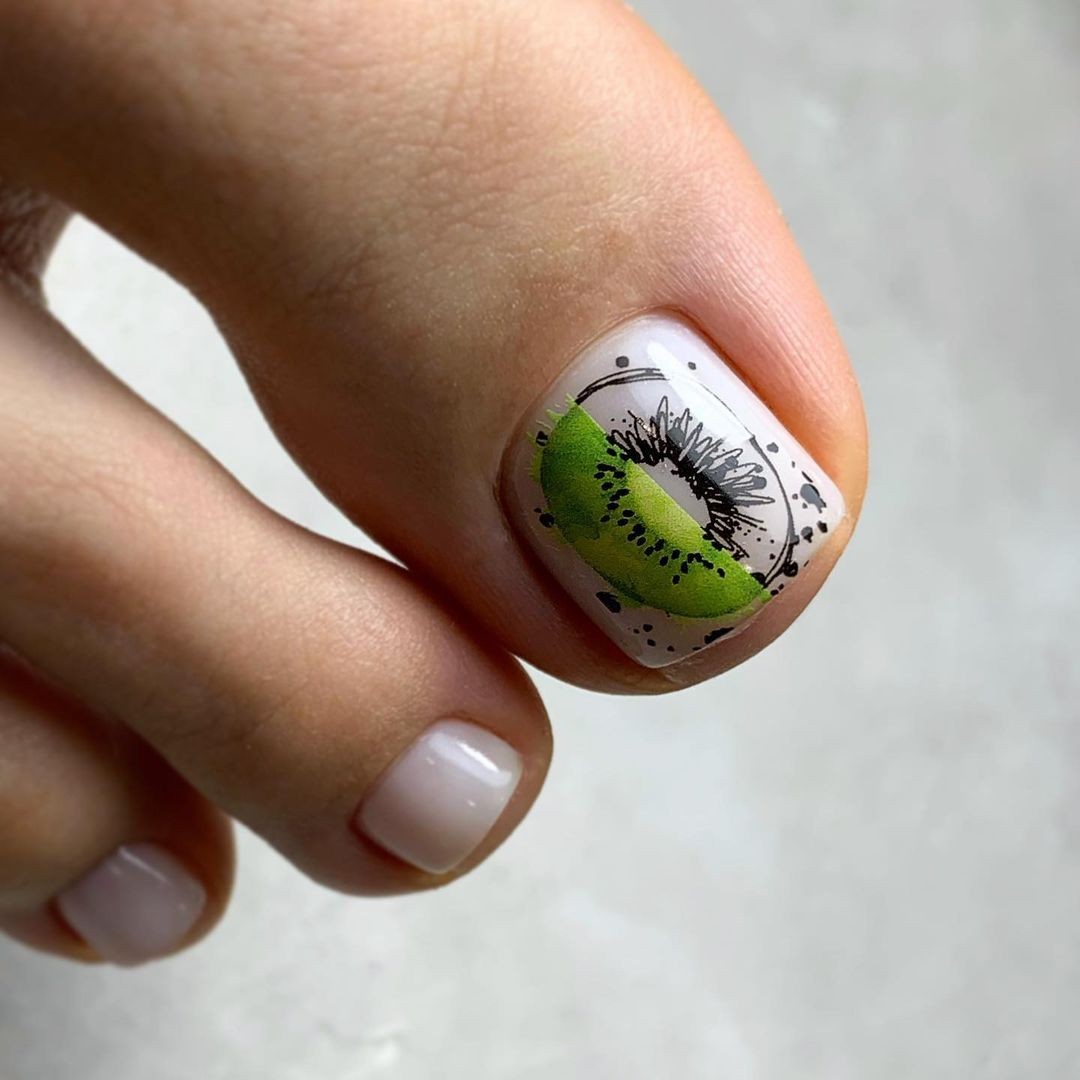
As the warmth of summer settles in, let the vibrant spirit of kiwi guide your creativity and bring a splash of color to your toes. This design is more than just a pattern – it’s an ode to the season’s flavors and hues. With its striking green and black tones, this kiwi-inspired nail art embodies the essence of summer. To achieve this look, start with a refreshing milky polish as your base coat. Then, add some green and black polish to create the distinctive flesh and seeds of a kiwi fruit.
Use a fine brush to add intricate details to the pulp and seeds. Finally, seal everything in place with a topcoat that not only prevents water from seeping into the design but also gives it a glossy finish. Start by painting your nails white as the base coat. Next, use green polish to create a semicircle at the bottom of each nail, representing the kiwi’s flesh. Add some small black dots for added texture and realism, and top everything off with a layer of topcoat for a fresh, fruity finish.
Lustrous Opalescence
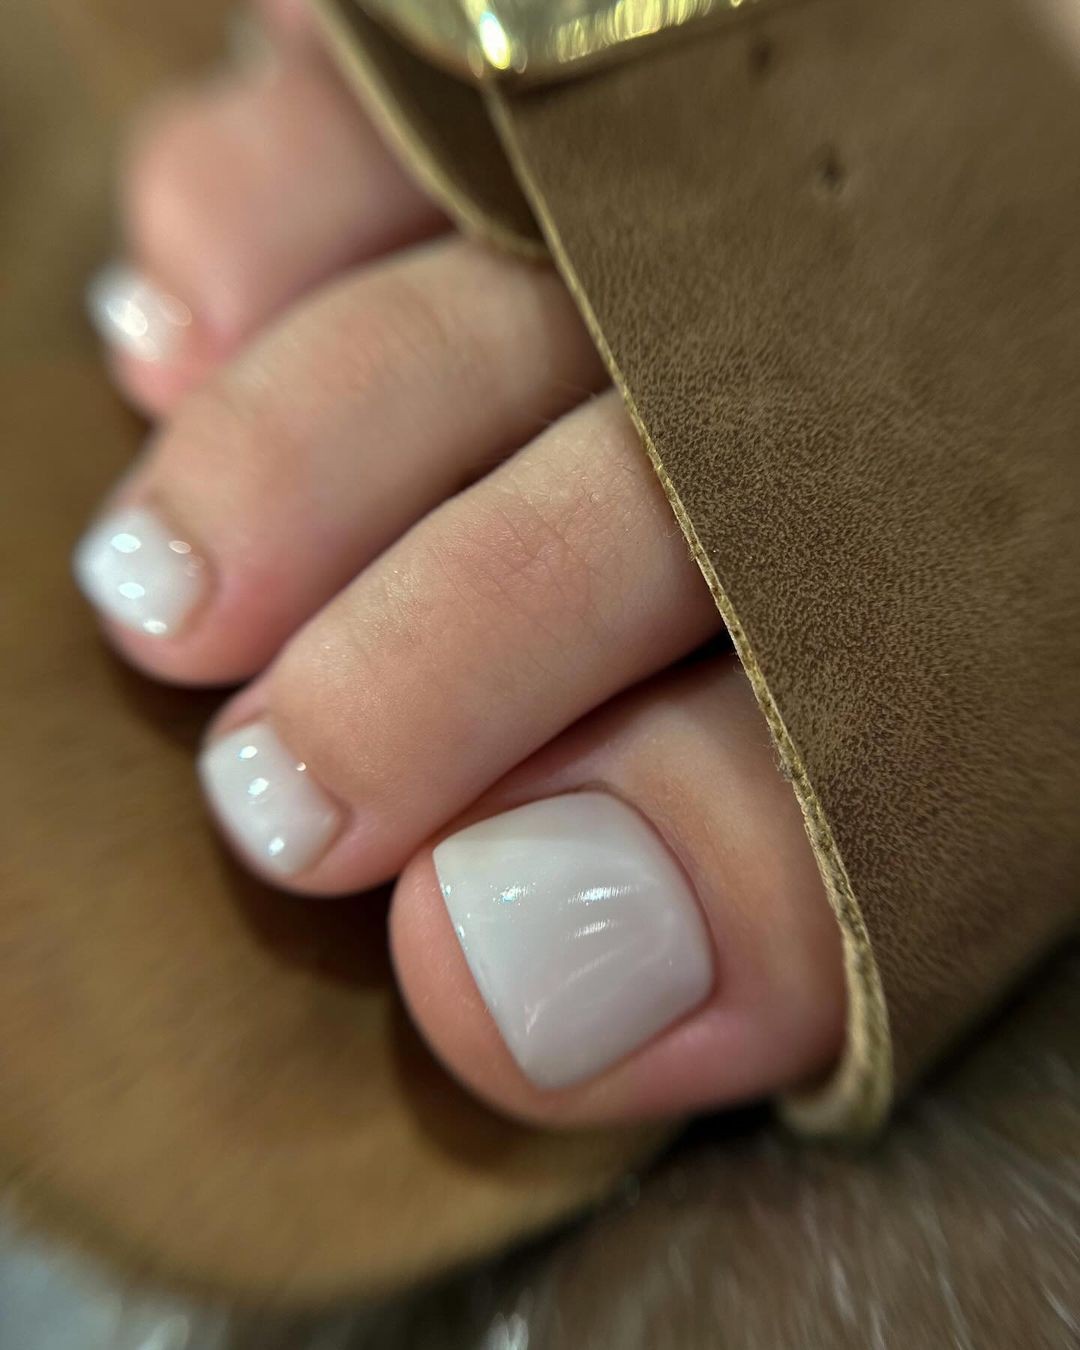
Envision a serene and luminous quality on your toes, reminiscent of an opal’s soft glow. This subtle yet captivating effect is achieved by combining a translucent white base with an opalescent top coat and finishing it off with a high-gloss sealant. The result is a sophisticated pedicure that exudes understated elegance, perfect for those who appreciate the beauty in simplicity.
To recreate this look, start by applying a sheer white polish as a translucent base.
Once dry, carefully brush on the opalescent top coat to coax out the delicate shimmer. Finally, seal everything with a high-gloss finish top coat to lock in the color and add an extra layer of protection. The combination of these three elements will leave your toes looking radiant and refined.
Pure White Sophistication
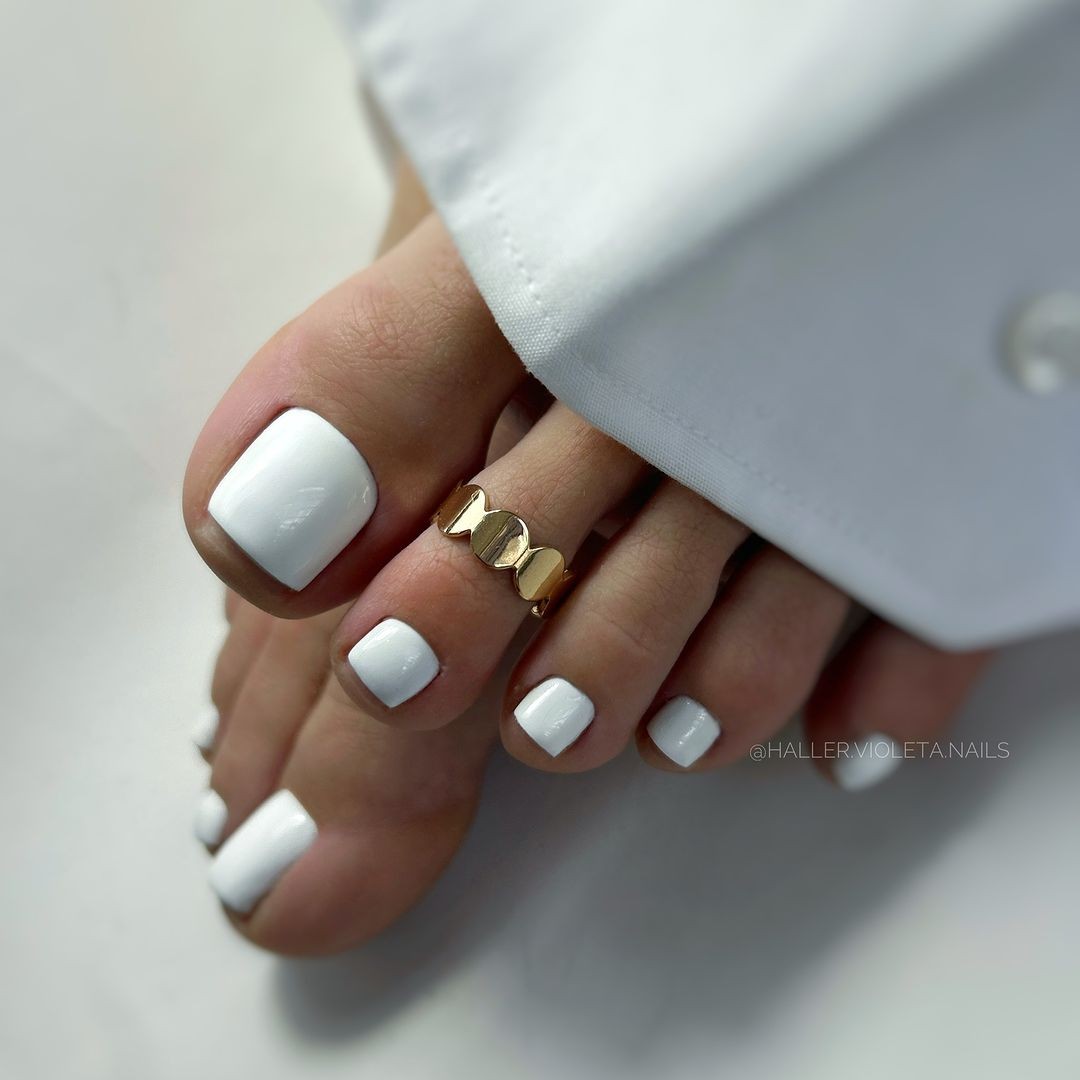
The essence of summer sophistication lies in the subtlety of perfectly painted toenails, a testament to the transformative power of a single color. The simplicity and boldness of this design serve as a reminder that elegance can be achieved through understated means, making it an ideal choice for any summer occasion. As seen in the accompanying photograph by @violeta. haller. nails, the key to achieving this crisp, clean look lies in the meticulous application of white polish.
To ensure optimal results, apply two coats of your chosen polish, allowing each coat to dry thoroughly before finishing with a glossy topcoat that seals and enhances the overall appearance. By taking the time to carefully execute this process, you’ll be rewarded with a pedicure that exudes classic elegance, perfect for making a stylish impression at any summer event.
Confetti Charm
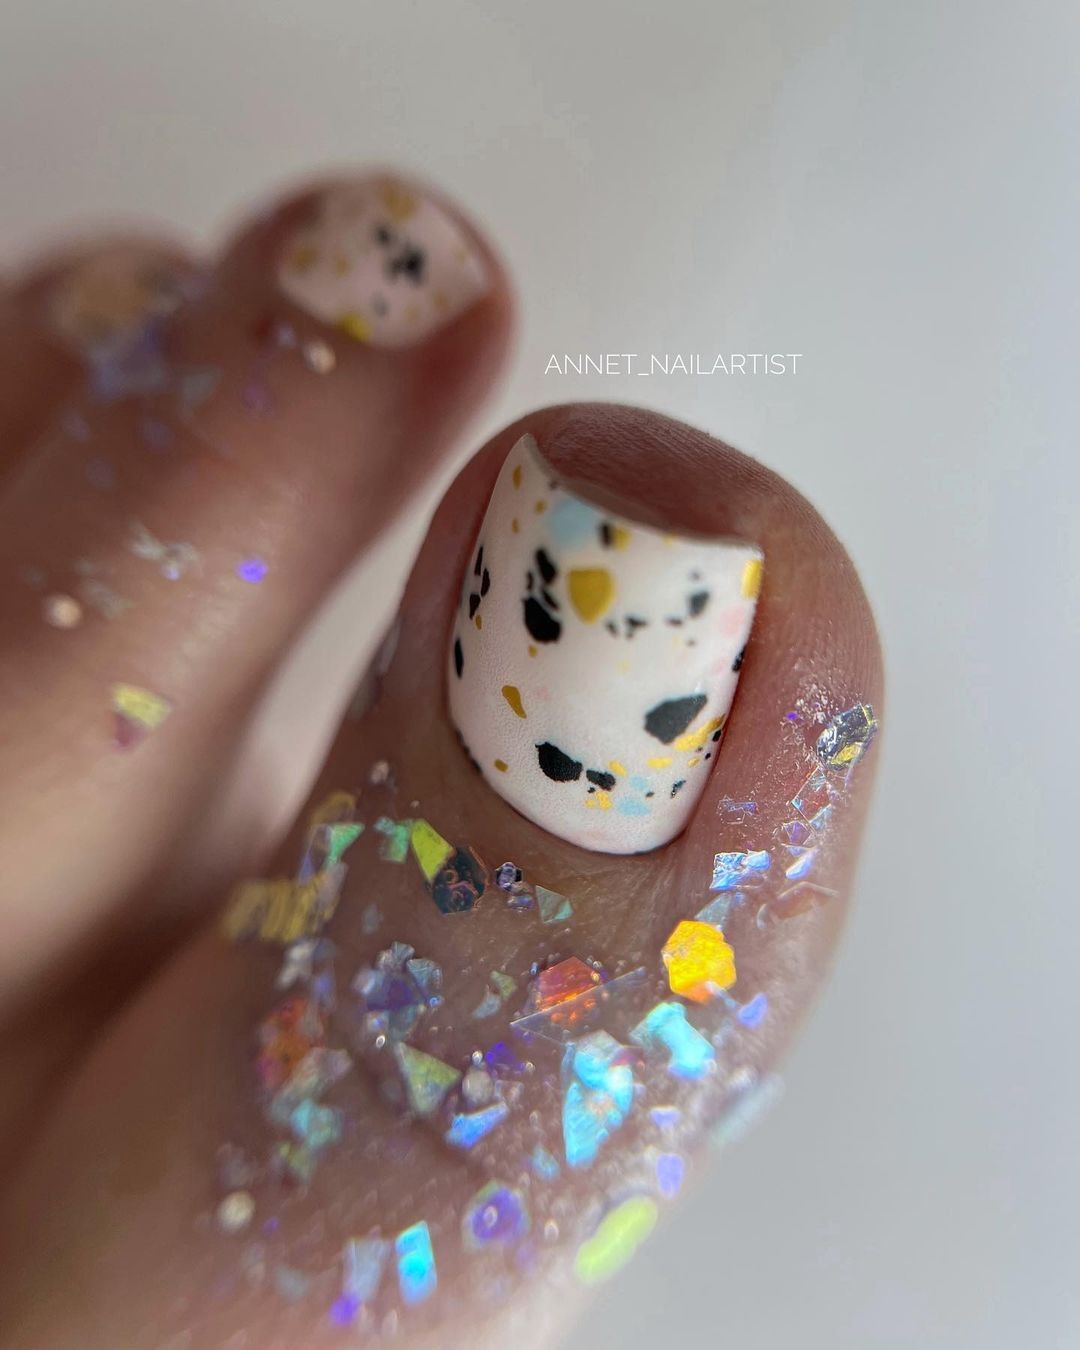
Imagine strolling through a festive atmosphere where Christmas confetti surrounds you, infusing your senses with joy and whimsy. The ‘Party’ design embodies the carefree spirit of the season, with black bursts and colorful dots scattered across a crisp white background. This vibrant pattern is all about embracing the little things that bring brightness to our lives.
To recreate this magical look, start by applying a base coat of pure white nail polish to set the stage for your artistic expression. Then, unleash your creativity with confetti-colored lacquers, dotting them across the surface in exuberant abandon. Each spot should be a testament to the infectious energy of summer’s lively essence.
To seal the deal and keep the party going, finish off with a transparent top coat that adds an extra layer of shine and protection.
As you gaze at your finished nails, let the joy and excitement of the season radiate from every colorful dot and sparkle.
Serene Gradient
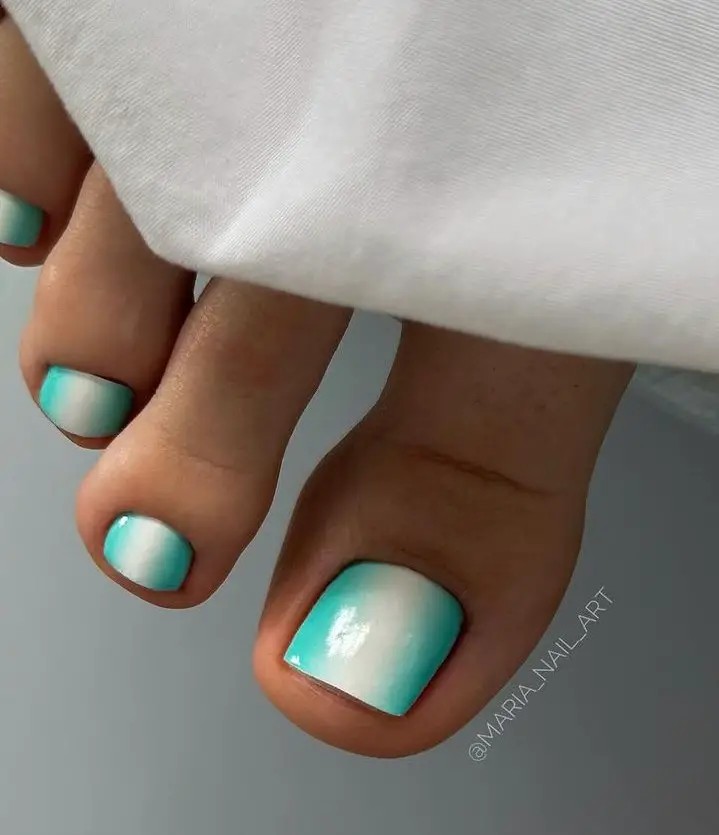
As the warm summer breeze caresses your skin, why not treat your toes to a serene gradient that evokes the gentle transition from sea to sky? Paint your toenails with a calming blue hue that melts into white, creating a soothing ombre effect. To achieve this tranquil look, you’ll need a pale polish and a cerulean polish, as well as a piece of fabric or sponge for blending colors seamlessly. A transparent top coat will add a touch of smoothness and shine to your finished design.
Begin by applying an undercoat of white to your toenails. Then, mix the blue and white polishes together on your fabric or sponge, and gently dapple the mixture onto your nails, gradually blending the colors as you move from one end of the nail to the other. Finally, apply a top coat to add a sleek finish and ensure that your design remains chip-resistant throughout the day.
These designs can last up to 14 days if properly applied and sealed with a high-quality top coat, making them perfect for hot summer days spent lounging by the pool or at the beach. And don’t worry about the length of your nails – these designs are adaptable and can be modified to suit any nail size or shape. Anyone looking to introduce some summer charm into their appearance can adopt this timeless nail art idea.
Just remember to take good care of your nails by using a base coat, top coat, and avoiding harsh chemicals that can dry out your cuticles. If you’re worried about achieving these designs at home without professional tools, fear not! With practice, you can master the technique using small brushes or even toothpicks for fine details. And if you do accidentally get polish on your skin, don’t worry – a gentle acetone-based remover will take care of it.
Of course, giving your nails a break between designs is always a good idea. Just be sure to keep them moisturized and take the time to remove old polish carefully before applying new designs. If you’re not confident in your handiwork or find intricate designs challenging, don’t worry – there are plenty of alternatives available! Nail stickers or stamping kits can help you achieve detailed appearances even if you don’t have a steady hand.
And as for how long the designs will last, it really depends on your nail care routine and the quality of the polish used.