As the warm sun shines down on us, whispers of style begin to dance in the breeze, hinting at the latest short summer nail designs trends for 2024. It’s an invitation to let your manicure routine be infused with a dash of magic. Do you crave the cool, oceanic hues of turquoise or the vibrant energy of orange sunsets on your fingertips? Perhaps you’re drawn to the timeless elegance of a French manicure or the daring allure of a stiletto tip.
This summer, allow your nails to tell a story before you even say a word. Get ready to dive into an artful world where nails are not just a finishing touch, but a statement piece that speaks volumes.
Sheer Pink Marbled Nails with Gold Flakes
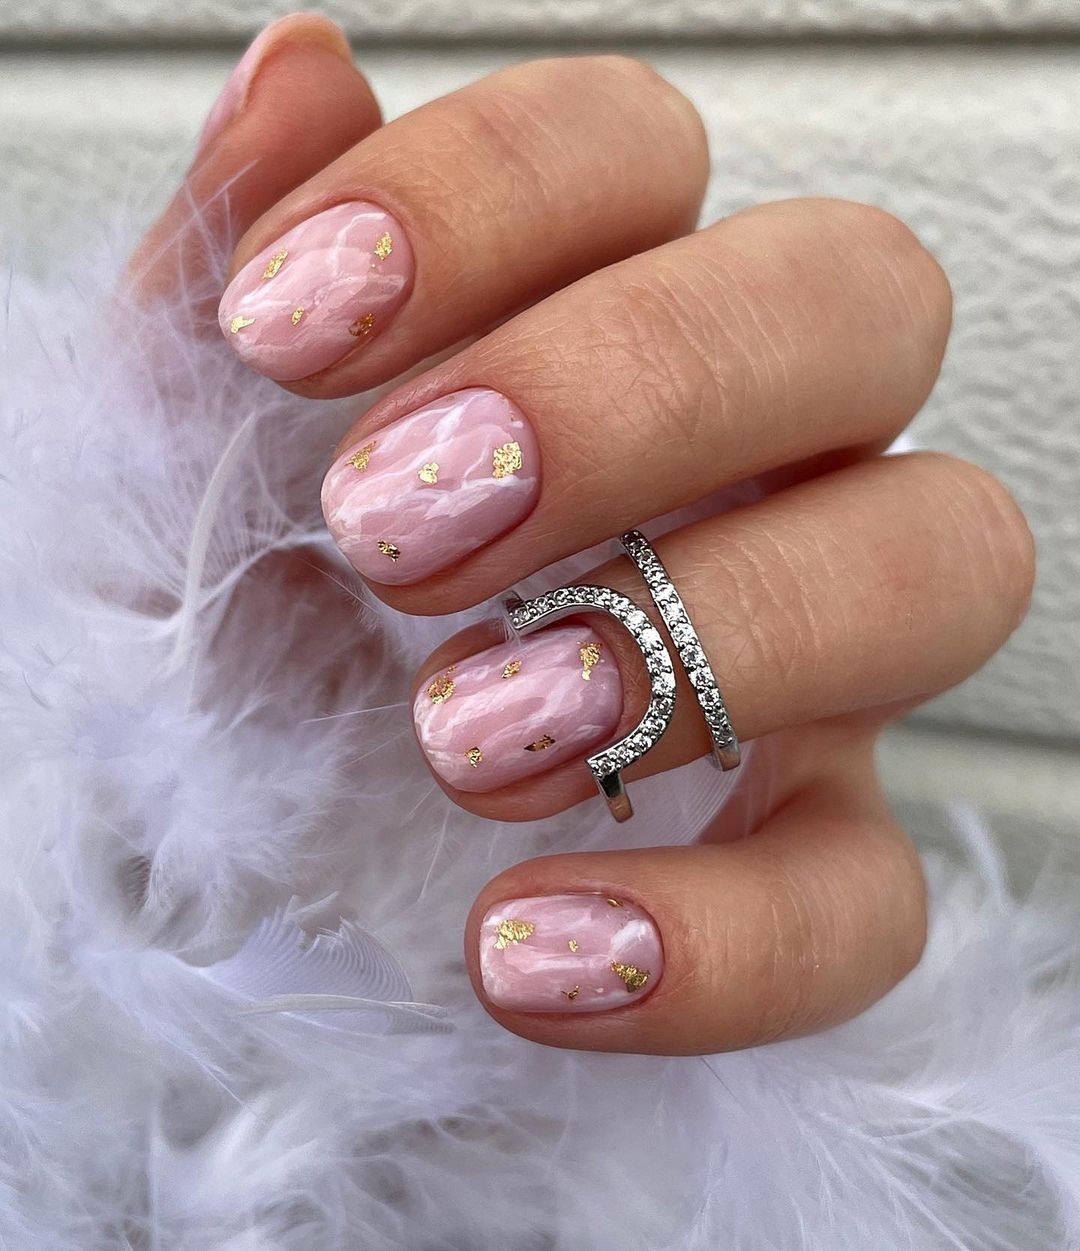
Embracing the simplicity of a minimalist summer aesthetic doesn’t mean sacrificing sophistication. This understated yet captivating gel manicure embodies the essence of elegance, where a delicate whisper of pink speaks volumes. Perfect for those who prefer a natural look, the soft pink hue evokes the gentle blush of a summer sunrise, while the radiant finish captures the essence of morning dew.
For this effortless yet polished look, you’ll need:
Base Coat: Laveni Sticky Base for a strong foundation,
Gel Polish: Essie Gel Couture in ‘Princess Charming’,
Top Coat: Seche Vive Gel Effect Top Coat for lasting shine,
LED Lamp: SunUV Sun2C for curing.
To recreate this look at home, start with clean and very short to medium nails, gently buffed for a smooth canvas. Apply the sticky base and let it set before painting on your Essie gel polish in smooth strokes.
Cure the polish under the LED lamp, then seal with the gel-effect top coat and cure once more. And just like that, you’ll have a touch of summer that’s effortlessly chic.
Pink Nails with White Tips and White Heart Accents
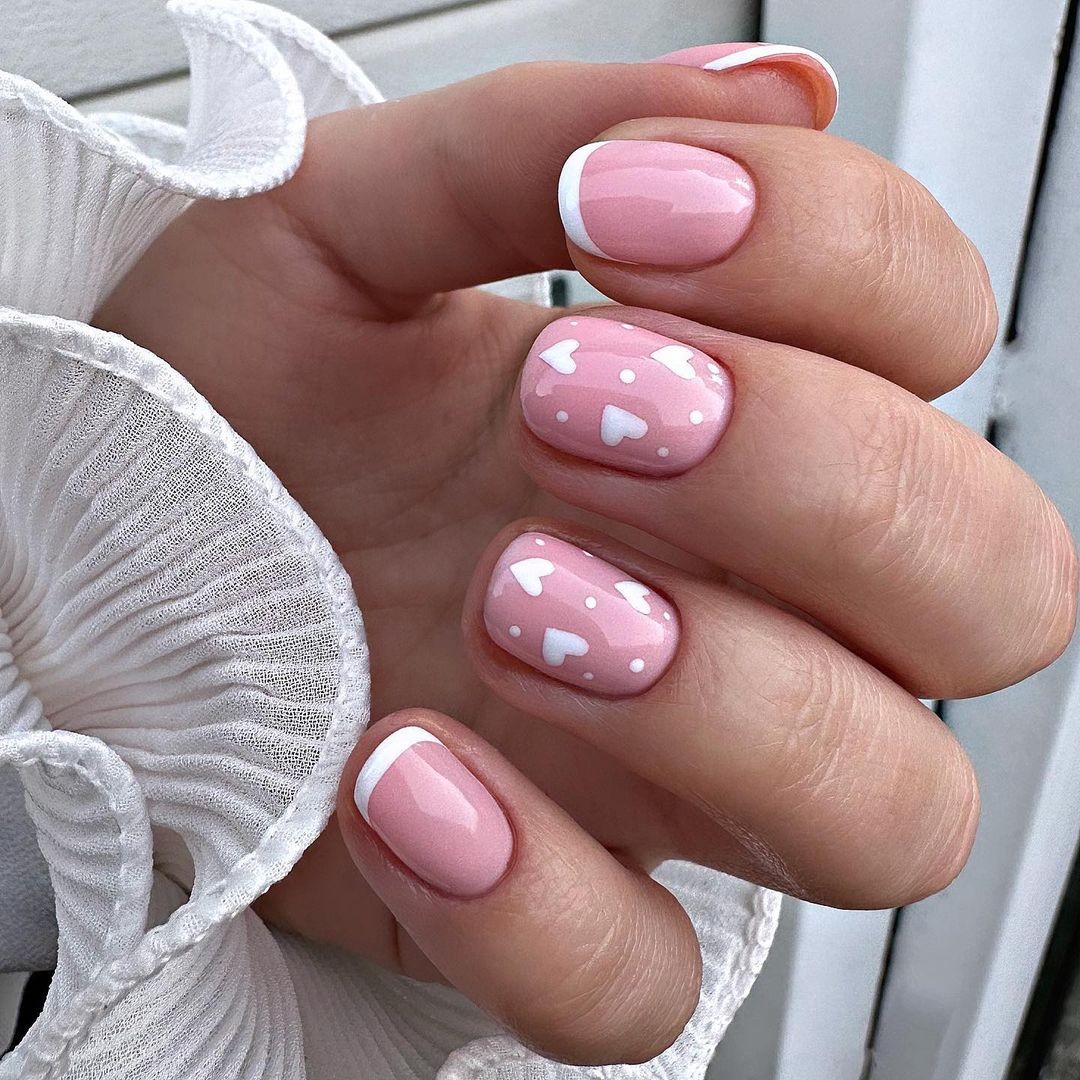
The classic French manicure has been reimagined for the warmth of summer, retaining its sophistication while adopting a more relaxed, natural vibe. A soft pink base paired with crisp white tips creates an effortlessly chic look perfect for a summer wedding or a stylish beach outing.
Photo credit by: @nails_bybius
To recreate this sun-kissed French manicure at home:
Start by prepping your nails, trimming them to a neat length and ensuring they’re free of any oils or lotions.
Apply the ridge-filling base coat for a smooth foundation, followed by a delicate application of pink polish. The key is patience when painting on the white tips – take your time to achieve crisp lines. Finish with a topcoat that’s designed to withstand the demands of summer, and you’ll be ready to take on any event with poise.
Sparkly Pink Almond-Shaped Nails with a Jeweled Accent Nail

Experience the essence of summer with a vibrant hot pink nail design that embodies carefree fun. The bold pink hue is elevated by subtle sparkle accents, resulting in a manicure that exudes playfulness and confidence. This look screams ‘I’m ready for adventure!’ – whether you’re soaking up the sun or dancing under the stars. To achieve this radiant look at home, start with short to medium-length nails primed with a base coat.
Apply two coats of China Glaze’s ‘Bottoms Up’ for a bright pink foundation. Add a touch of sparkle to your accent nails or tips using Sally Hansen Xtreme Wear’s ‘Strobe Light’, and seal it all off with a strong top coat from Glisten & Glow. With these simple steps, you’ll be rocking a summer festival-inspired manicure in no time!
French Manicure with Alternating Sparkly Silver and Pink Nails
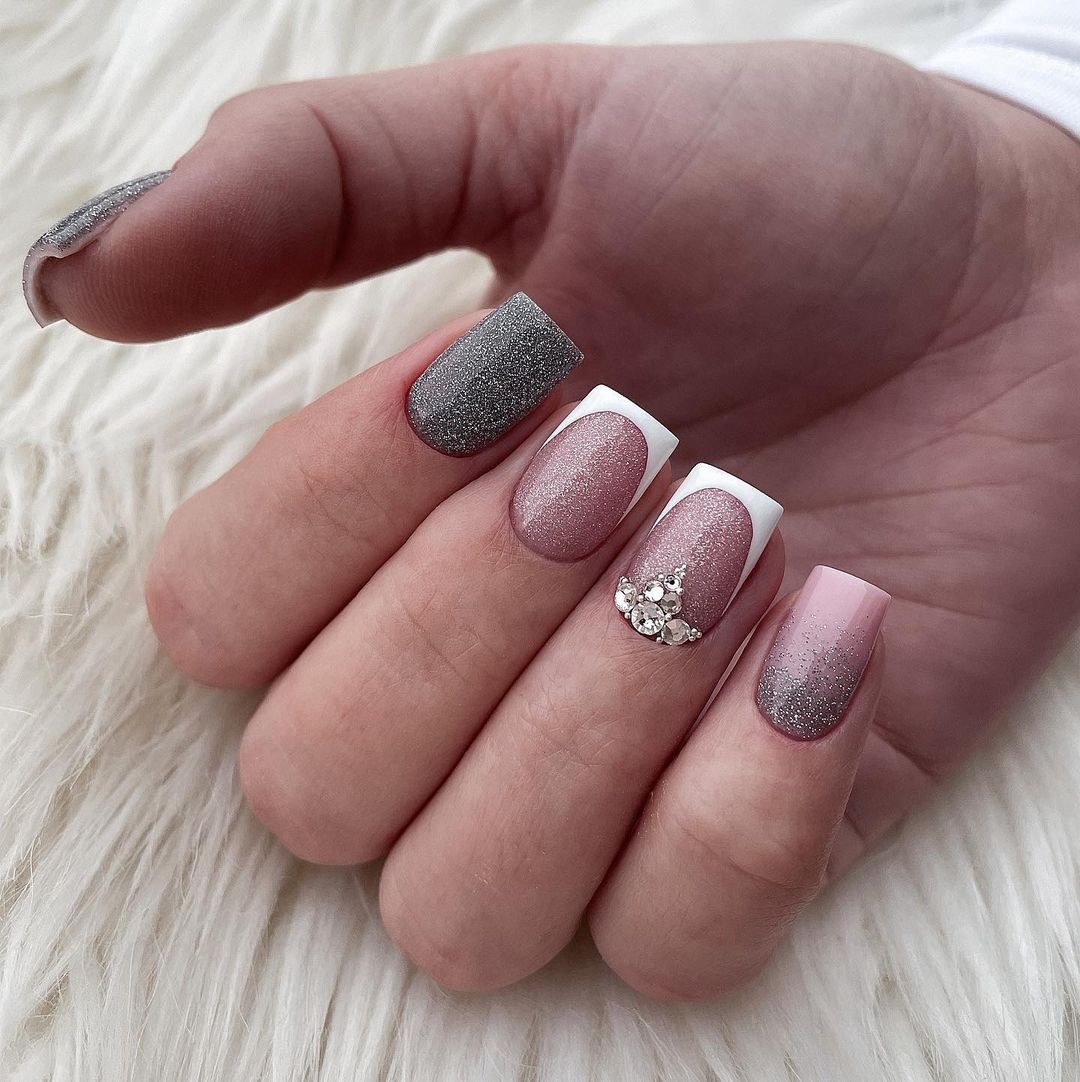
Imagine a summer evening, the sun setting behind you, and your nails catching the light like a constellation in the night sky. This frosty silver manicure is the perfect combination of cool and classic, featuring a matte white base, icy silver sparkle, and crystalline embellishments. The almond shape adds a touch of sophistication, making it a versatile choice for any summer evening plans.
When it comes to recreating this look at home, you’ll need the following consumables:
– Base Coat: OPI Infinite Shine Primer;
– Matte White Polish: Sally Hansen Miracle Gel in “Matte-ly In Love”;
– Silver Glitter Polish: Essie Luxeffects in “Set in Stones”;
– Crystal Embellishments: Swarovski Clear Flatback Crystals;
– Top Coat: OPI Matte Top Coat for a subtle sheen.
To achieve this frosty finish, start by applying two coats of matte white polish over your base coat.
Once dry, add a single layer of silver glitter to the desired nails. Next, use a small dot of nail glue to secure the crystals onto the feature nail. Finally, seal all but the crystal nail with a matte top coat for a soft, frosted finish.
Bright Green Nails with Jeweled Cuticle Accents on Sheer Pink Bases
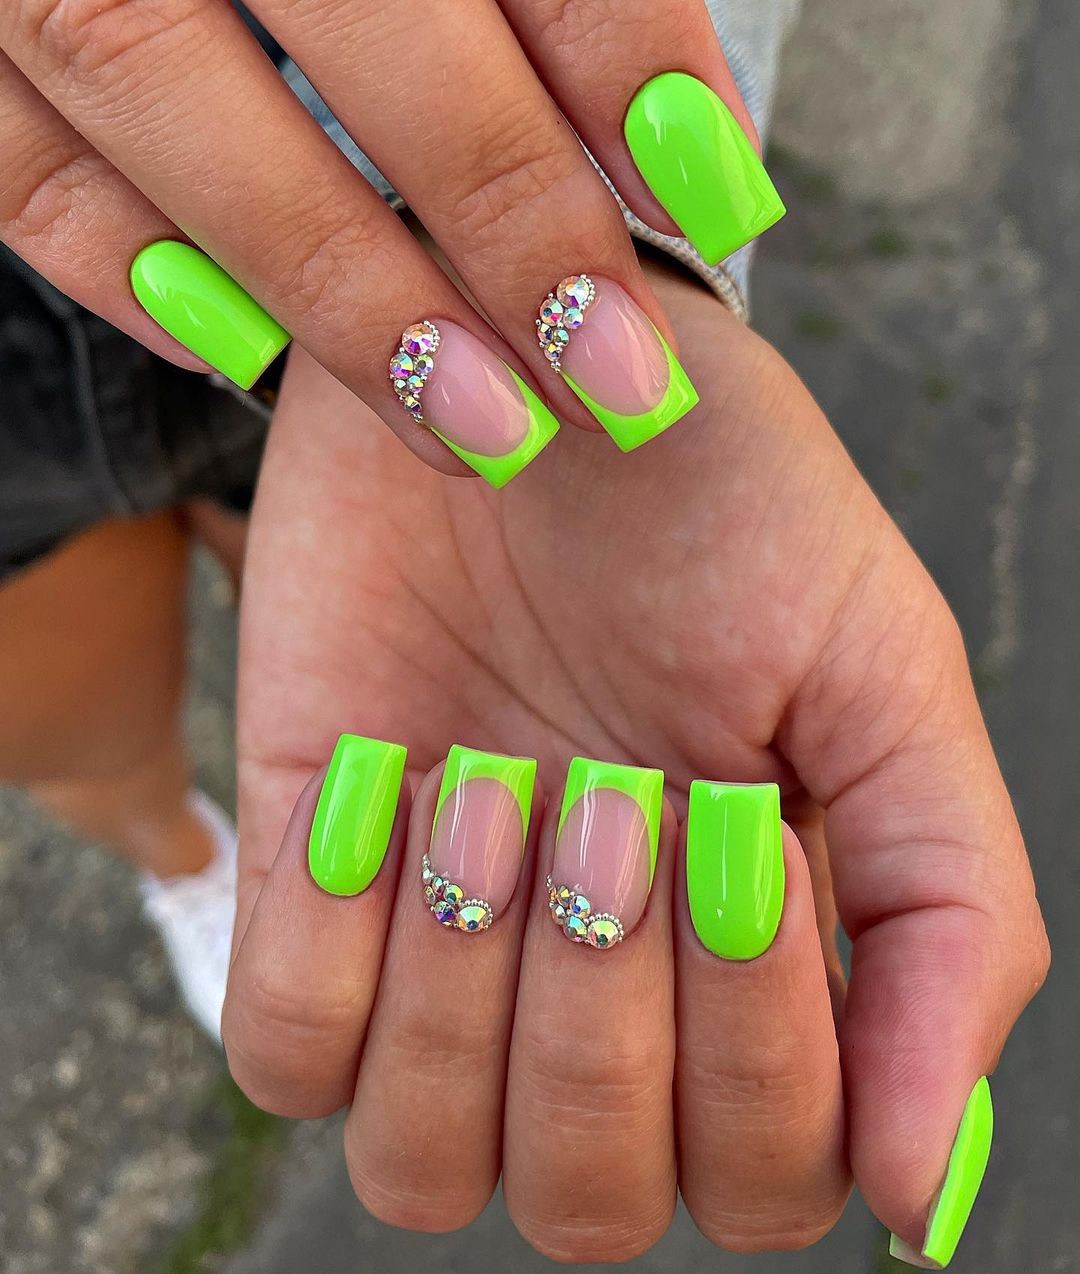
Elevate your nail game with an electrifying neon green manicure that’s sure to turn heads! This bold look features a vibrant half-moon design adorned with rhinestones, perfect for making a statement at summer concerts or adding an edgy touch to your everyday style. For a flawless finish, start by applying a base coat, followed by two layers of neon green gel polish. Then, use top gel to create the half-moons and secure your rhinestones before finishing with a high-gloss top coat.
With these simple steps, you can achieve this eye-catching look at home.
White Nails with Small Red Heart Accents
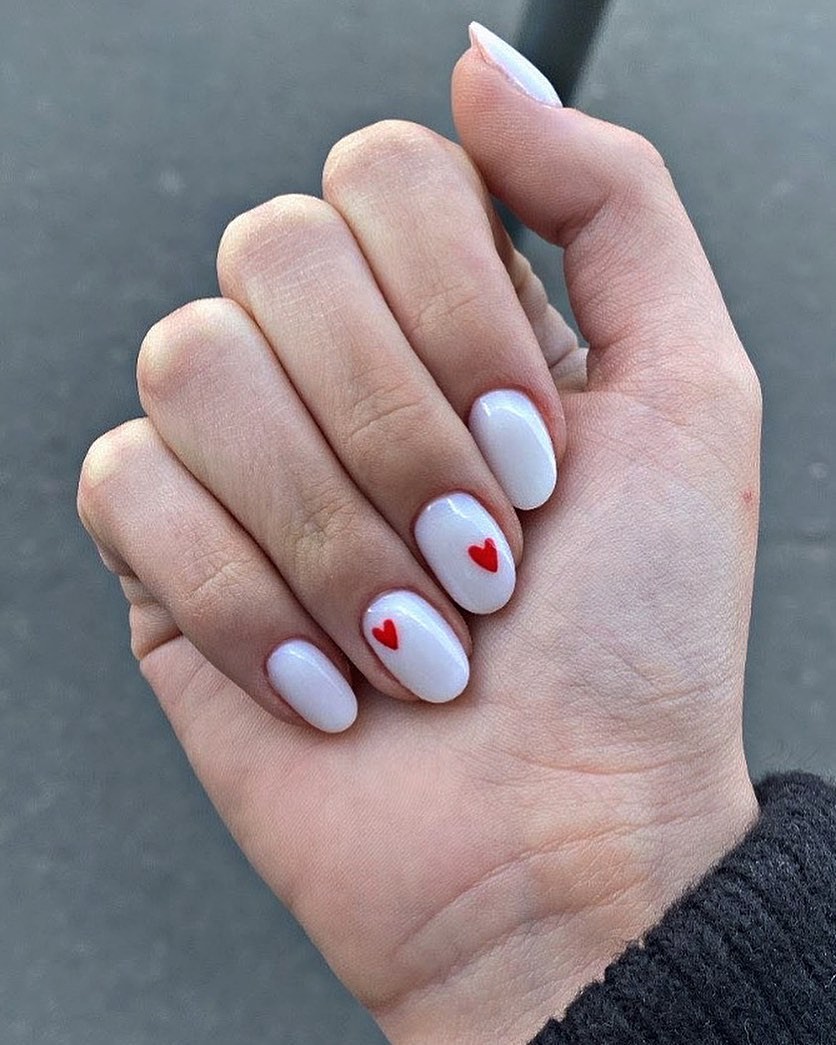
This charming manicure features a crisp white backdrop adorned with dainty red hearts, evoking a sense of romance without being too overt. The result is a look that’s both playful and effortlessly stylish, making it perfect for pairing with any summer outfit. Whether you’re heading to the beach or just running errands, this sweet design is sure to put a smile on your face.
To recreate this look, start by applying a smooth base coat, followed by a coat of white polish.
Use a fine brush to paint tiny hearts in a deep red shade. Don’t worry too much about perfection – the charm lies in the homemade touch. Finish with a quick-drying top coat and you’re ready to take on the day with confidence.
The products used to achieve this look include:
Base Coat: Zoya Anchor Base Coat
White Polish: China Glaze White on White
Red Accents: OPI Nail Lacquer in ‘Big Apple Red’
Top Coat: INM Out The Door Super Fast Drying Top Coat
Sheer Nails with Scattered Rhinestone Accents
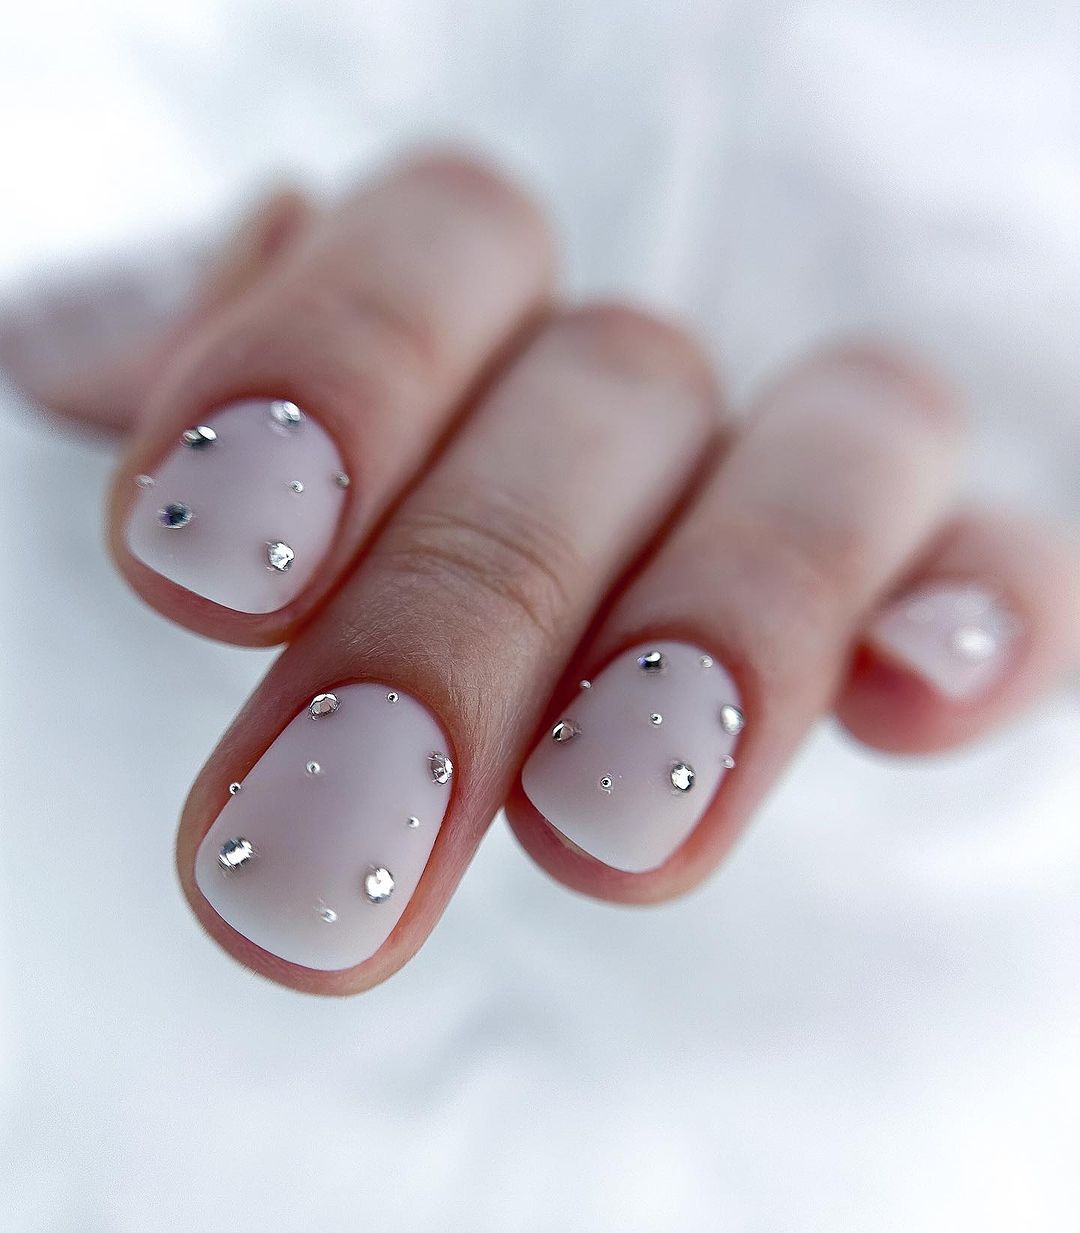
As the eye wanders across this understated yet luxurious design, it’s as if the softness of morning dew has been distilled onto the nails. Tiny crystal clear rhinestones sparkle against a sheer pink backdrop, creating an air of subtlety that belies the richness of the overall aesthetic. The rounded shape of the nails themselves adds to the invitation, drawing the viewer in with its gentle curves.
The consumables required for this look are straightforward: Deborah Lippmann’s All About That Base serves as a solid foundation, while OPI’s ‘Bubble Bath’ polish provides the sheer pink hue. Tiny Crystal Clear Nail Art Rhinestones bring the sparkle to life, and Essie Gel Setter Top Coat seals everything in place.
To craft this look at home, begin by applying the base coat followed by two coats of ‘Bubble Bath’.
Then, strategically place the rhinestones on each nail using a small amount of top coat as adhesive. Finish with a final layer of top coat to protect your gems and achieve a glossy finish that showcases their beauty.
White Nails with Silver Glitter Encapsulated Tips
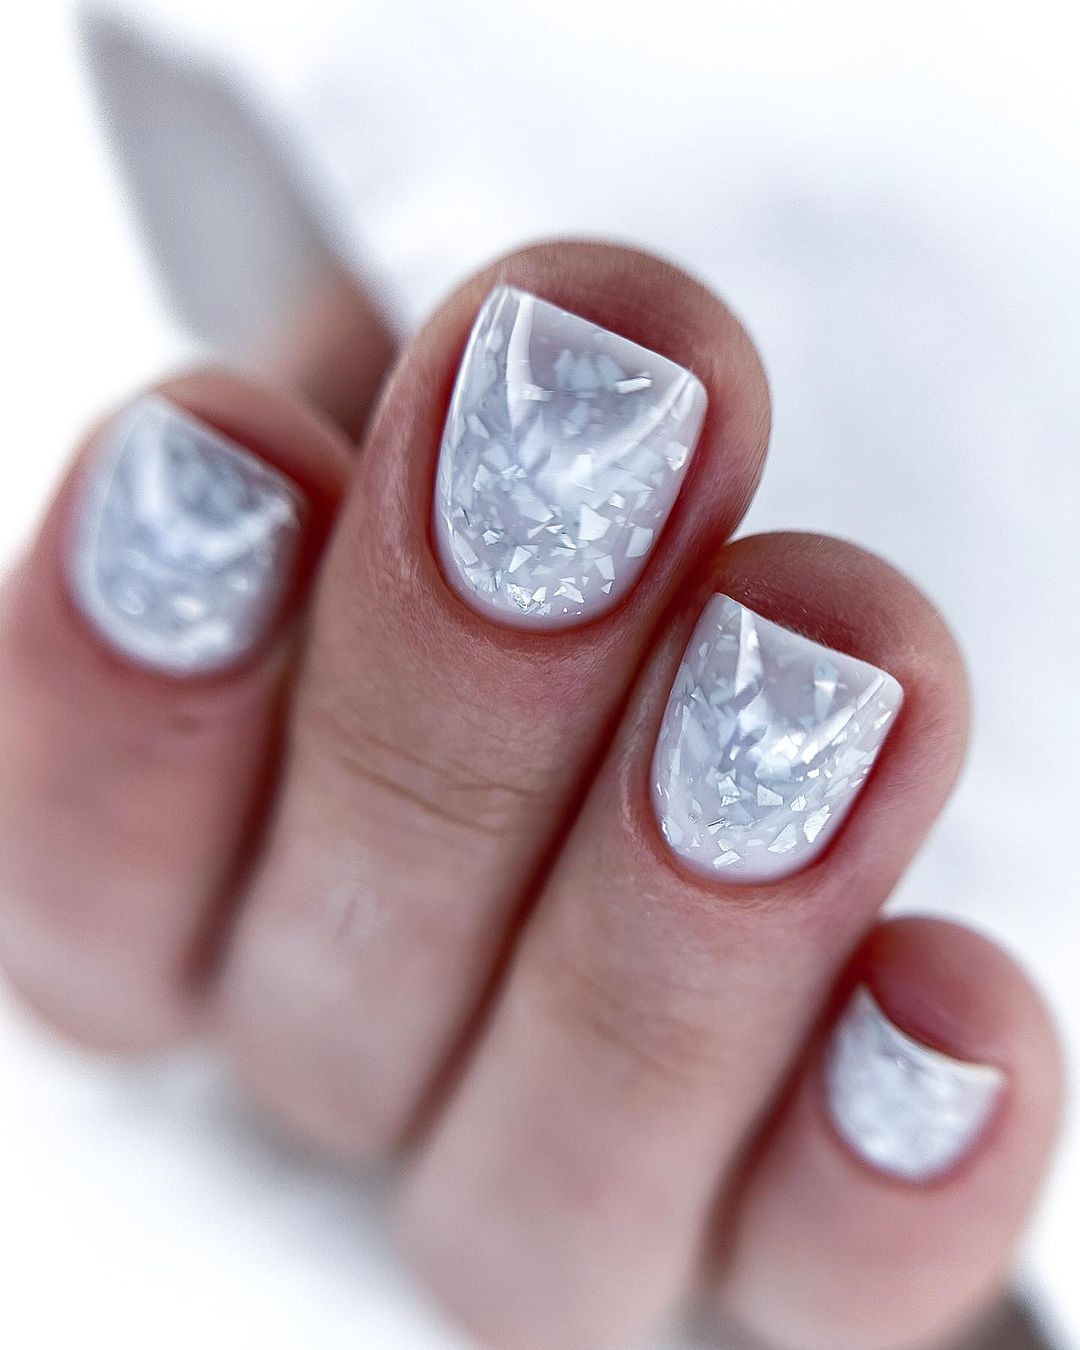
Innovative textures converge with short nails in a design that embodies the essence of a refreshing summer evening. This manicure’s frosty glass effect harmonizes beautifully with an oval shape, introducing a contemporary spin on the natural nail. As light catches the sparkle within the texture, it’s as if the nail is transformed into a chilled cocktail glass. A perfect union of icy coolness and understated elegance.
For this unique look, you’ll need:Base Coat: OPI Natural Nail Base CoatFrosted Polish: Sally Hansen Frosted Matte Top CoatTop Coat: INM Out The Door Top Coat for a swift-drying finishTo replicate the frosted glass effect at home, start by applying a base coat. Next, add a layer of your preferred sheer polish, followed by the frosted matte top coat. A steady hand and patience are crucial to achieving the desired glass-like finish.
Once dry, seal with a glossy top coat to reveal a texture that’s smooth to the touch yet icy to the eye.
Manicure with a Golden Foil Accent on the Ring Finger
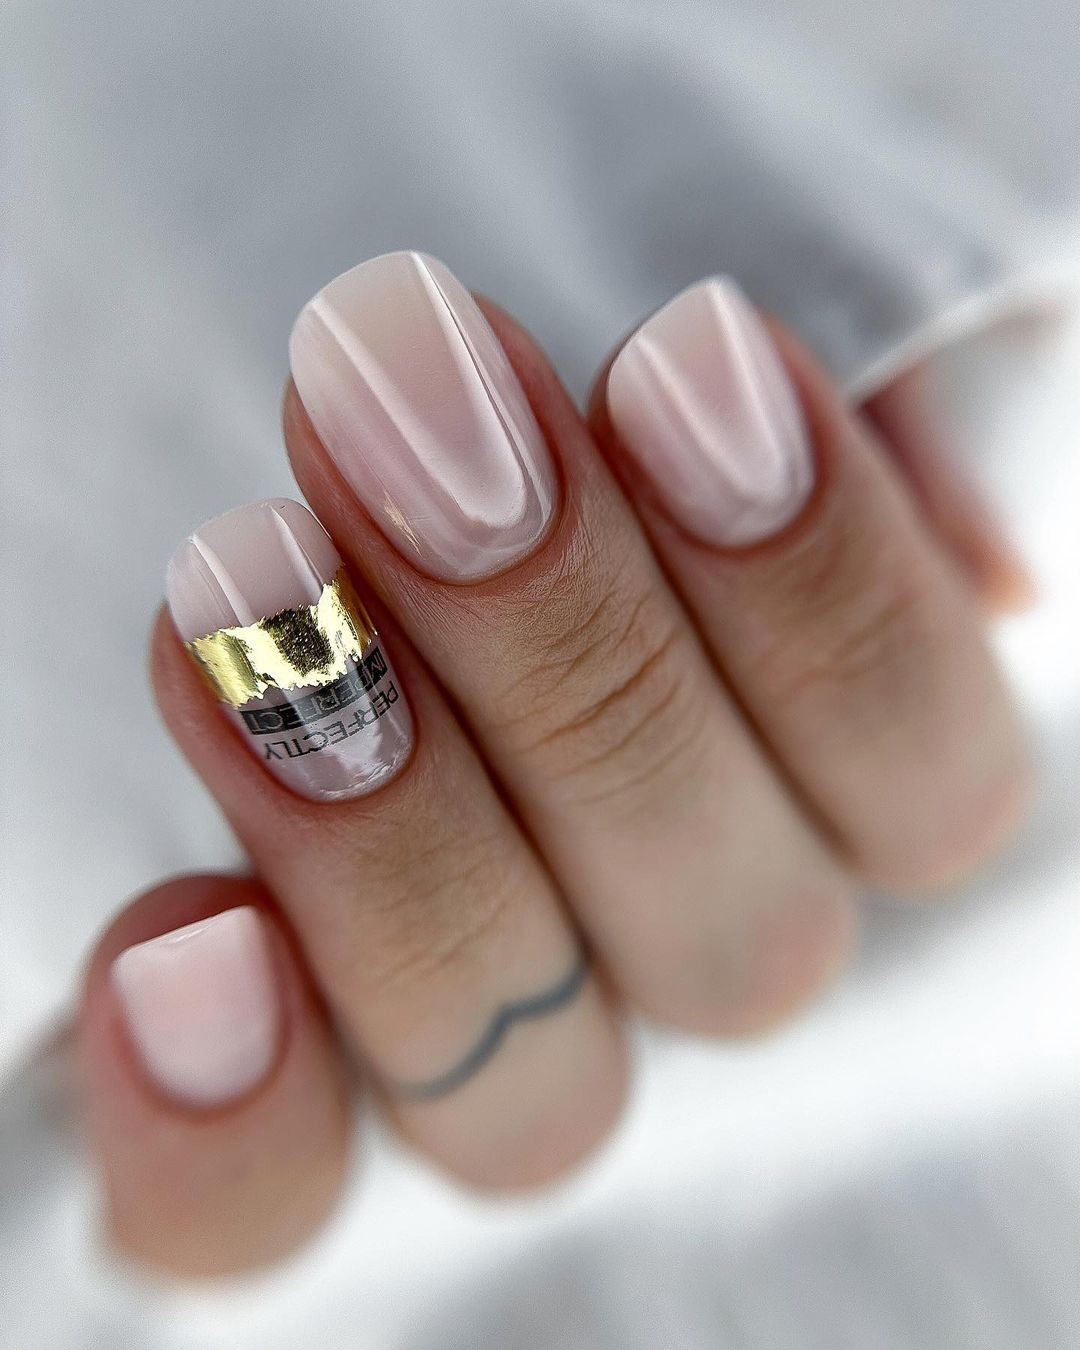
The French manicure gets a modern twist by combining timeless almond shapes with a touch of luxury. A delicate golden stripe on a nude background creates a look that’s understated yet striking, ideal for the woman who makes a lasting impression without drawing attention to herself.
Credit: @georgiploscar
To achieve this glamorous nail art, you’ll need:
– Base Coat: Butter LONDON Nail Foundation Priming Basecoat
– Nude Polish: Essie ‘Topless & Barefoot’
– Gold Leaf: Gold Leaf Sheets for Nail Art
– Top Coat: Deborah Lippmann Gel Lab Pro Top Coat
To master the golden touch at home, start by applying a solid base coat. Follow up with two coats of ‘Topless & Barefoot’ for a flawless nude finish.
Apply adhesive to the tips and gently press on the gold leaf before sealing it all in with a gel-like top coat. The result is a smooth, long-lasting finish that exudes elegance and sophistication.
Golden Textured Metallic Nails with One Black Accent Nail

In a bold fusion of luxury and audacity, this show-stopping manicure shines bright like a beacon of opulence. A rich gold leaf texture on one nail, perfectly offset by sleek black accents on the others, is a masterclass in contrast that will leave onlookers green with envy. As a testament to the art of statement nails, these 2024 long nails are destined to be a head-turning sensation. The consumables for achieving this metallic masterpiece?
Smith & Cult’s Basis of Everything Base Coat as the foundation, Cirque Colors’ Crème Nail Polish in ‘Memento Mori’ for the bold black base, 24k Gold Leaf Sheets for the luxurious finishing touch, and ILNP’s Ultra Glossy Seal to seal the deal. Crafting the golden glamour requires a precise balance of artistry. Begin with a pristine base coat, followed by a thick layer of the boldest black polish you own.
Next, apply adhesive to the nails destined for gold, then gently press the gold leaf sheets on top, allowing them to conform to the curve of your nail. The solid black anchor provides a striking counterpoint to the gilded accents, while a glossy top coat seals the deal and ensures an extraordinary finish that’s nothing short of jaw-dropping.
Sheer Pink Ombre Nails with White Floral Stamping
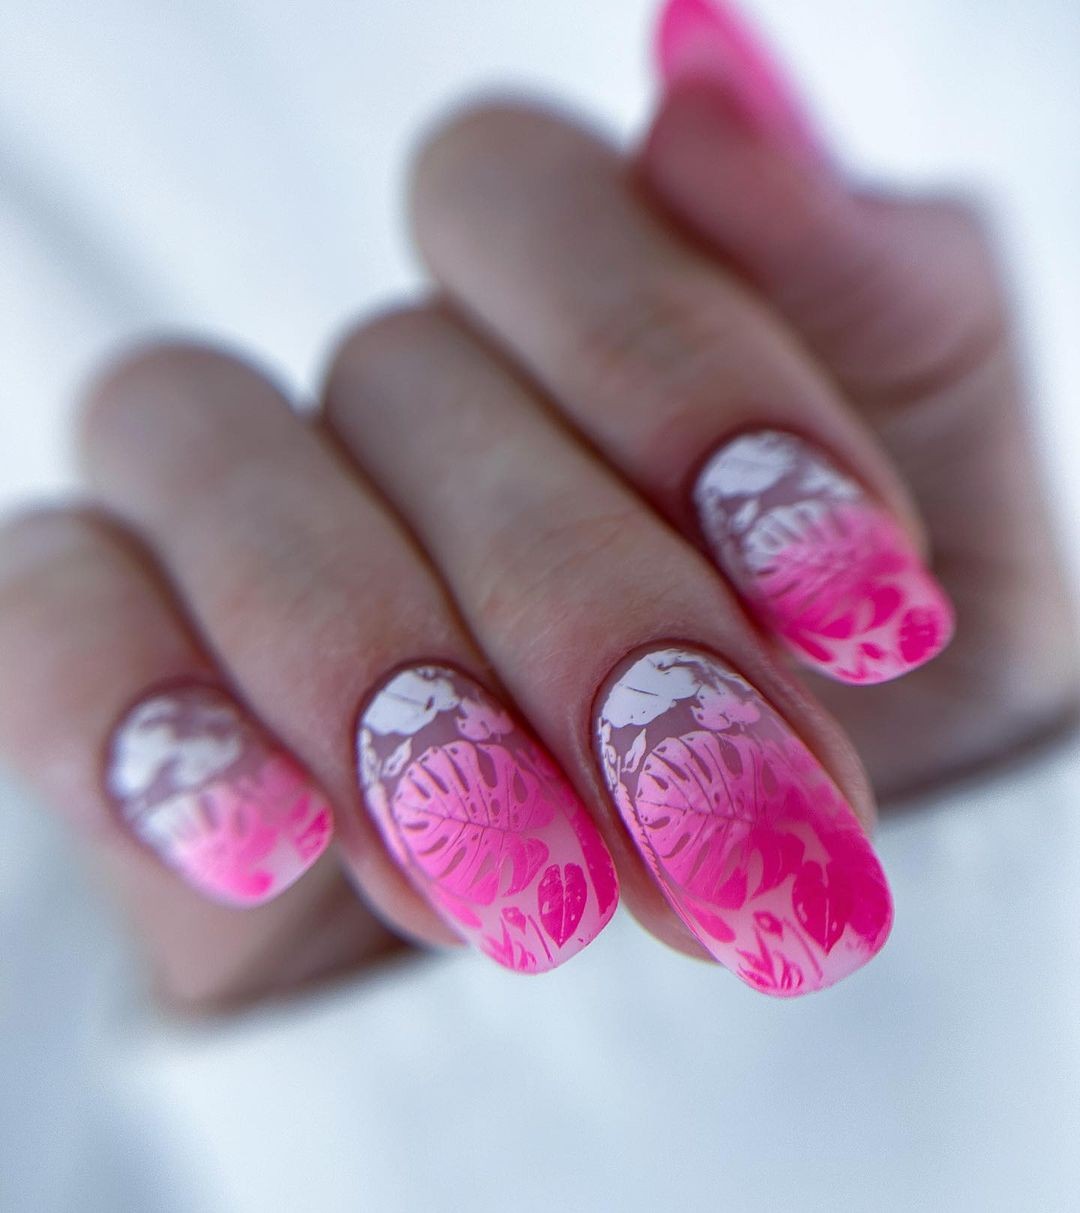
Transform your nails into a vibrant summer haven with this hot pink and white design that’s reminiscent of a lush garden party. The bold colors and delicate art come together in perfect harmony, making it a show-stopping choice for beach days or outdoor escapades. With its unique blend of vibrancy and elegance, these tropical art nails are sure to spark conversation.
To recreate this stunning look, you’ll need the following consumables: ORLY Bonder Rubberized Basecoat as your base coat, OPI Neon Collection’s ‘Down to the Core-al’ for the pink gradient, Konad Nail Art Stamping Polish in white for the tropical design, Bundle Monster’s ‘Tropical Vibes’ stamping plate, and Seche Vite Dry Fast Top Coat to seal it all. To nail this tropical design, start by applying the bonder as your base coat.
Then, use a sponge to apply the pink gradient polish, achieving a sunset effect. Once dry, use the stamping plate to transfer your white tropical design onto your nail. Finish with a swift stroke of Seche Vite to capture the vibrancy beneath a glossy seal.
Nails with Iridescent Pink
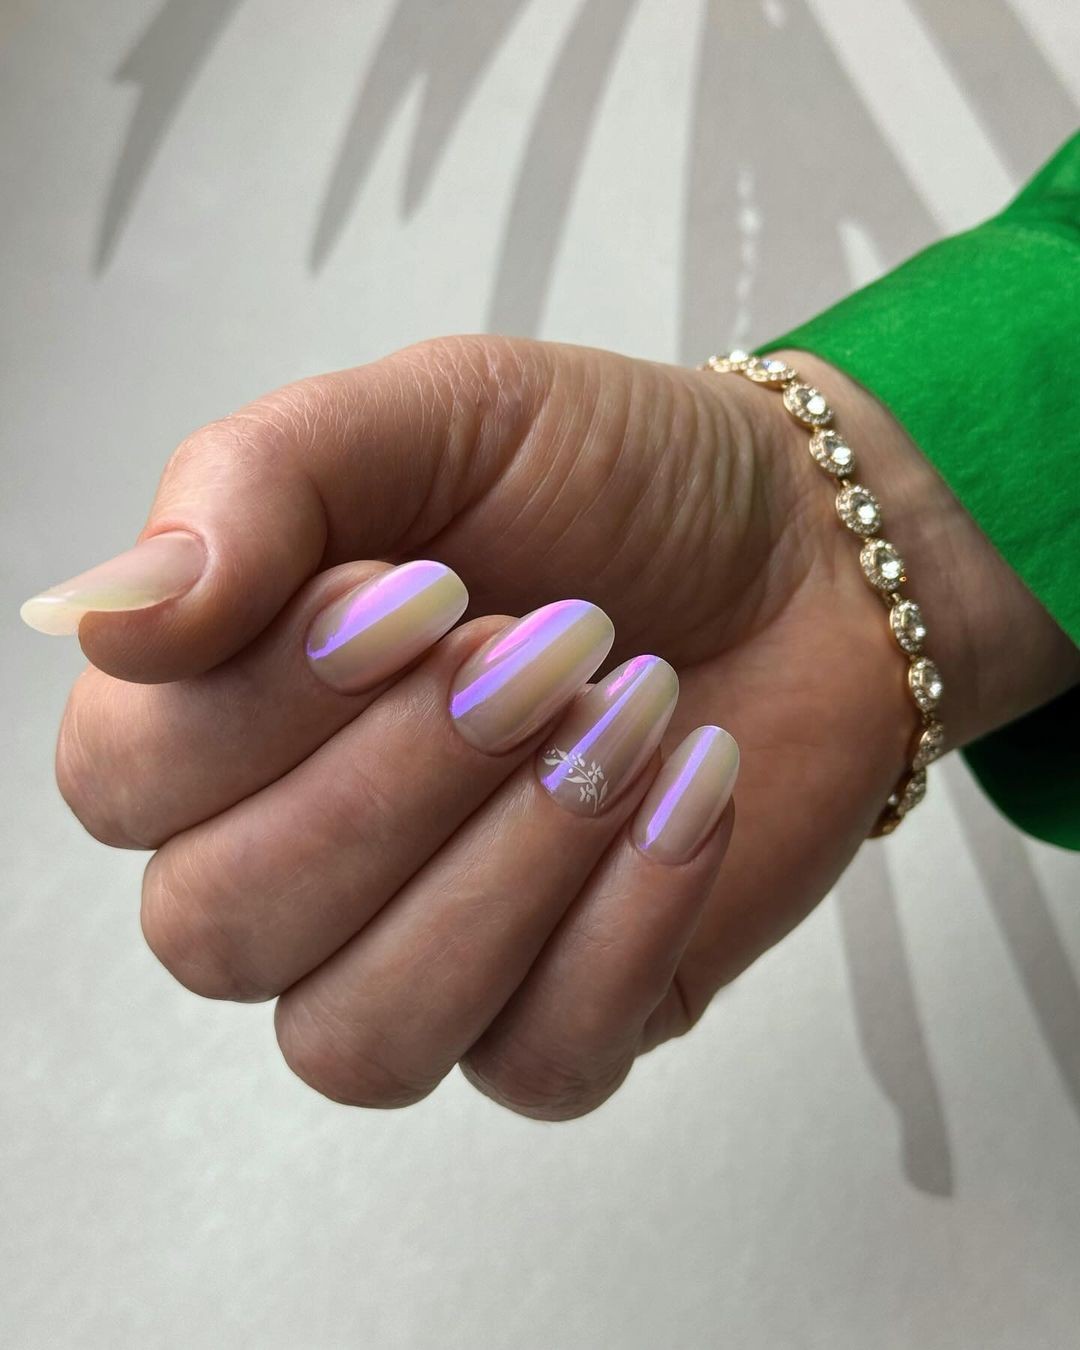
Immerse yourself in the whimsical charm of pastel iridescence, where each delicate touch evokes the gentle radiance of a summer sunrise. The subtle sparkle of a star accent brings an air of fantasy to this gel manicure, making it perfect for those who crave a touch of magic in their style. This look embodies the essence of 2024’s trendy short nails, boasting a soft- focus quality that’s both understated and captivating.
[Photo credit: @coranailart]
To create this enchanting look at home:
Start by applying a sturdy base coat, then build up the pastel gels in light, airy layers for an ethereal effect. Top it all off with a holographic top coat that shimmers like the night sky. Add a single star stud as a touch of whimsy, and seal the deal with a final layer of clear polish. The result is a design that’s both striking and subdued, perfect for those who want to add a dash of fantasy to their everyday look.
Pink Nails with White Geometric Lines and Rhinestone Accents

The White Wave design is a masterclass in serenity, evoking the gentle lapping of summer waves against the shore. Delicate white lines undulate across a soft pink canvas, as if sunlight has been distilled into pure visual harmony. Tiny gemstones add a playful touch, capturing the mischievous twinkle of light dancing on water’s surface.
This design’s secret to success lies in its restraint – subtle yet striking, it’s a perfect blend of soothing and sophisticated.
The creative process begins with a base coat, followed by a couple of layers of OPI’s ‘Put it in Neutral’ for that signature pink hue. Next, employ the Sally Hansen Nail Art Pen in White to draw your waves with finesse, as if channeling the tide itself. Place a small round crystal embellishment at the crest of select waves, then seal the design with INM Out The Door Super Fast Drying Top Coat for long-lasting wear.
Nude Nails with Minimalistic Red Art
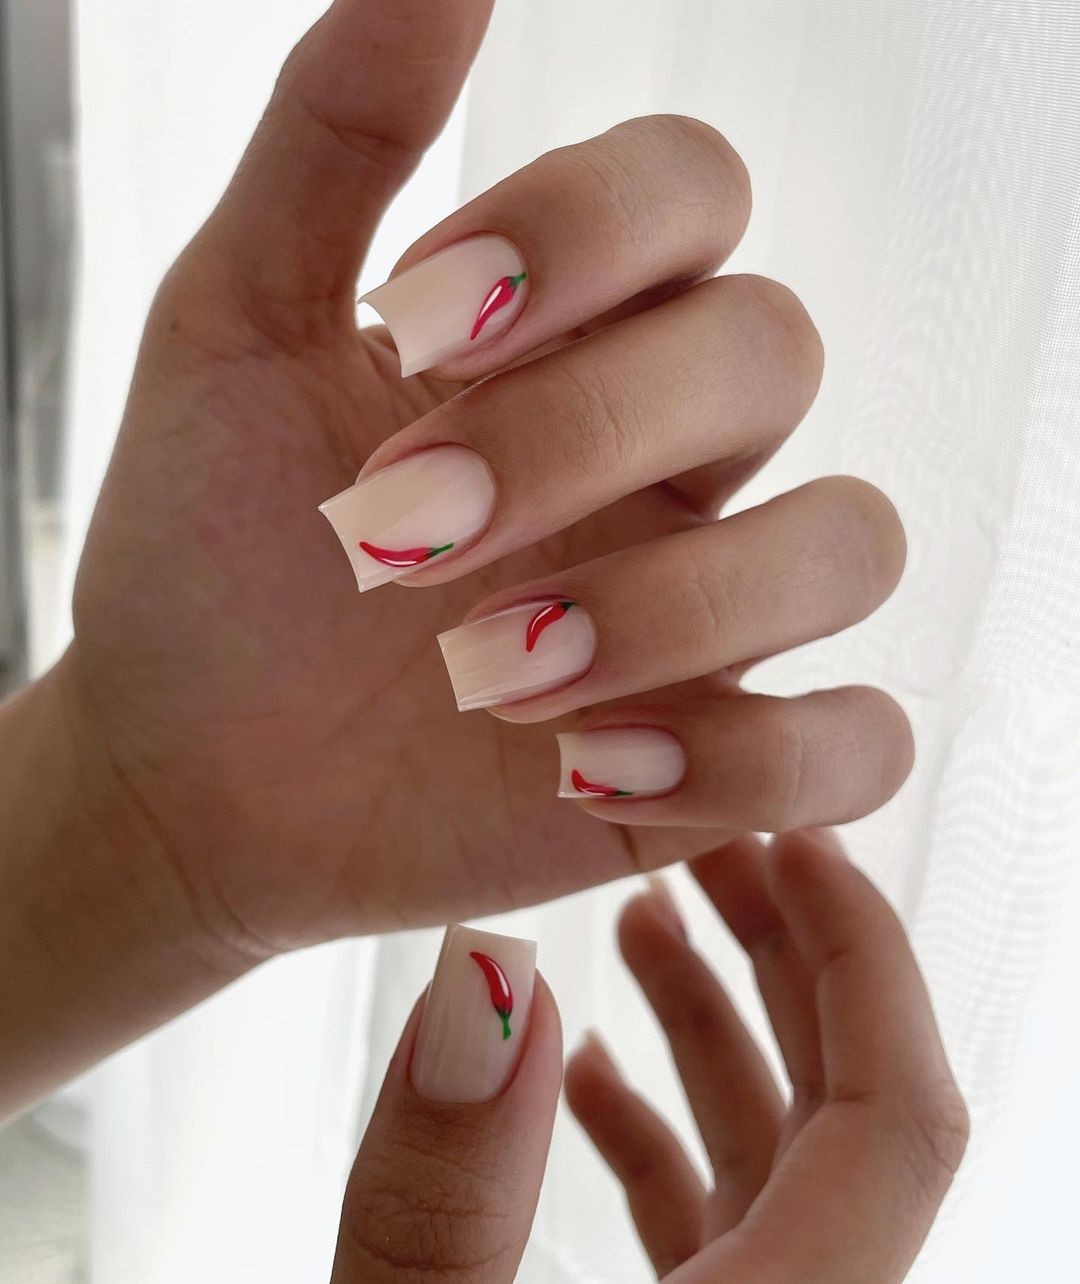
This vibrant floral design is an ode to nature’s unbridled beauty. By combining bold colors and a nude base, you’ll create a stunning art piece that’s as unique as your own creative expression. It’s the perfect way to wear your artistic flair like a badge of honor.
Image credit: @coranailart
To bring this whimsical floral design to life, start with a solid base coat and then apply a neutral beige polish, ‘April’, by Zoya.
Next, unleash your creativity with a variety of colorful pens or brushes and acrylic paints, freely sketching out your abstract florals. Don’t be afraid to experiment – after all, the beauty of this design lies in its uniqueness! Finish off the look with ORLY’s Glosser Super High-Shine Top Coat for a long-lasting, glossy finish that’s as vibrant as your artistic spirit.
Sheer Pink Nails with White Flowers and Gold Glitter Accents

A timeless fusion of elegance and luxury, this design is reimagined in a romantic and sophisticated way. Delicate golden blossoms float against a subtle pink backdrop, evoking the essence of summer weddings and everyday glamour. The combination of white, gold, and sheer pink hues creates an air of refinement that’s perfect for any occasion.
Photo credit: @aguilar_nails
To recreate this look, you’ll need:
– Base Coat: Orly Bonder Basecoat
– Sheer Pink Polish: Essie “Sugar Daddy”
– Gold Flake Polish: ILNP “The Magician”
– White Stamping Polish: Mundo de Uñas White
– Stamping Plate: MoYou London “Floral”
– Top Coat: Essie Gel Setter Top Coat
To achieve the floral gold design, start by prepping your nails with Orly Bonder. Apply a sheer layer of Essie’s “Sugar Daddy” for a soft pink hue.
Then, target specific areas where you’ll stamp the white florals from MoYou’s “Floral” plate using ILNP’s “The Magician.” Gently press the gold flakes onto the stamped design to create a regal finish. Seal everything with Essie’s Gel Setter Top Coat for a smooth and radiant result.
Varied Nail Art Featuring an Eye Design, White Florals, and a Jeweled Accent
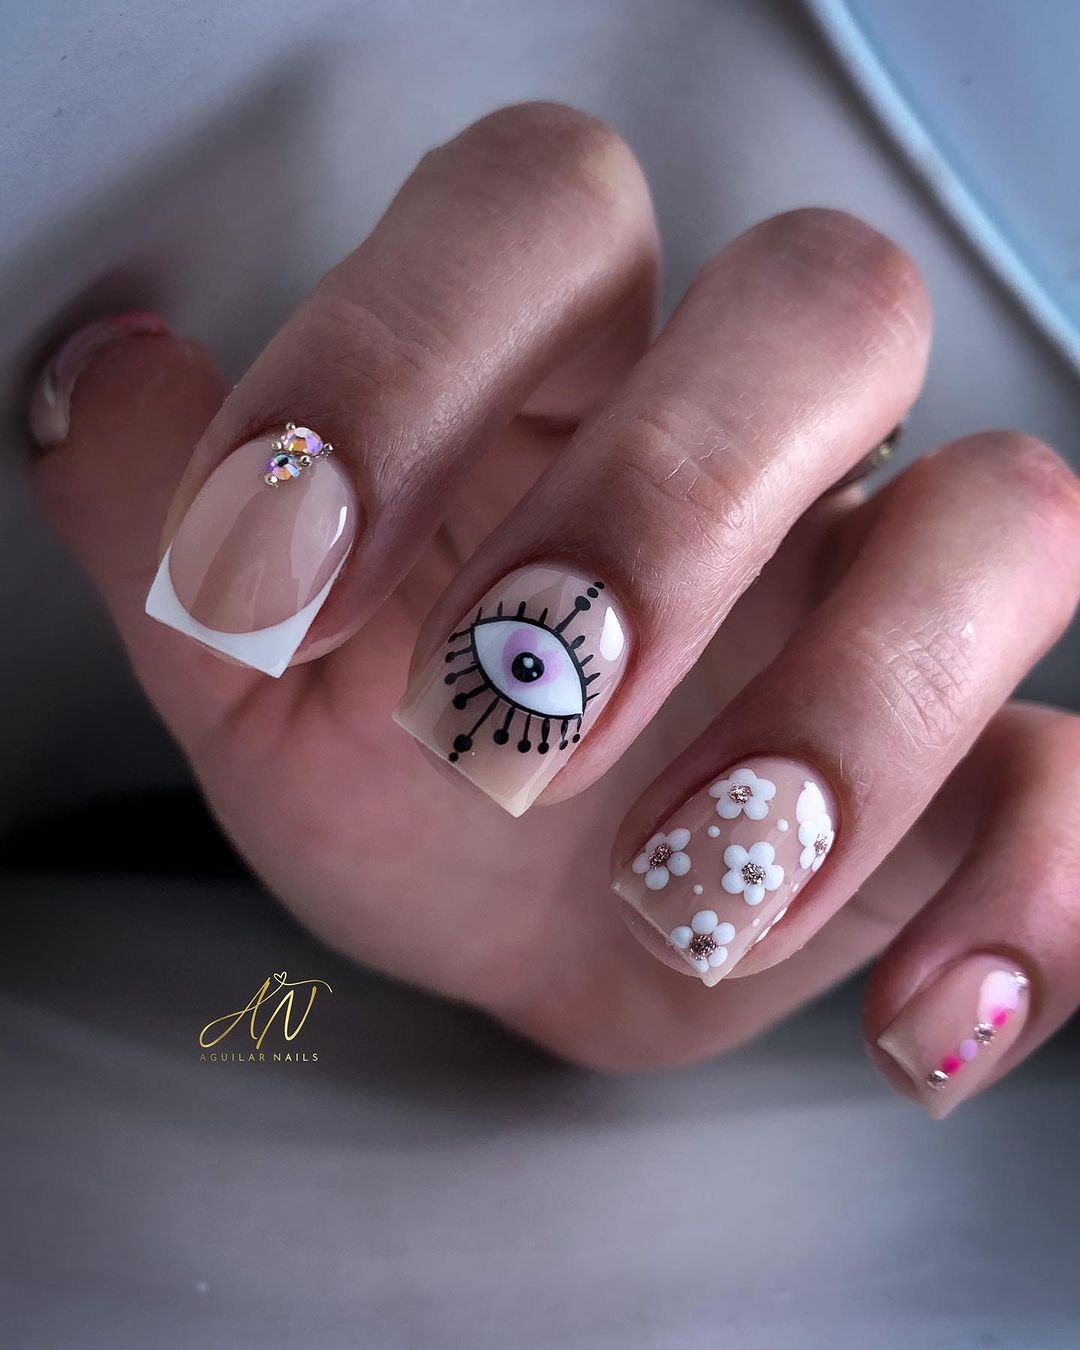
In a bold fusion of artistry and whimsy, this design combines an illustrative eye with lush floral patterns and a touch of rhinestone sparkle. The result is a narrative nail that not only tells a story but also transports the viewer to a world of imagination. Each element contributes its unique voice, from the playful flowers to the watchful eye. To achieve this artistic masterpiece, you’ll need the right consumables. Start with a base coat of OPI’s Infinite Shine Primer for a smooth foundation.
Then, apply two coats of ‘Be There in a Prosecco’ for a creamy, nude hue. For detailed drawing, use black and white acrylic paint to bring your design to life. Add a dash of sparkle with assorted rhinestones and finish with a top coat of OPI’s Infinite Shine Gloss for a story that truly lasts. To create this narrative nail, start by preparing the surface with primer and applying two coats of ‘Be There in a Prosecco’ for a rich base color.
Carefully paint the eye and floral patterns using acrylics, allowing each detail to shine through. Strategically place rhinestones to add depth and dimension, then seal it all with the glossy top coat for a finish that’s as captivating as the story itself.
Sheer Base and Colorful French Tips in Pastel Shades
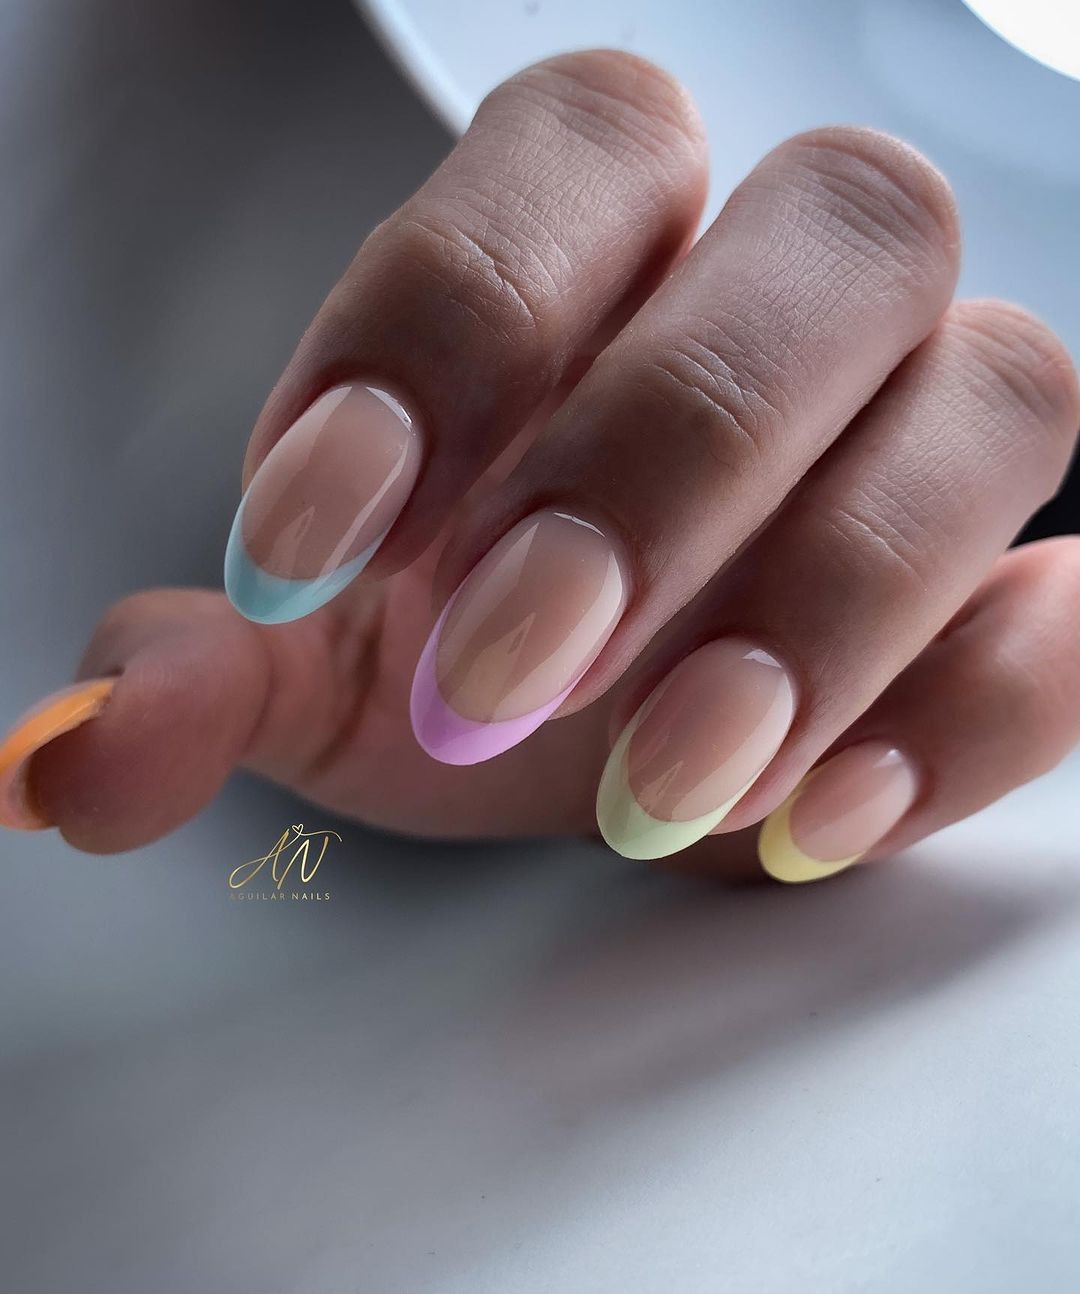
The serene allure of ombre nail art is reimagined in this design, where soft pastel hues evoke the gentle warmth of a sunrise. This understated gradient, reminiscent of dawn’s earliest light, brings a touch of ethereal beauty to one’s fingertips. The subtle transition from clear to soft pastel is nothing short of mesmerizing. To achieve this look, you’ll need the right tools and products.
Start with a Butter LONDON Nail Foundation Priming Basecoat as your base coat, followed by Essie’s Spring Collection for the pastel polishes. A sponge will be your trusted companion in blending each color seamlessly into the next. Finish off the look with Smith & Cult’s Above it All Top Coat for long-lasting wear.
Simple, Glossy, Pale Pink Square-Shaped Nails
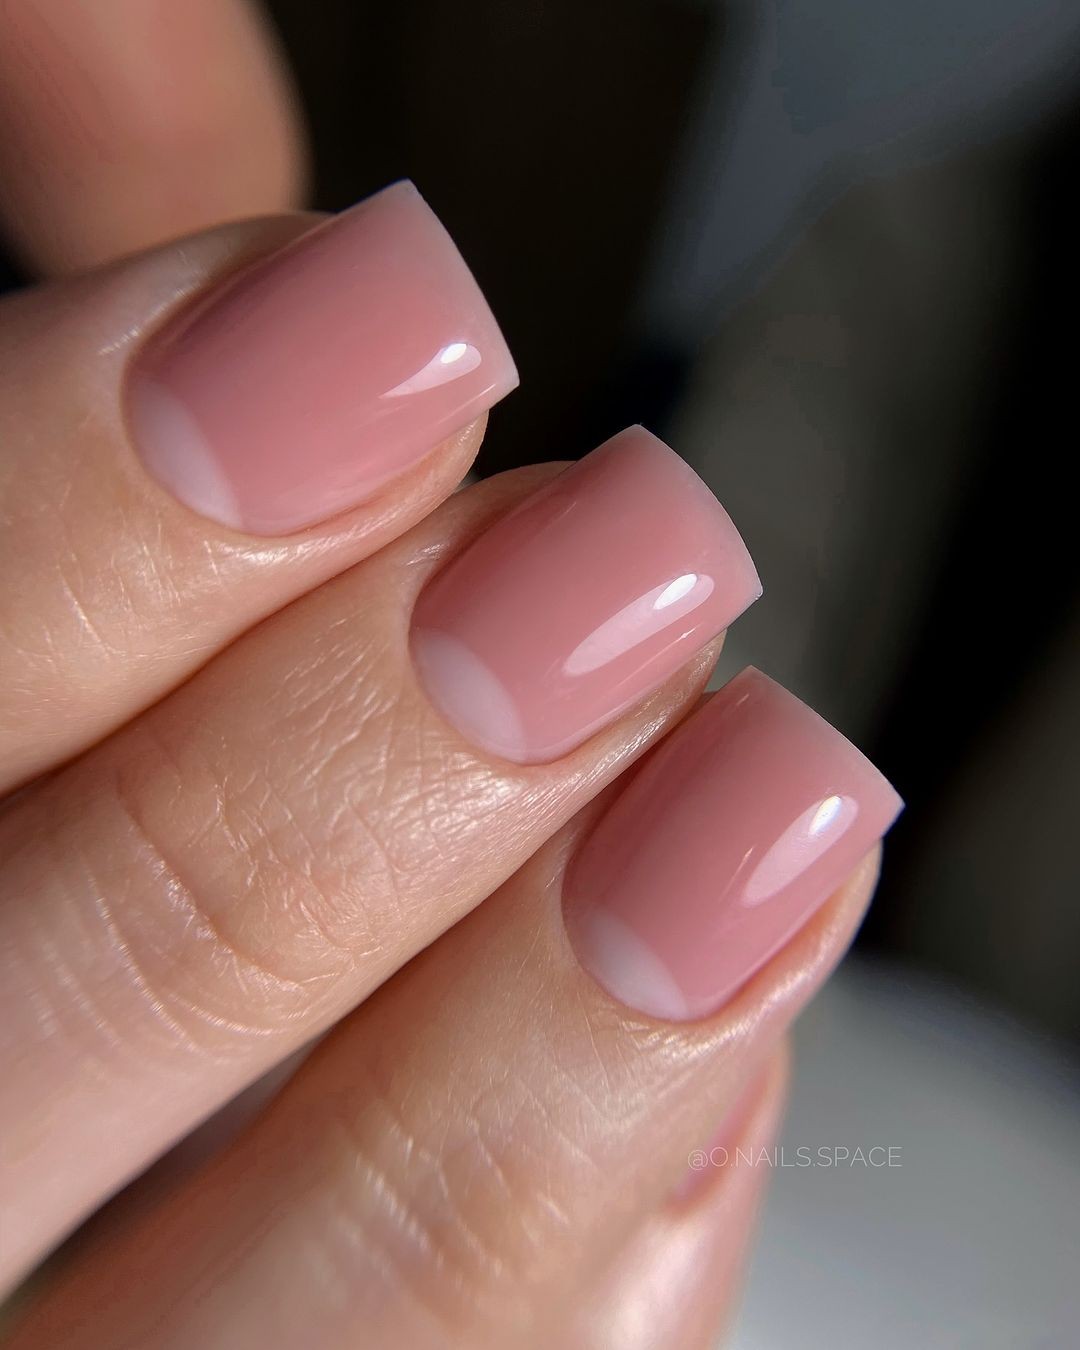
The simplicity of this classic pink polish embodies timeless femininity. Its self-leveling formula yields a smooth, impeccable finish that never goes out of style. This understated elegance is the epitome of tradition, making it a true beauty staple.
To recreate this timeless manicure, start with a luxurious base coat from Chanel La Base. Two coats of Dior’s iconic ‘Tra-La-La’ polish in shade 155 will provide the perfect depth of color.
Finish off the look with Chanel Le Gel Coat Longwear Top Coat for a high-gloss finish that will last as long as it is elegant.
Classic Glossy Deep Maroon Nails
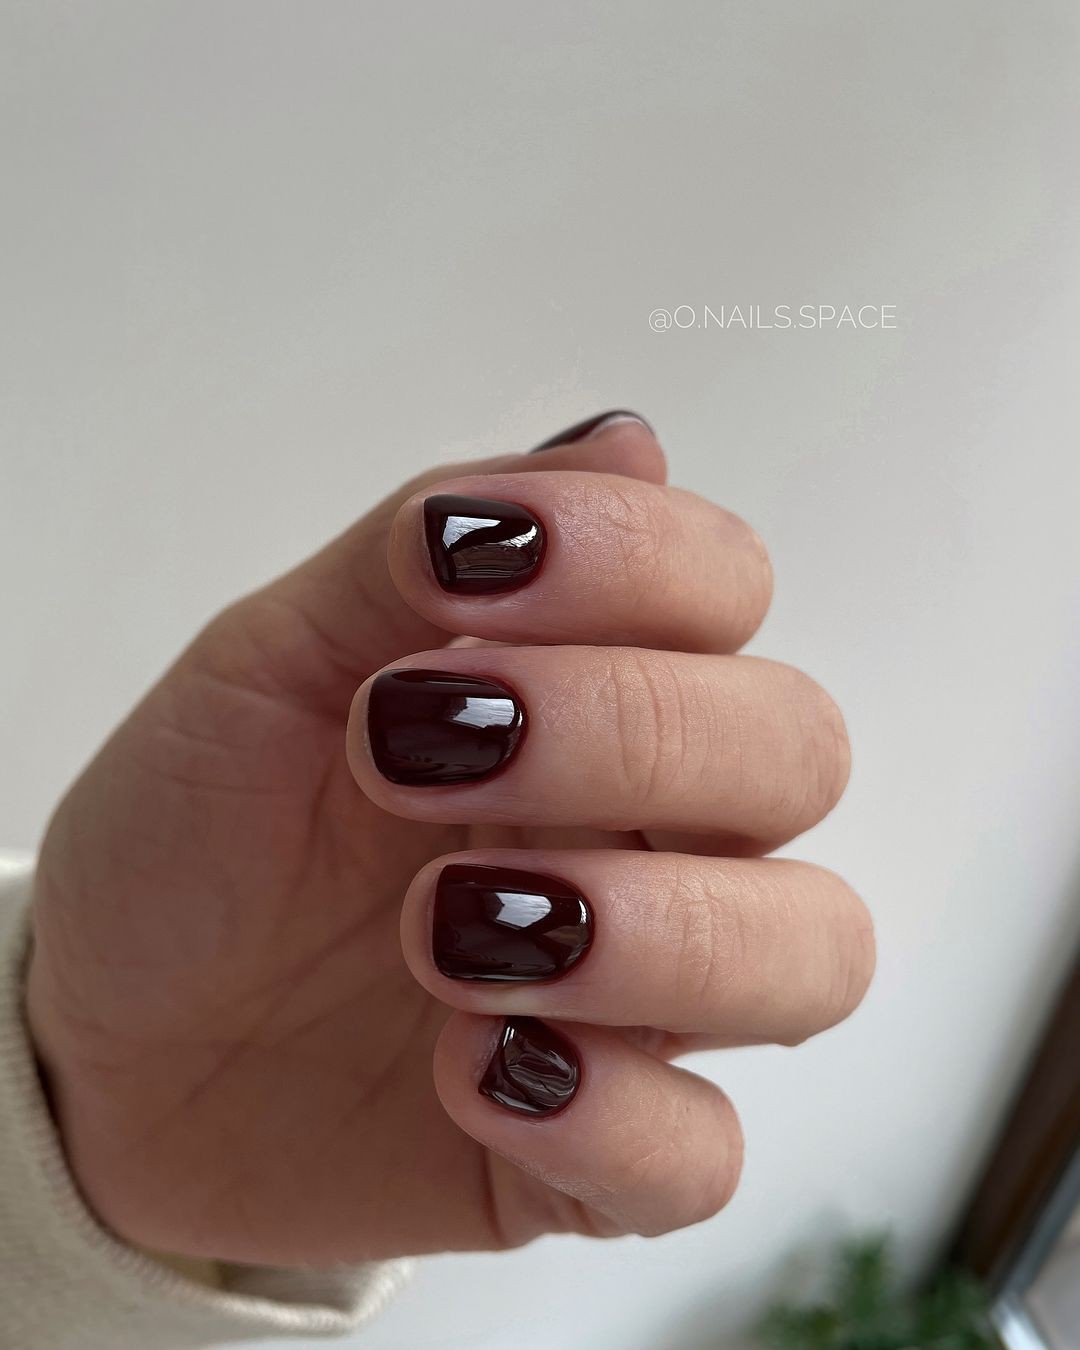
The essence of sophistication is captured in this stunning deep burgundy gel manicure, reminiscent of a luxurious velvet evening gown. The rich color’s depth creates a striking contrast with the natural shape of the nails, offering a modern twist on classic elegance. This look is perfect for making a statement on those sophisticated summer nights.
Behind the Scenes: @o. nails. space
To create this velvety masterpiece, start by applying a solid base coat.
Then, build up to two coats of OPI Gel Color’s ‘Malaga Wine’ for that deep burgundy hue. Finish with a gel top coat from Sally Hansen Miracle Gel for a glossy, durable finish that shines like the night sky.
Black Nails with a Leopard Print Design
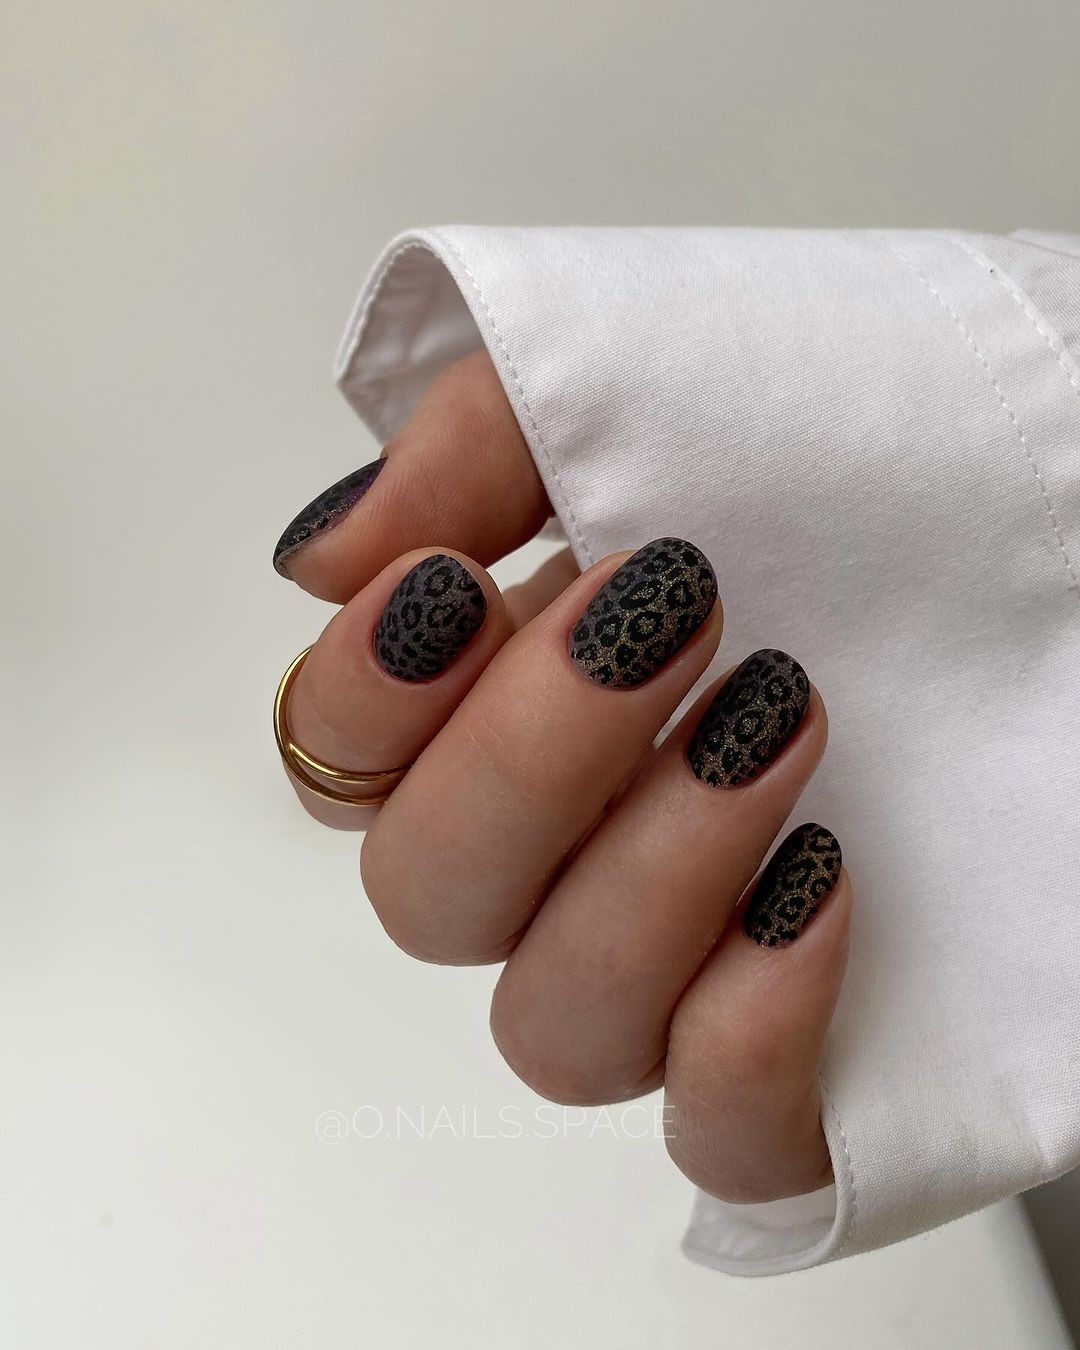
Unleash your untamed creativity with this captivating leopard print design, where sophistication meets audacity. The timeless allure of the print is cleverly juxtaposed against a subtle matte backdrop, resulting in a daring yet refined combination that commands attention without being too loud. This look is perfect for those who crave making a statement without shouting it from the rooftops. Photo credit by: @o. nails.
spaceTo bring this fierce design to life, you’ll need:* Base Coat: Essie Matte About You* Black and Gold Polishes: For the leopard’s signature spots* Dotting Tools: To precision-craft each spot and accent* Top Coat: A matte finish to keep the overall look understatedTo create this striking effect, start by applying a matte base coat. Next, use a fine dotting tool to carefully place your leopard spots in black and gold. For an added layer of subtlety, seal it all off with a matte top coat.
Each spot is a deliberate declaration of personal style – a testament to your bold yet refined sensibilities.
Almond-Shaped Nails with a Glossy Chocolate Brown Finish
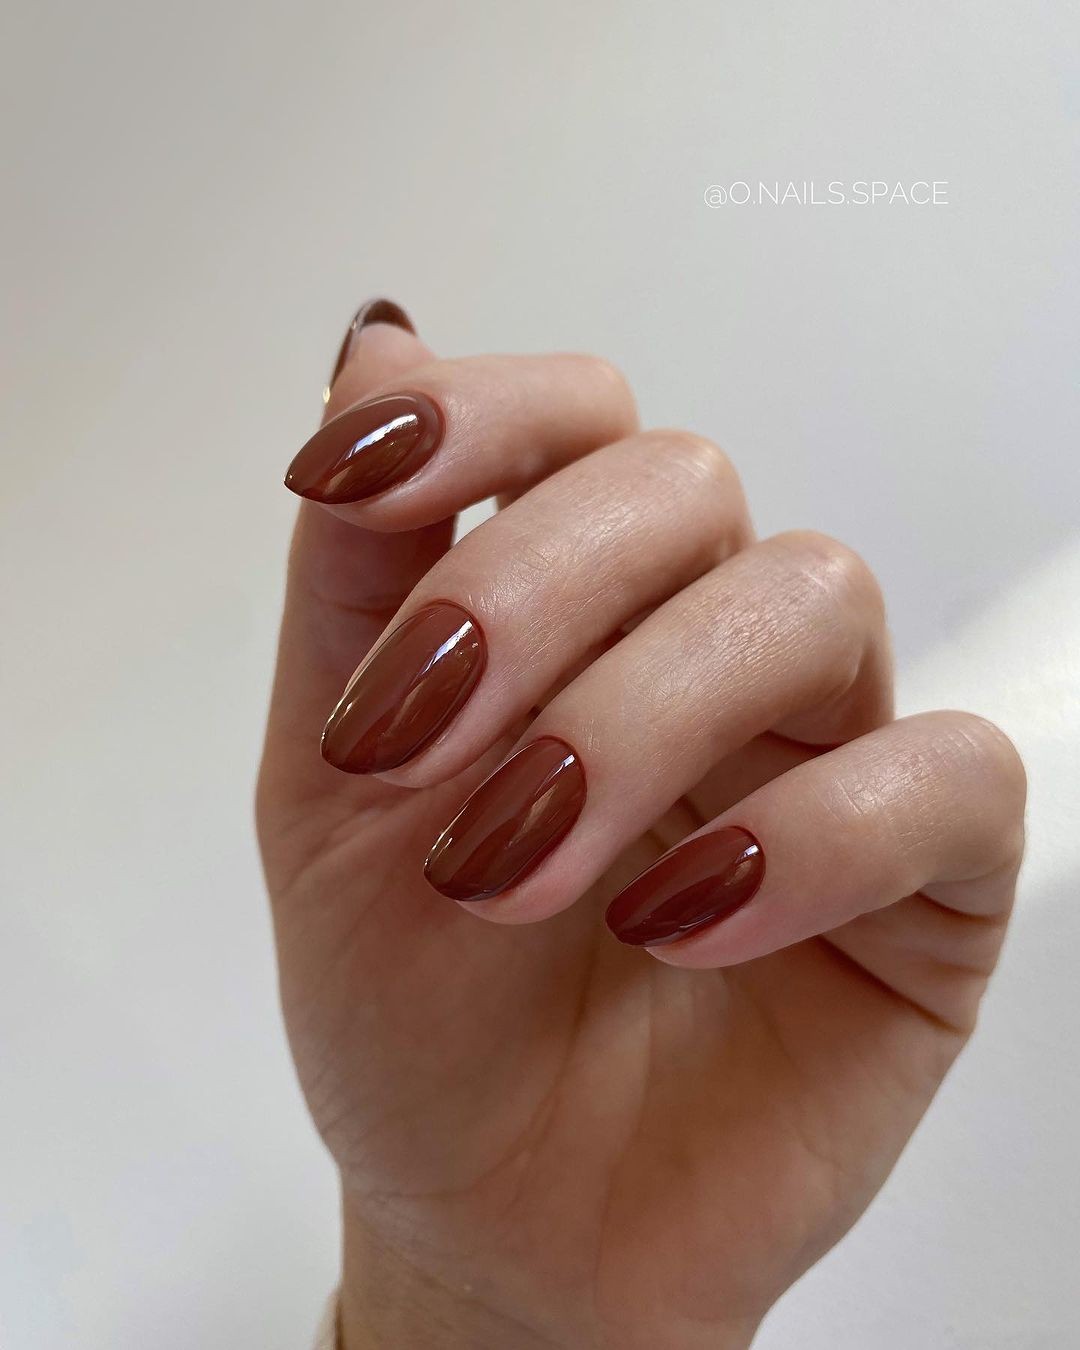
The timeless almond nail shape exudes femininity and elongation, making it a classic choice for those who appreciate elegance. When paired with a rich burgundy hue, the result is nothing short of sophisticated. This look is perfect for individuals who value tradition and confidence in their style. The simplicity of this design allows it to be worn for any occasion, from everyday life to more formal events.
Consumables:Base Coat: OPI Natural Nail Base CoatBurgundy Polish: OPI “Got the Blues for Red”Top Coat: Seche Vite Dry Fast Top CoatCrafting the Elegance:Begin with a natural base coat, followed by two coats of the burgundy polish for a deep, rich color. Finally, apply a quick-drying top coat to seal in the finish and ensure your nails are ready for any situation that requires elegance.
Vintage Floral and Cupid Print Designs, Edged with Gold
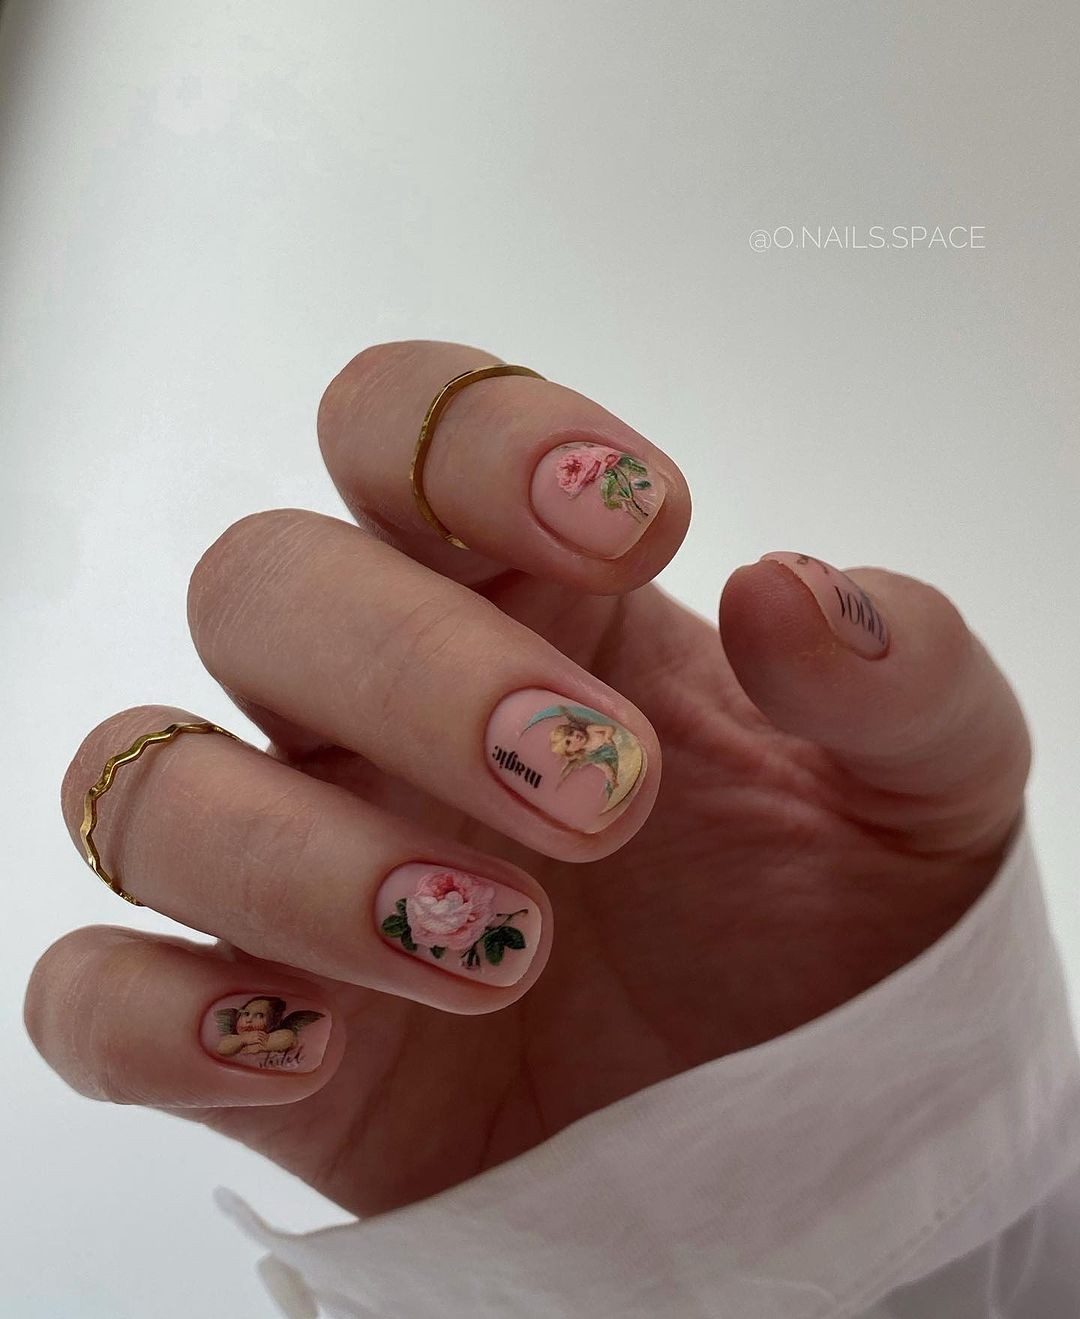
A vintage-inspired manicure gets a modern makeover in this design, where delicate floral decals evoke a sense of nostalgia. The ring finger takes center stage with its golden framing, reminiscent of an antique locket’s intricate details. This look is perfect for those who romanticize the past.
To achieve this look, start by applying a base coat, followed by a sheer layer of pink polish. Carefully place the floral decals on each nail, ensuring they lie flat against the surface.
Use a fine brush to paint a golden frame on the ring finger’s accent nail. Finally, seal everything with a glossy top coat for a finish that’s both durable and enchanting.
To create this look, you’ll need:
Base Coat: Essie Strong Start Base Coat
Pink Polish: Essie ‘Mademoiselle’
Floral Decals: Vintage Floral Nail Stickers
Gold Paint: For the ring finger’s delicate frame
Top Coat: Sally Hansen Miracle Gel Top Coat
Sheer Pink Nails Adorned with Cute Illustrations

Embracing summer’s carefree vibe, this design lets loose with a medley of playful pop culture icons on a crisp white backdrop. From star-studded skies to watermelon wedges, each nail showcases a unique symbol, capturing the lighthearted essence of life’s simple pleasures. Perfect for casual outings or weekend festivals, this look combines creativity with ease, making it a delightful expression of one’s personality.
For this whimsical design, start by applying OPI Natural Nail Base Coat as your foundation. Once dry, carefully place assorted pop culture nail stickers to maximize their visual impact. Finally, seal the deal with INM Out the Door Fast Drying Top Coat to preserve the vibrancy and playfulness of your handiwork.
Mustard Yellow Nails with a Single Daisy Design

The cheerful yellow hue of these playful nails radiates warmth, transporting you to a bright and sunny day. The whimsical daisy design on the accent nail adds a touch of carefree charm, reminiscent of strolling through fields of blooming wildflowers. This delightful nail art brings the essence of summer to your fingertips, infusing your daily routine with a sense of joy and lightness.
Credit: @o. nails.
space
To create this daisy delight, you’ll need:
– Base Coat: Zoya Anchor Base Coat
– Yellow Polish: China Glaze ‘Sun Upon My Skin’
– White and Brown Polish: For the daisy accents
– Detailing Brush: For crafting the daisy design
– Top Coat: Zoya Armor Top Coat
To bring this sunny creation to life, start by applying a solid base coat as your foundation. Paint your nails with two coats of the vibrant yellow polish for opaque coverage.
Then, use the detailing brush to create a simple yet charming daisy on the accent nail, featuring white petals and a dot of brown at the center. Finish off your design with a top coat to seal in the color and ensure a lasting finish.
Pink Almond-Shaped Nails with Glitter, Lace Details, and Petal Appliqués
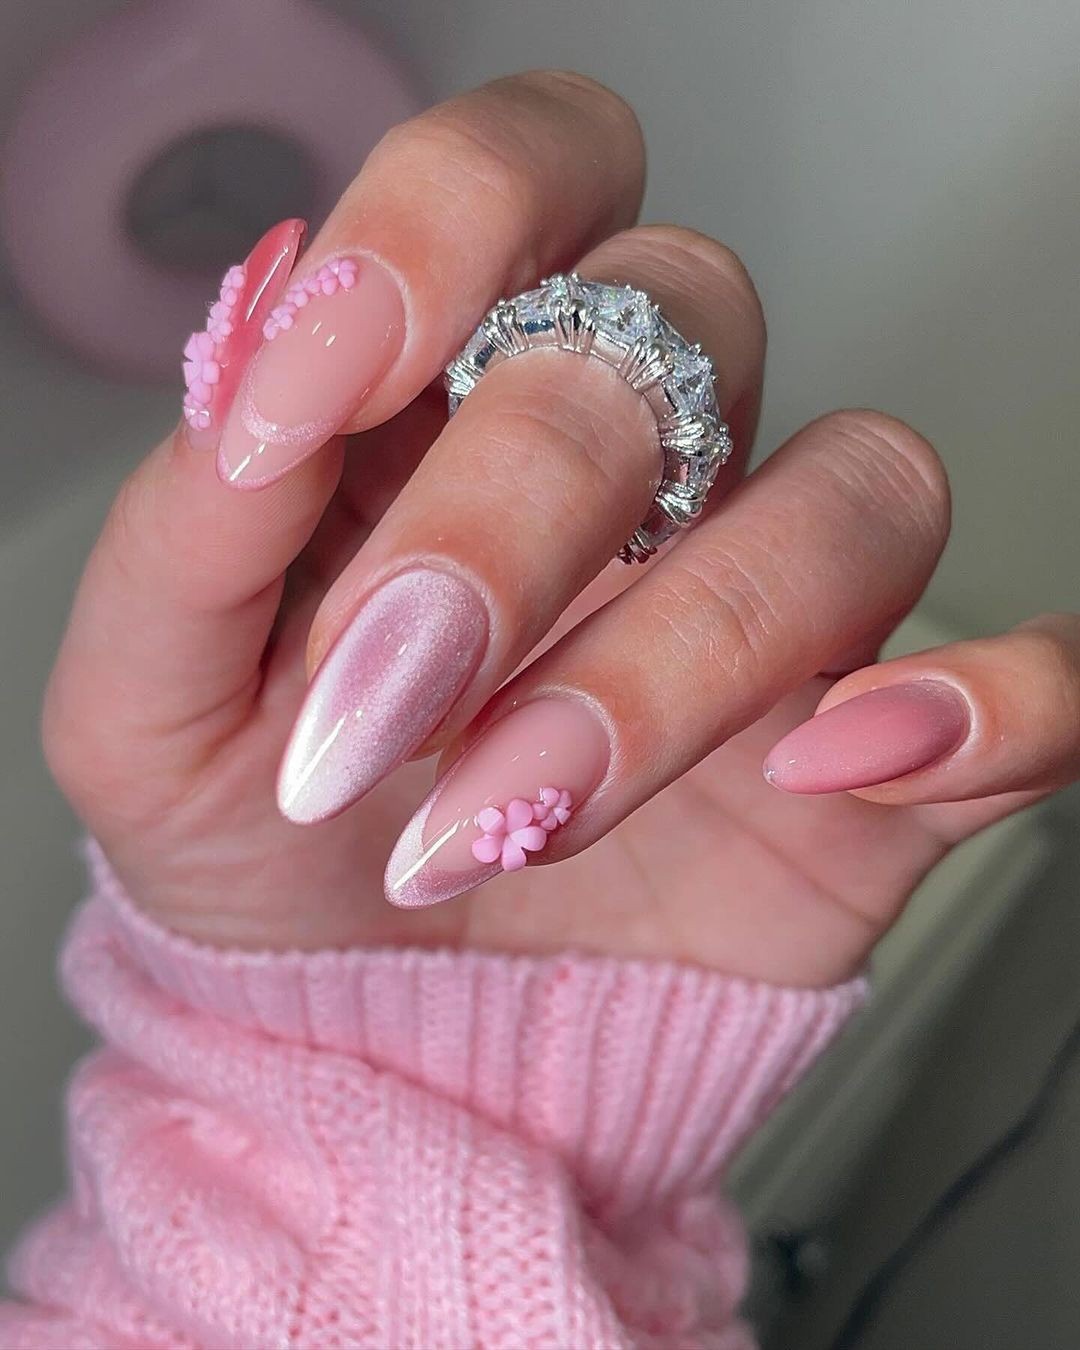
Springtime elegance shines through in this delicate nail art design, where a subtle pink ombre effect meets dainty floral accents on a crystal-clear base. Three-dimensional flowers are gently placed to create a textured, whimsical look that’s perfect for any occasion calling for a touch of romance.
For this enchanting look, you’ll need: Base Coat: OPI Natural Nail Base Coat Pink Gel Polishes: For the gradient ombre effect 3D Flower Decents: For the floral accents Top Coat: OPI GelColor Top Coat for a glossy finish. To perfect the pink ombre and floral accents, start by prepping your nails with the base coat. Use a sponge to dab on the pink gel polish, creating a seamless gradient effect. While the gel is still tacky, apply the 3D flower decals to the accent nails.
Finally, seal it all in with a top coat for a protective glossy finish.
Bold Red Nails with a Glittering Jewel Accent on the Ring Finger
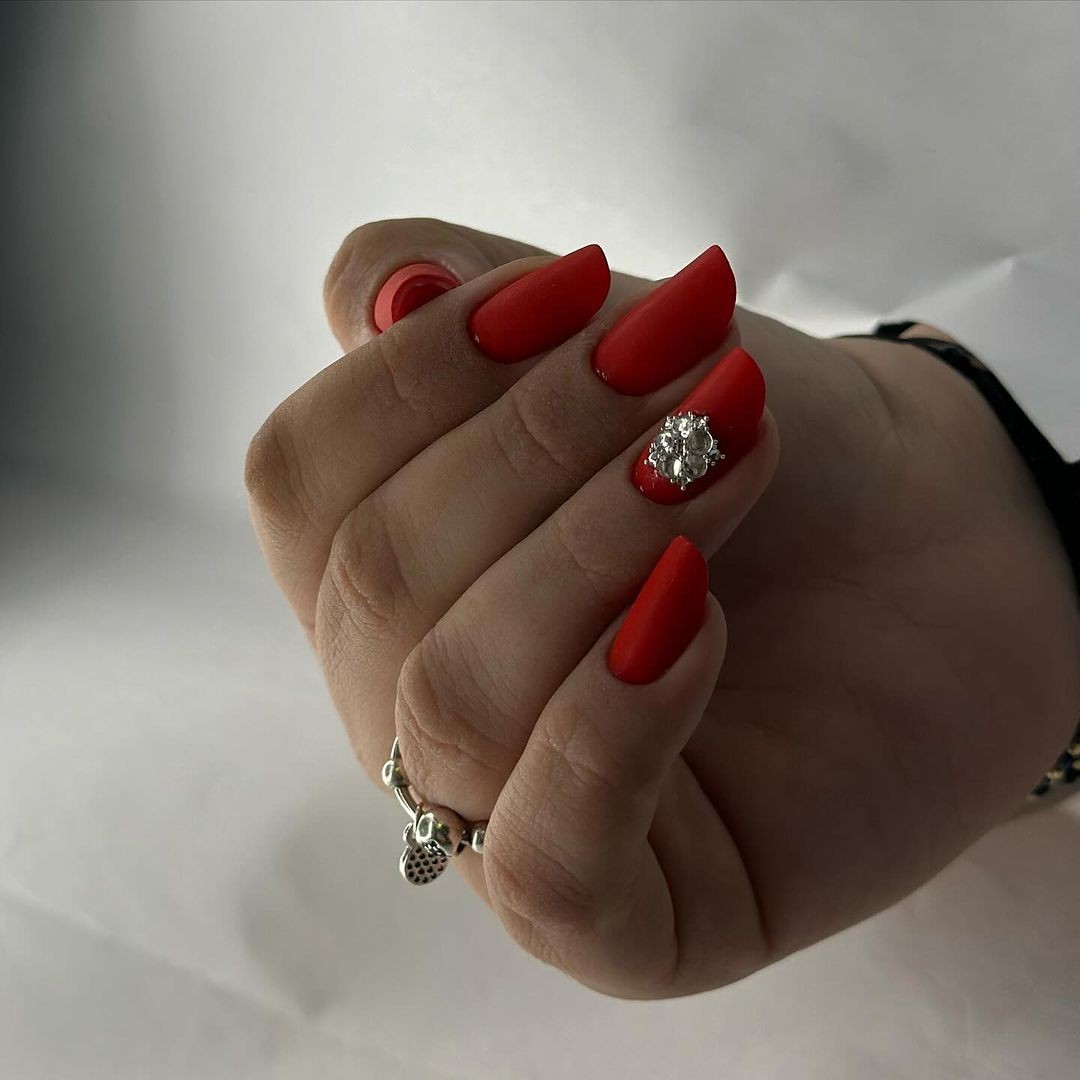
The radiant red gel manicure is more than just a statement – it’s an embodiment of confidence and style. The combination of a matte finish, a single sparkling diamond-like stone, and a stiletto shape comes together to create a design that transforms nails into miniature jewels. The key to achieving this look lies in the attention to detail. Start by applying a base coat followed by your chosen shade of red polish. Once dry, add a layer of matte top coat to give it a sophisticated finish.
Next, use nail glue to secure the rhinestone onto the ring finger nail, creating a dazzling effect that adds an extra touch of glamour. Finally, seal the look with another layer of matte top coat for uniformity and protection. The result is a classic yet audacious design that’s sure to turn heads.
Consumables used in this look include: OPI Natural Nail Base Coat, CND Shellac Matte Top Coat over a red polish, a large rhinestone or crystal, nail glue, and another layer of CND Shellac Matte Top Coat for the overall finish.
Sheer Nails with Abstract Black Swirls and Gold Embellishments
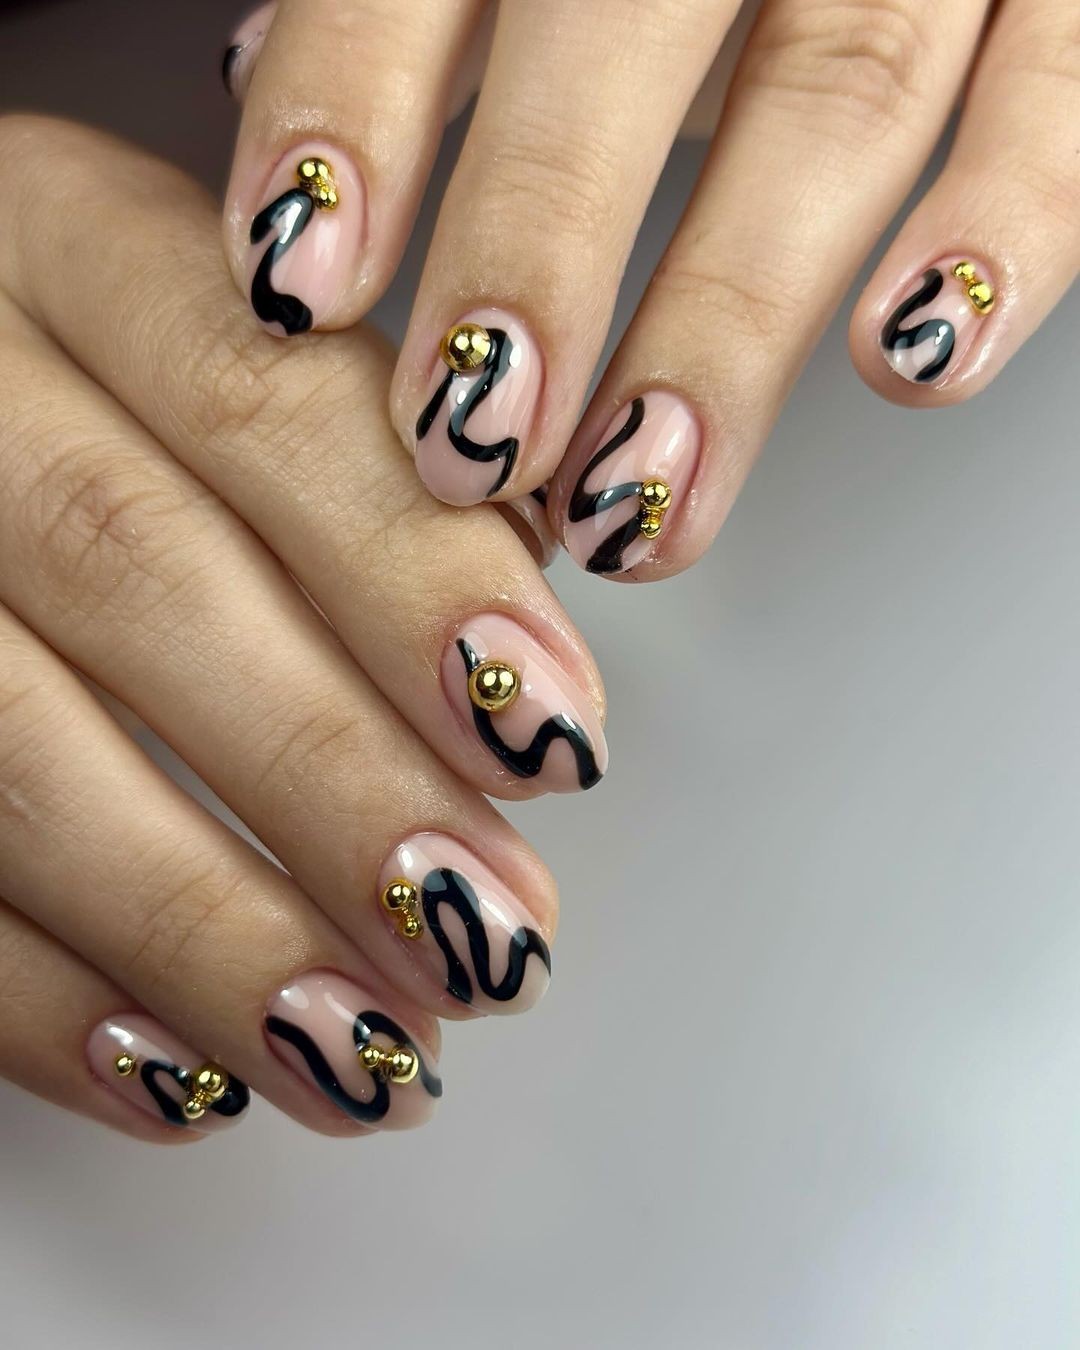
Transform your nails into a masterpiece with this striking abstract wave design. The sleek black curves are elevated by golden accents, blending avant-garde flair with wearable artistry. This look is perfect for the contemporary woman who sees her style as an ever-evolving canvas.
Consumables for Creating Elegant Abstract Nails:Base Coat: Essie’s Here to Stay Base CoatNude Polish: Essie’s Ballet SlippersBlack Polish: Essie’s Licorice for the wavesGold Studs: For the embellishmentsTop Coat: Essie’s Gel Setter for a flawless finishDesigning Abstract Elegance:Begin by applying the base coat, followed by a pale pink base color. Use a thin brush to carefully draw the abstract black curves, then add the gold studs as accents.
Seal the design with a layer of gel setter top coat, ensuring the art stays put and capturing the essence of elegance with a modern twist. FAQ:Q: How do I ensure rhinestones stay on my nails? A: Apply a small dot of nail glue or clear polish to your nail, then press the rhinestone onto it. Finish by encasing the edge of the rhinestone with a clear top coat for added security. Q: What’s the secret to achieving a smooth ombre gradient?
A: The key is using a sponge to gently dab and blend colors on the nail. Thinner polishes also help create a seamless transition between hues. Q: Can a classic pink polish work on any nail shape? A: Absolutely. A timeless pink shade is versatile, suiting every nail shape – from short and round to long and almond. It’s an universally flattering hue that can be elegant or playful, depending on your overall styling.