As the warmth of summer settles in, it’s only fitting that our nail game gets a refreshing revamp. The allure of natural summer nails lies not just in their ease and simplicity, but also in the effortless elegance they bring to any outfit. As someone who’s spent years perfecting the art of manicuring, I’m here to walk you through embracing the understated sophistication of natural summer nails 2024, ensuring your fingertips are as stylishly relaxed as a warm-weather afternoon.
The Quintessence of Natural Elegance
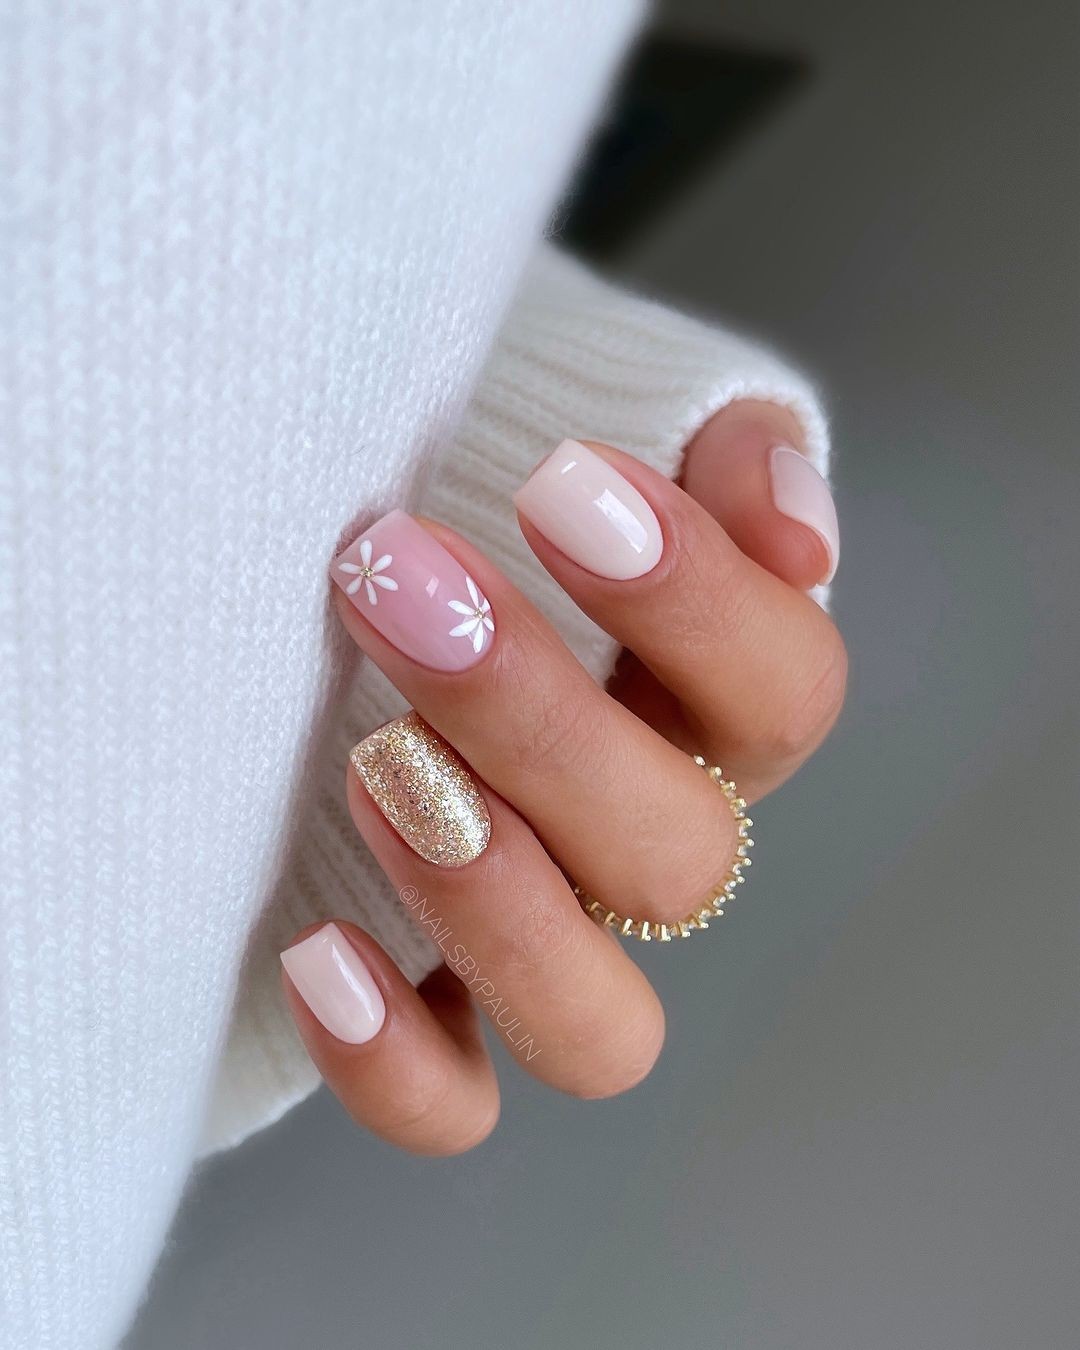
Imagine your nails as a blank slate for capturing the essence of summer’s gentle warmth. For me, it’s a delicate balance of soft pastel hues and subtle sparkle, reminiscent of a flawless summer day. The acrylic design, kept intentionally understated, tells a story in its simplicity. The star attraction? A whisper-light pastel pink gel polish that effortlessly complements every skin tone, adorned with a single, elegant flower and a companion nail featuring refined gold glitter.
This look masterfully blends the elegance of gel polish, the creativity of art, and the trendy allure of an on-trend manicure.
Photo credit: @nailsbypaulin
Materials Needed:
• Pastel pink gel polish
• Gold glitter powder
• High-quality acrylic
Professional Tip: Don’t underestimate the transformative power of a premium base coat – it’s the key to a long-lasting manicure that withstands the test of time.
DIY Manicure Steps:
1.
Begin with clean, buffed nails, setting the stage for your summer-inspired masterpiece.
2. Apply a pastel pink gel polish as the foundation of your design.
3. Elevate one nail with a thoughtful blend of gold glitter and acrylic, striking the perfect balance between subtle sophistication and bold statement-making.
4. Conclude with a clear top coat, imbuing your look with a radiant, glossy sheen that’s sure to turn heads throughout the sun-kissed summer season.
The Whimsical Touch of Hearts
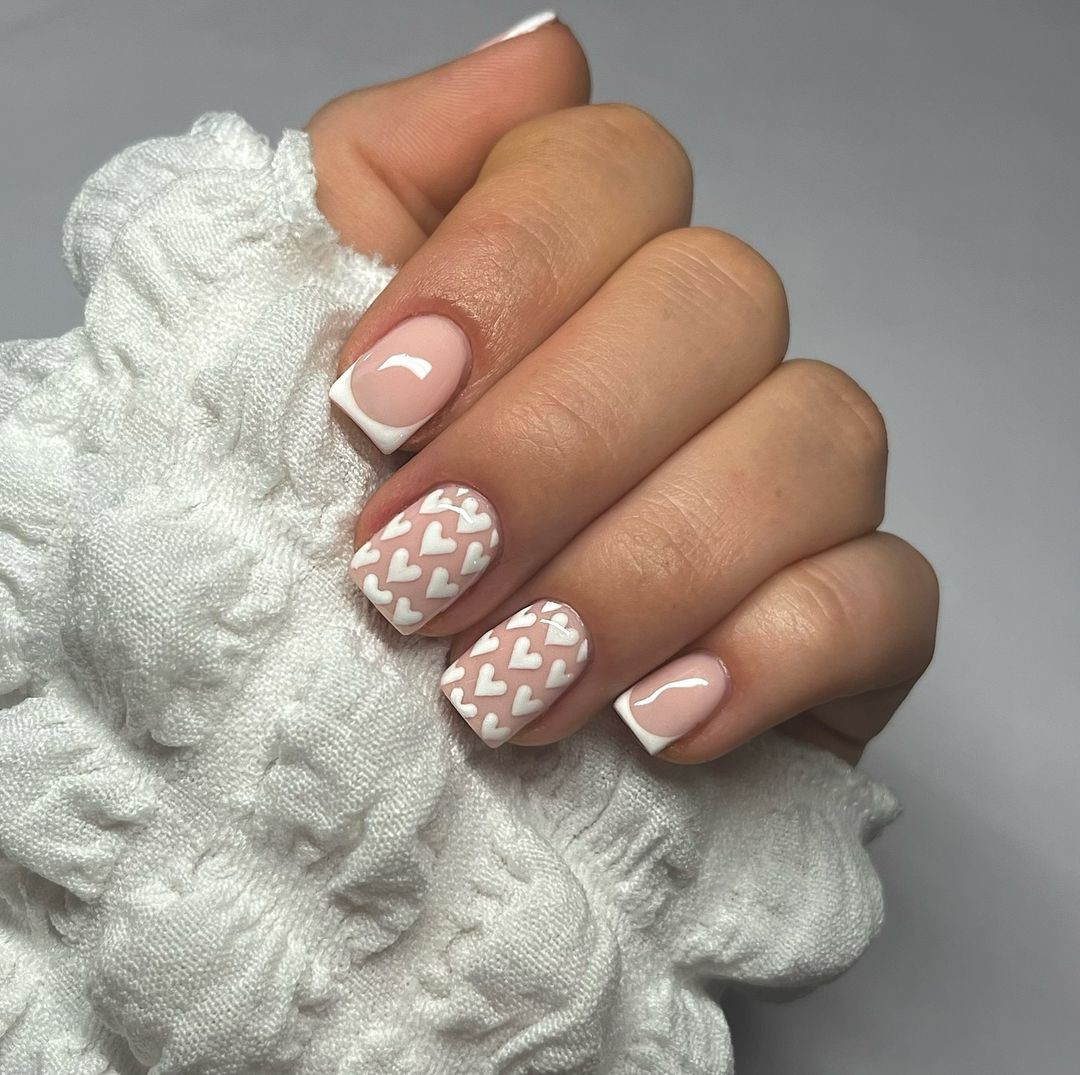
As we enter the peak of summer, let’s infuse our nails with a playful vibe. Imagine a delicate blend of blush hues as the backdrop for a whimsical arrangement of dainty white hearts, each one a testament to the precision and artistry of gel polish. This unique design is not only adorable but also a conversation starter that tells a story. Perfect for those who adore short nails with a touch of personality.
To achieve this look, you’ll need:
– Blush gel polish as the base color
– White nail art paint for the heart details
– A detailing brush for precision and control
Professional Tip: Take your time when creating the heart shapes. Perfection is key to achieving a beautiful and cohesive design.
To DIY this manicure:
1. Apply a thin coat of blush gel polish as the base color.
2. Using a detailing brush, carefully create the heart shapes in white.
3.
Seal your design with a topcoat and add a layer of professional finesse.
Lavender Dreams and Glossy Sheens
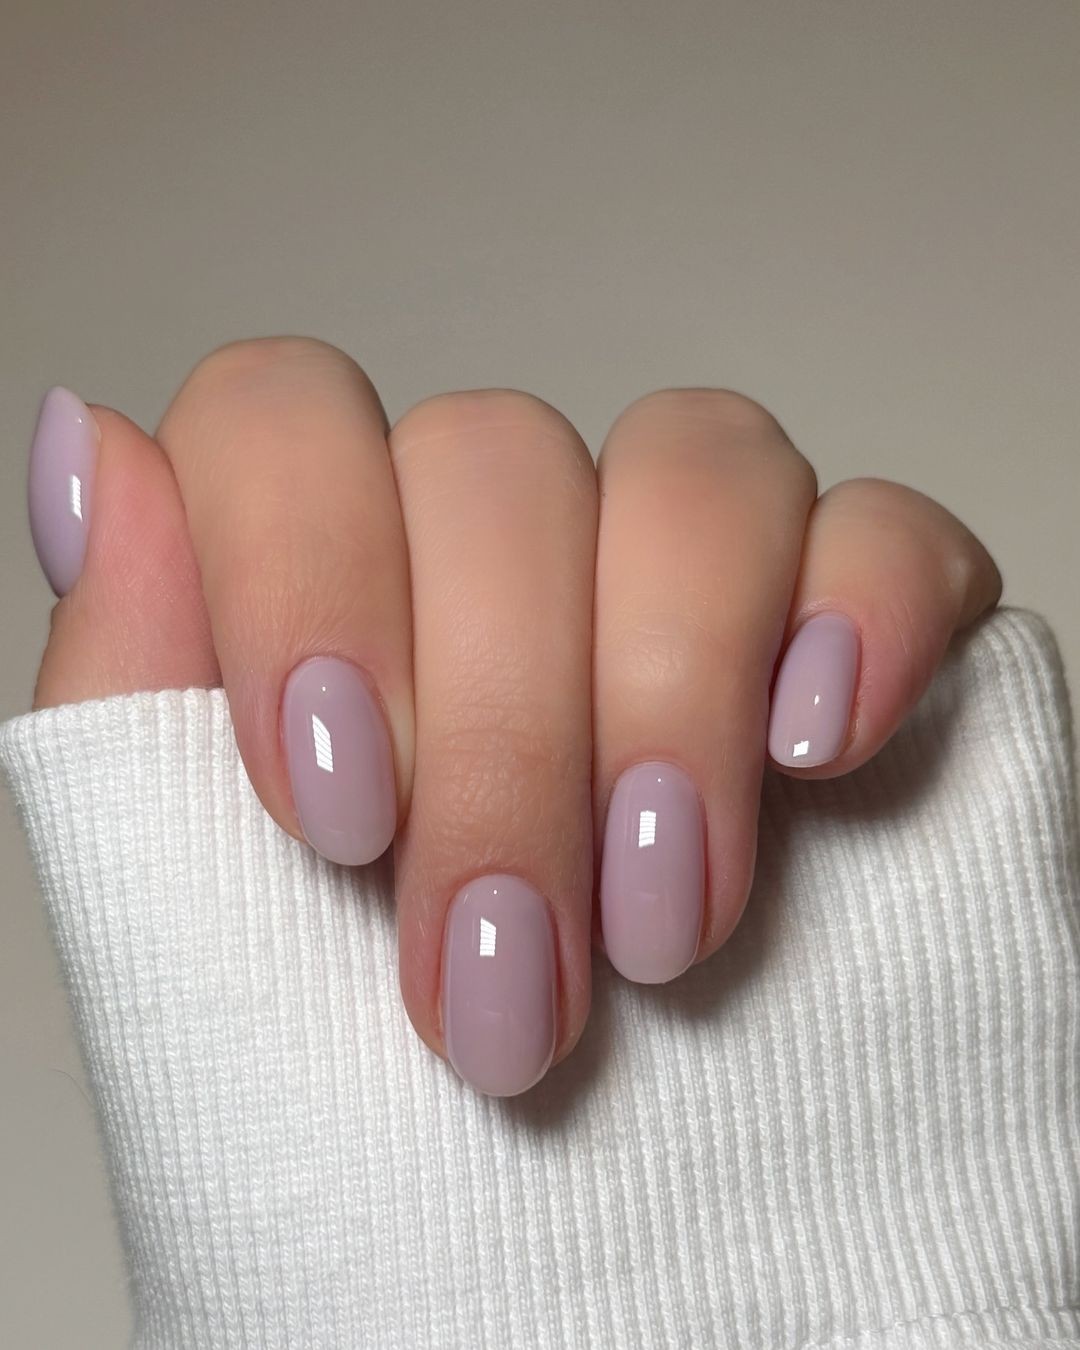
The captivating allure of a 2024 gel manicure featuring an almond-shaped nail coated in soft, dreamy lavender is undeniable. This single-color design embodies the serenity and enchantment of Provence’s lavender fields, effortlessly conveying elegance and poise. It’s a Gel manicure that celebrates the joy of self-care and inspiration, making it an integral part of every summer’s beauty routine.
To recreate this stunning look, you’ll need:* Lavender gel polish* Almond nail tips for shaping* Base and topcoat for added durabilityA professional tip to keep in mind is to opt for a polish with medium viscosity, as this will help prevent spills onto the cuticles and ensure an even coat. To achieve this DIY manicure, follow these steps:1. Begin by sculpting your nails into an almond shape.2. Apply a base coat, followed by two coats of your chosen lavender polish.3.
Finish with a clear top coat to seal in the color and create a look that lasts throughout the season.
The Allure of Almond: A Summer Staple
As the warmth of summer surrounds you, why not let your nails join in on the fun? A classic almond shape is the perfect way to add a touch of timeless elegance to any outfit. The combination of sheer pink gel polish and a glossy topcoat creates a look that’s equal parts sophisticated and radiant. Whether you’re heading to a backyard BBQ or just want a stylish finish for your everyday look, this manicure has got you covered.
To achieve this sun-kissed look, you’ll need:
* Sheer pink gel polish: A light, airy shade that’s perfect for the season
* Glossy topcoat: Adds shine and durability to your manicure
* Almond nail tips: For shaping your nails into the desired silhouette
A pro tip to keep in mind is to file your nails evenly on both sides to achieve a soft, rounded tip. From there, you can follow these easy steps:
1. Shape your nails into an almond shape, with softly rounded tips.
2.
Apply a thin layer of sheer pink gel polish for a hint of color.
3. Seal everything in place with a glossy topcoat for a finish that’s both durable and eye-catching.
A Monochrome Mosaic: Bold and Artistic
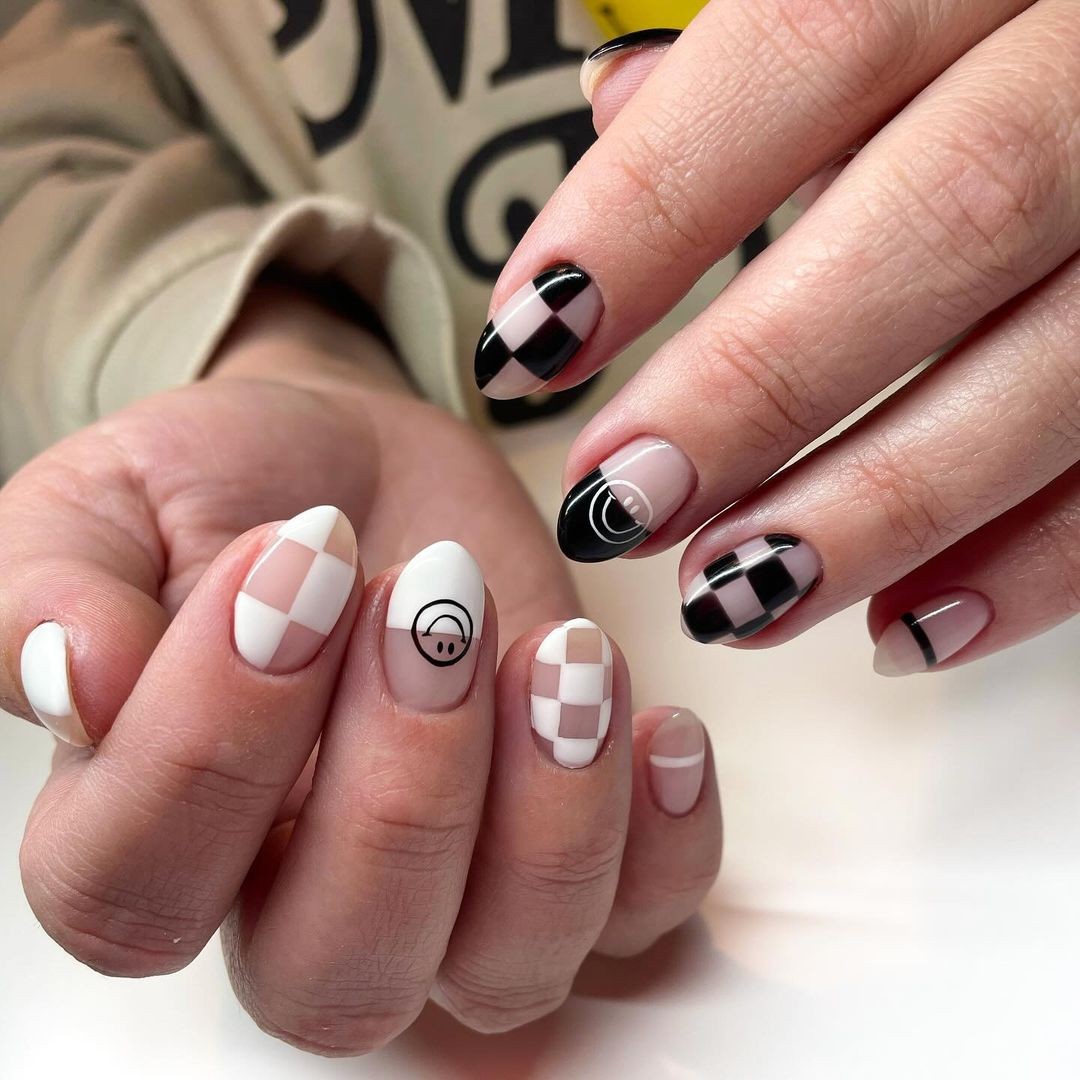
This summer, make a statement with your nails! A monochrome palette offers a bold and chic look perfect for those hot summer nights out. The playful mix of designs – from classic stripes to cheeky smileys – adds a whimsical touch to the timeless black and white. This style is daring yet effortlessly wearable. To achieve this look, start by applying a base coat of either white or black gel polish. Then, use a detailing brush to paint your chosen design onto each nail.
Finish off the manicure by alternating between matte and glossy topcoats for added depth and contrast. With these simple steps, you’ll be rocking a statement-making monochrome manicure that’s sure to turn heads!
Delicate Florals: Whisper of Romance
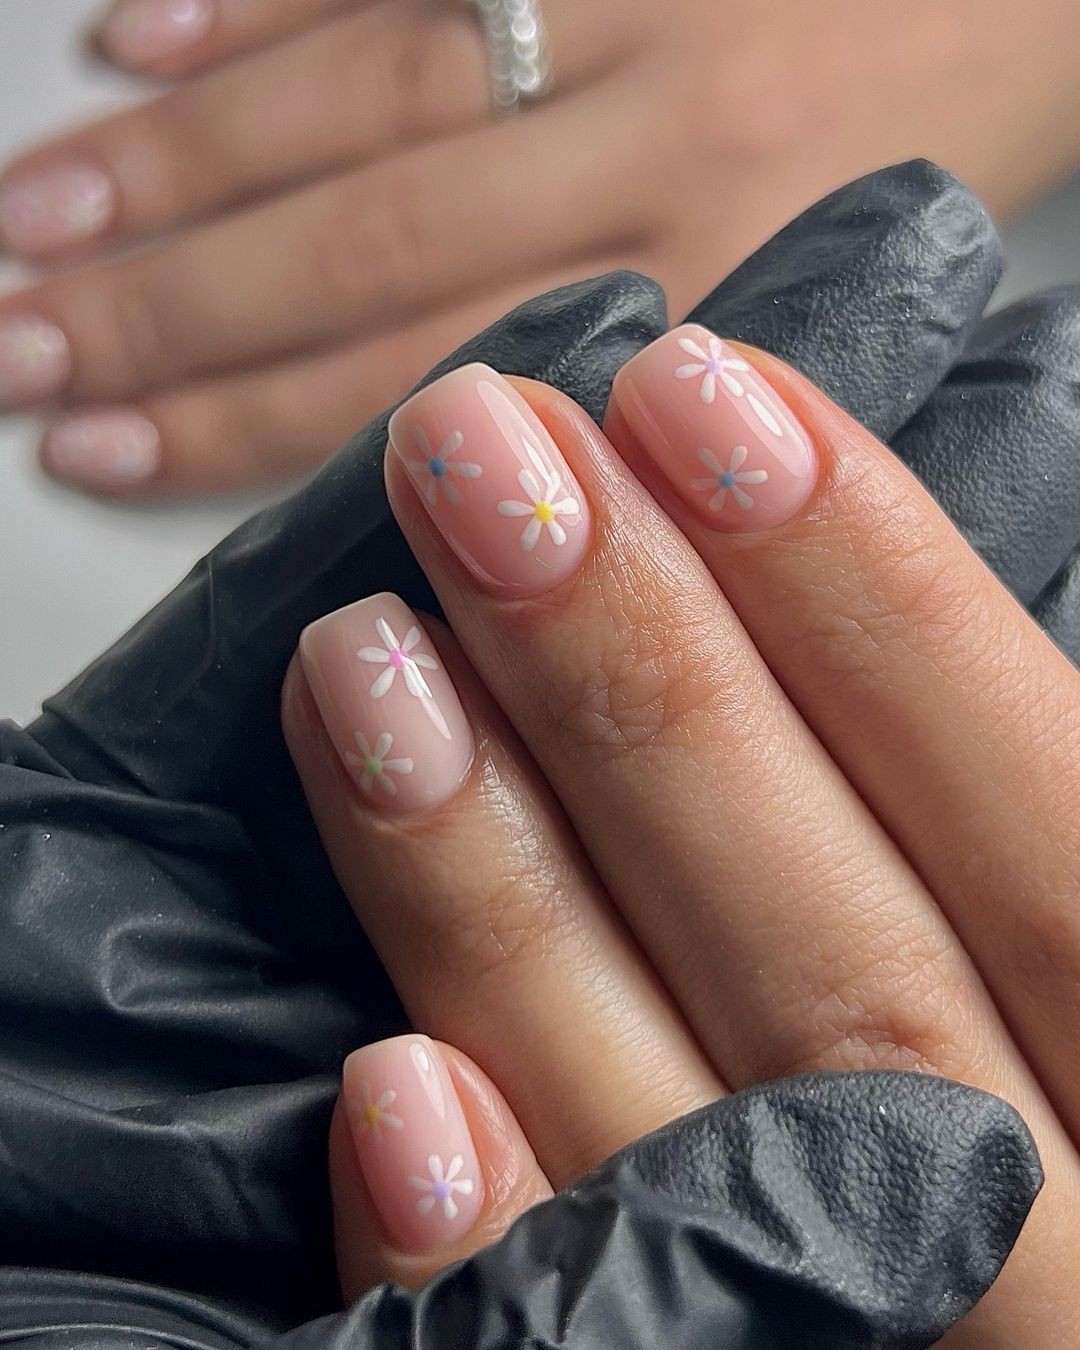
As summer arrives, bring a touch of romance and whimsy to your nail game with a soft pink gel polish adorned with subtle floral accents. Inspired by the serenity of a lush garden, this delicate artistry transports you to a sunny day, where the beauty of nature is at your fingertips. The gentle hue and dainty blooms evoke a sense of calm, making it the perfect accompaniment to your summer style.
To recreate this look, you’ll need:
– Soft pink gel polish
– White nail art paint for floral details
– A fine-tipped brush
For a professional finish, consider using a dotting tool to create the center of the flowers and fine brush strokes for the petals.
To achieve this DIY manicure:
1. Apply a soft pink base coat.
2. Paint small flowers using a fine-tipped brush dipped in white nail paint.
3. Seal your design with a topcoat to protect it from chipping.
Minimalist Chic: Elegantly Understated
For those seeking a laid-back summer vibe, a minimalist approach gets a modern makeover. A sheer beige polish serves as the perfect canvas for subtle geometric patterns, achieved by layering a deeper beige hue. This understated yet elegant combination is ideal for any summer soiree or casual gathering.
Photo credit: @raelondonnails
Materials Needed:
• Sheer beige gel polish
• Deeper beige polish for patterns
• Striping tape or steady hand for freehand designs
Professional Tip: For precise lines, use striping tape as a guide or a fine brush for a confident freehand execution.
DIY Manicure Steps:
1. Apply a coat of sheer beige polish as the base.
2. Once dry, utilize striping tape or a brush to create geometric patterns with the deeper beige shade.
3.
Seal your artwork with a clear topcoat for a high-shine finish.
Subtle Ombre: The Elegance of Fading Hues
The ombre nail trend is characterized by its subtle yet sophisticated blend of colors, reminiscent of the gentle sunset hues that softly transition from one shade to another. This understated elegance makes it an ideal choice for warm weather when you want a design that’s both beautiful and unobtrusive.
To achieve this look, you’ll need some essential materials: nude gel polish as your base coat, pink gel polish for the ombre effect, a sponge to create the gradient blend, and topcoat to seal everything in place.
For a seamless transition between colors, professional manicurists recommend building up the ombre effect gradually from the nail base upward. To do this, lightly dab your sponge onto the nail, allowing the pink polish to spread outwards.
This will create a soft, natural-looking fade that’s perfect for everyday wear.
To try it yourself, start by applying a nude base coat and letting it dry slightly. Then, use your sponge to apply pink polish in a gradient effect. Finally, seal everything with topcoat for a glossy, long-lasting finish that’s sure to turn heads.
Playful Edges: Adding a Twist to the Classics
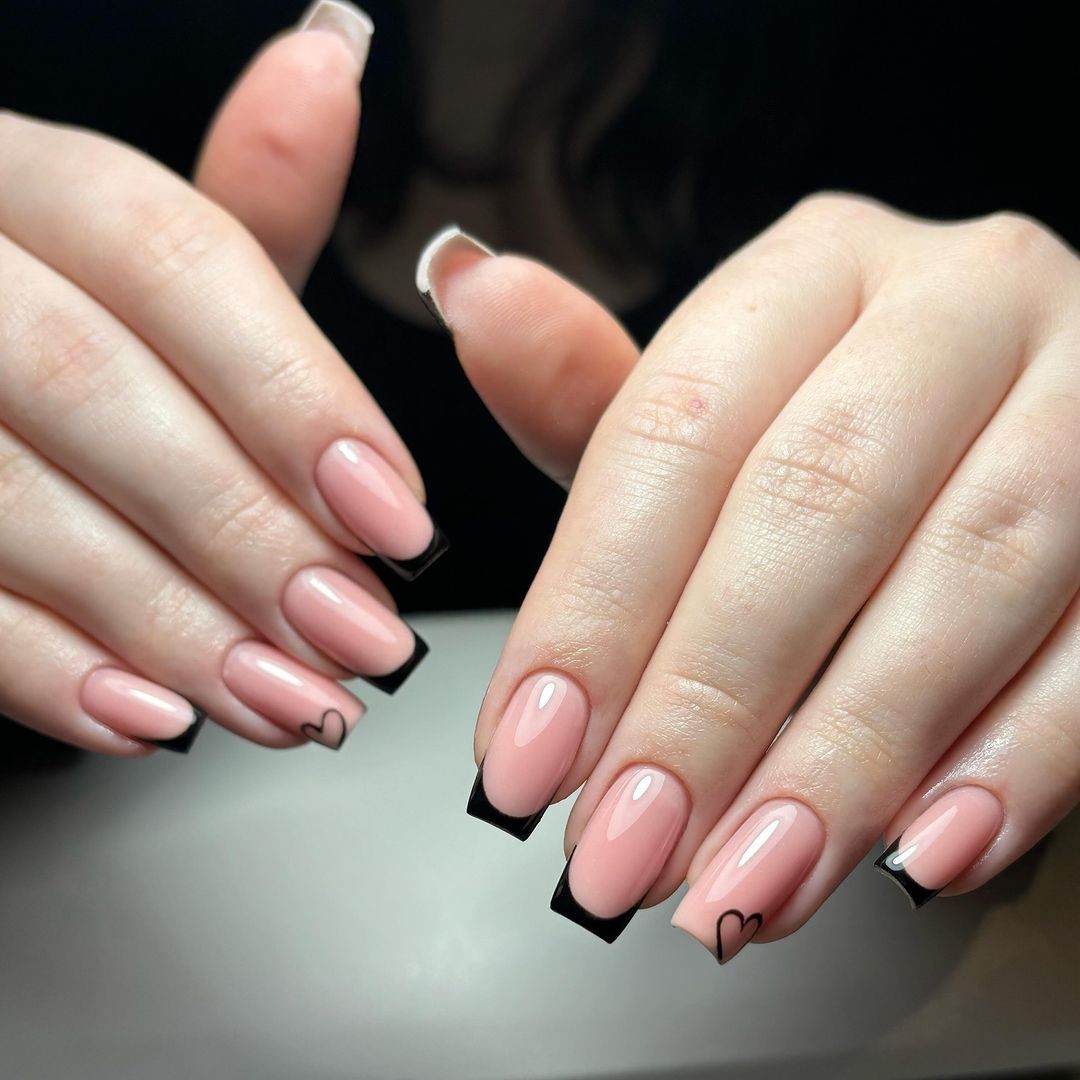
Elevate classic French manicure by infusing it with modern whimsy and playfulness. Black-tipped nails adorned with delicate heart decals or freehand art add an unexpected twist to the timeless style. The result is a unique expression of personality that’s both trendy and endearing.
To recreate this look, you’ll need:
* Light pink gel polish for the base coat
* Black gel polish for the tips
* Heart decals or a detailing brush for freehand art
* Topcoat to seal in your design
A professional tip: Use a fine brush to achieve precise edges on the black tips, giving your manicure a crisp finish.
To DIY this look:
1. Apply a light pink polish as the base coat.
2. Paint the tips with black polish, creating a sharp line.
3.
Add heart decals or hand-painted hearts using a fine brush for added whimsy.
4. Finish with a topcoat to protect your artistic masterpiece and give it a glossy finish.
Sweetheart Accents: A Love Note on Your Nails
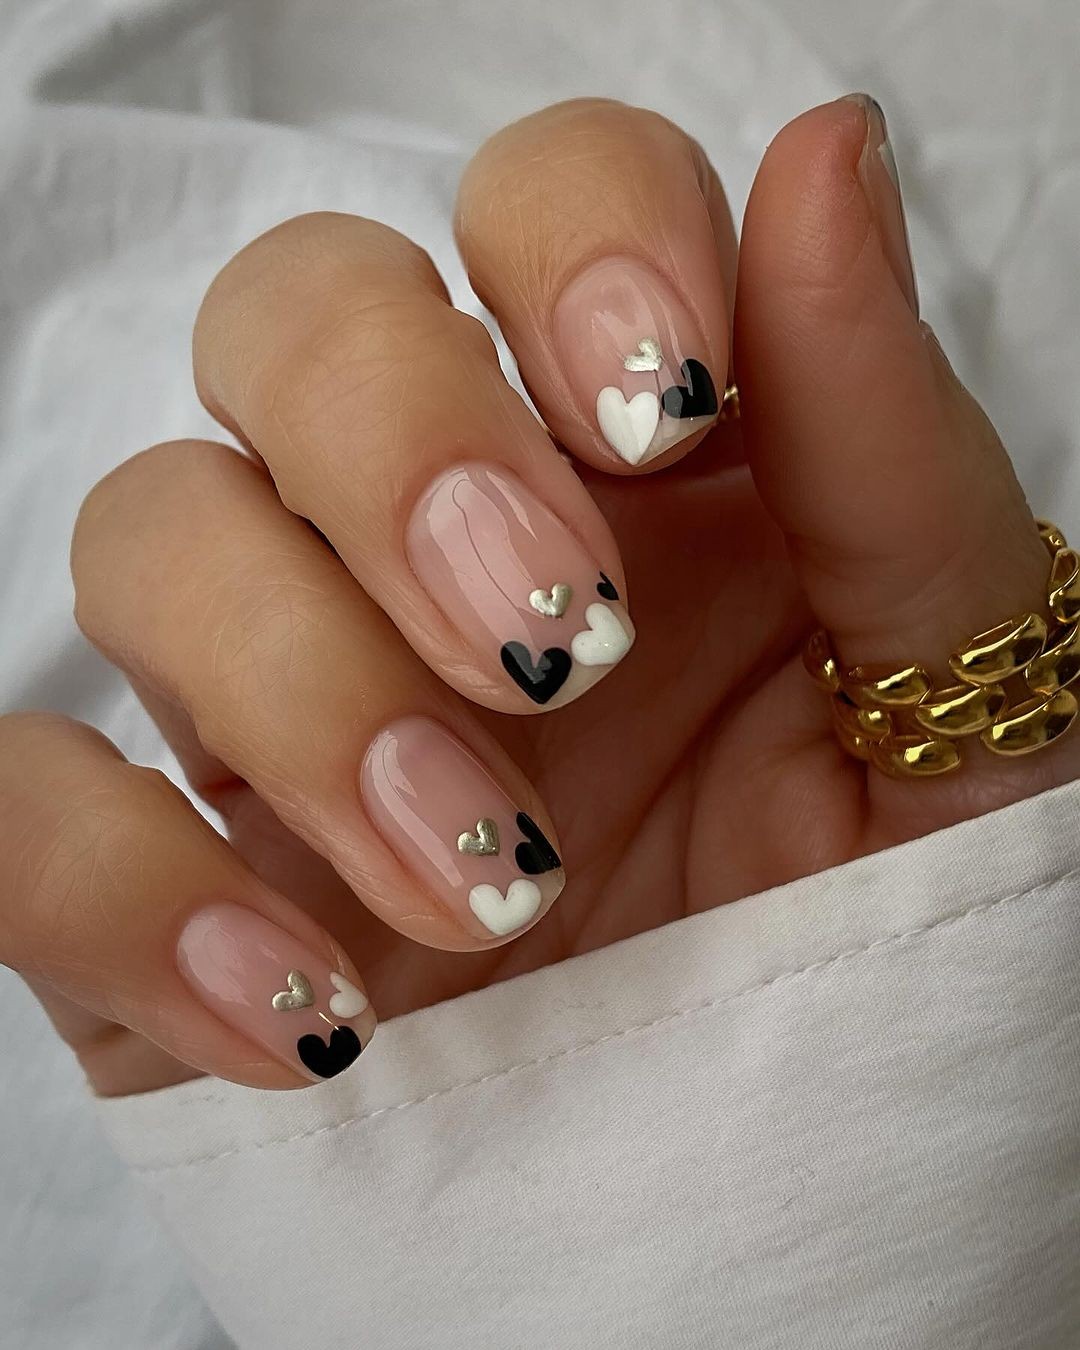
For those who believe in the magic of summer flings, incorporating delicate love symbols on your nails is an excellent way to pay tribute to fleeting moments of romance. The harmonious blend of black and white hearts on a soft pink canvas exudes a whimsical charm that effortlessly elevates one’s overall aesthetic.
To achieve this enchanting look, you’ll need:
– A base coat in a soft pink hue
– Gel polishes in black and white for the heart motifs
– A detailing brush for precise designs
– Rhinestones for an extra touch of sparkle
Pro Tip: To ensure stability while painting the intricate hearts, anchor your hand on a flat surface.
DIY Manicure Steps:
1. Apply a soft pink base coat to each nail.
2.
Using a fine brush, create alternating black and white heart shapes, adding a touch of whimsy to your manicure.
3. Embellish some hearts with a rhinestone for subtle shimmer effects.
4. Seal the look with a topcoat for a durable, glossy finish.
Cosmic Shimmer: A Galaxy on Your Tips
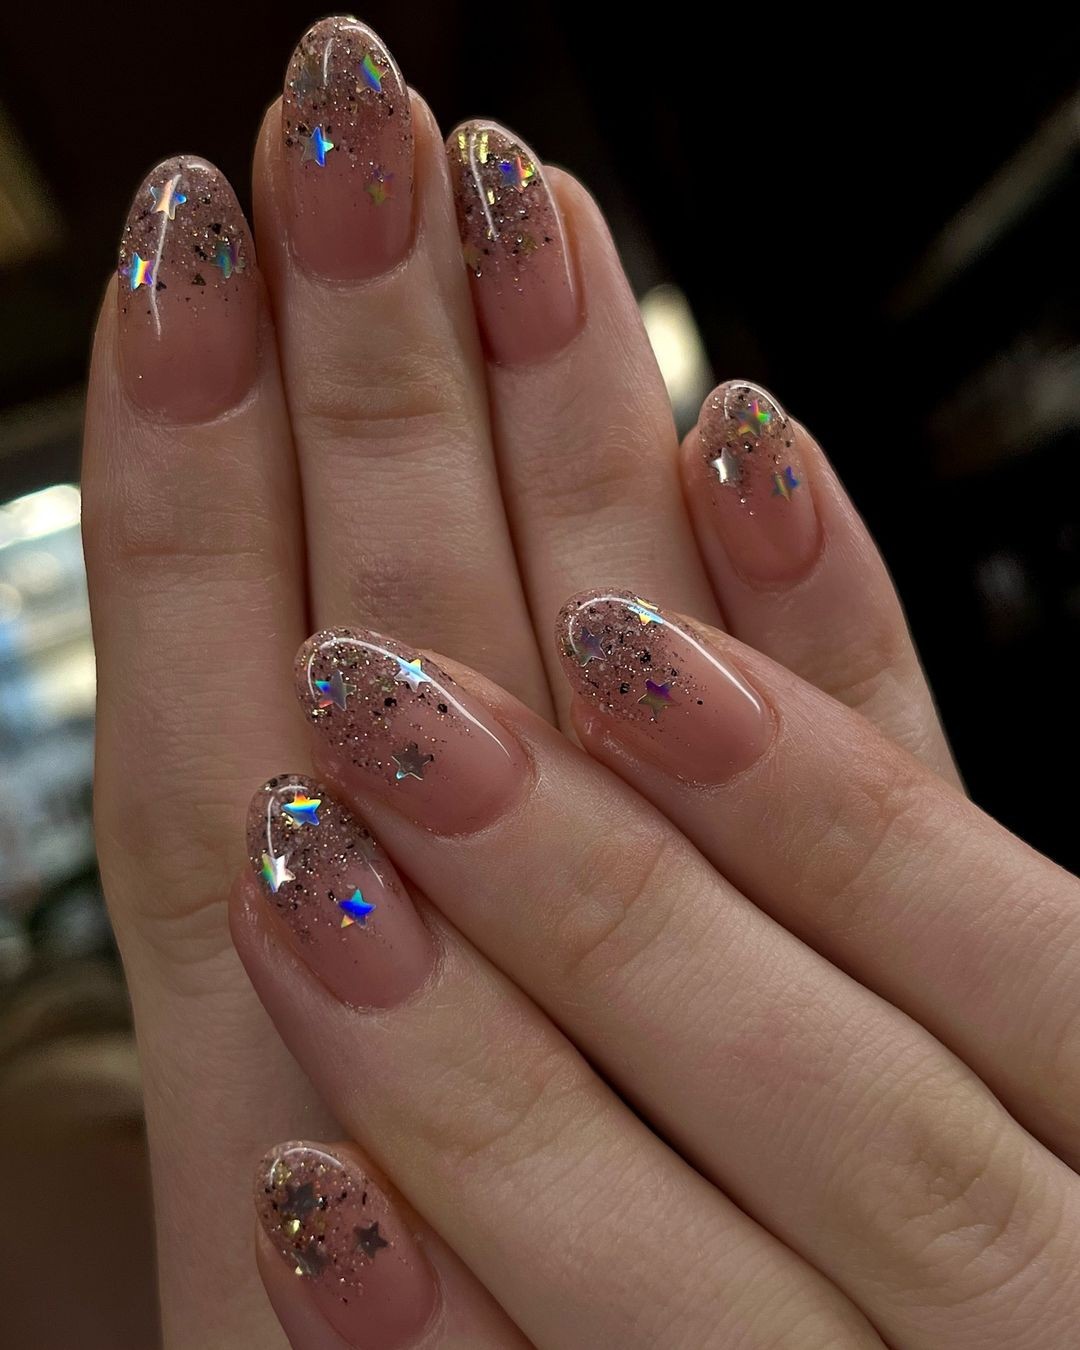
Elevate your summer look by embracing the cosmic trend with a mesmerizing manicure that captures the essence of a starlit sky. The combination of a translucent base coat, scattered glitter flakes, and strategically placed star-shaped sequins creates a truly enchanting effect that effortlessly complements any outfit. This neutral yet attention-grabbing design is sure to make you shine like the stars on a clear night.
To achieve this celestial look, you’ll need:* Clear gel polish as the base* Glitter flakes for added sparkle* Star-shaped sequins to add an extra touch of magic* Topcoat to seal in all the sparklesFor a professional finish, be sure to use tweezers or a precision tool to carefully place the star sequins. Then, follow these easy steps:1. Apply a clear base coat to your nails.2. While the base is still tacky, sprinkle glitter flakes onto the nail for added sparkle.3.
Strategically place the star-shaped sequins on each nail for a truly celestial effect.4. Seal everything in with a topcoat for a durable and shiny finish.
Love in Red: A Vivacious French Tip
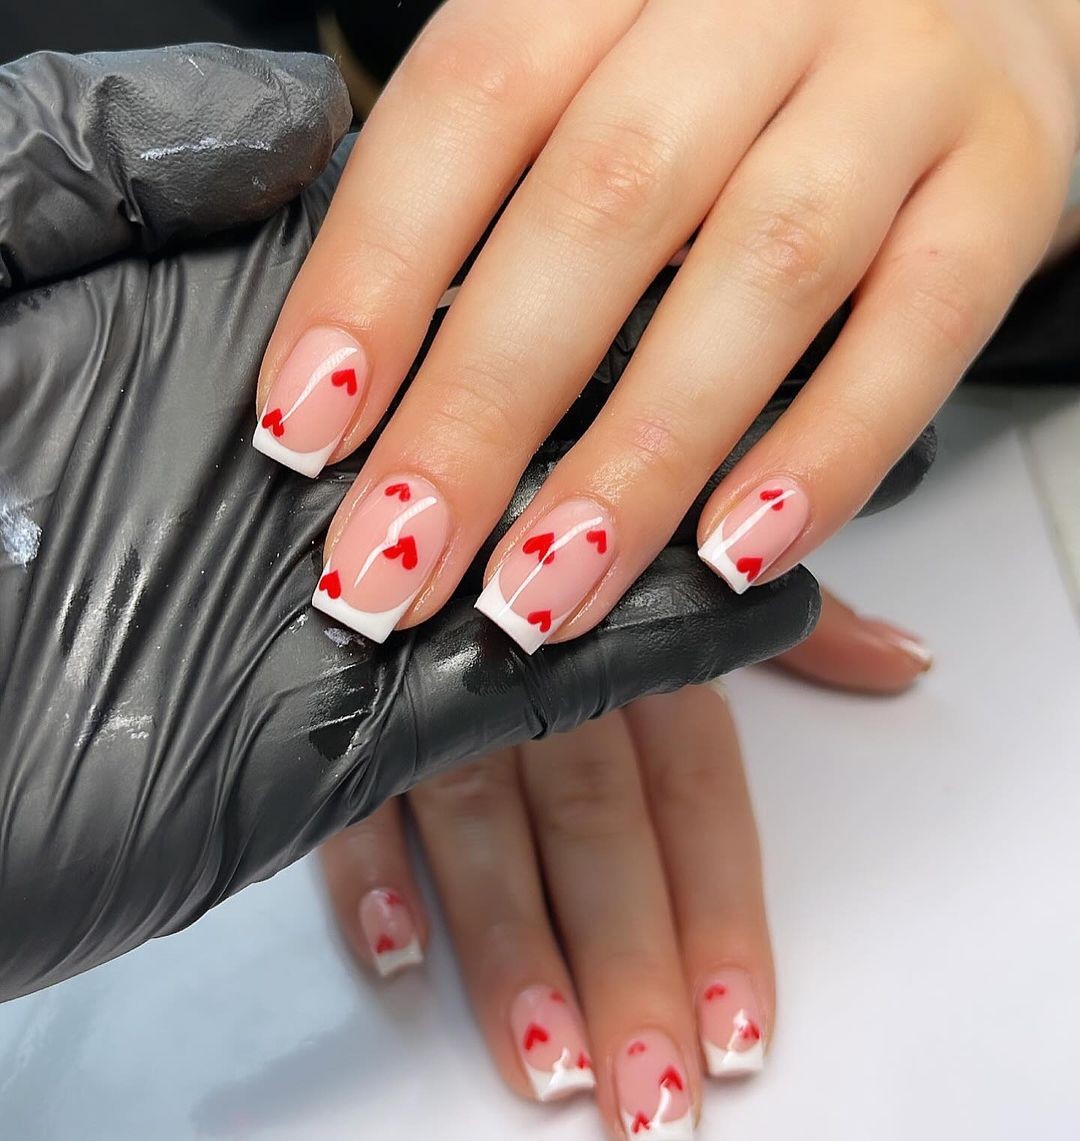
This summer, give the traditional French manicure a vibrant twist by infusing it with whimsy. The combination of bold red tips adorned with delicate heart silhouettes creates a design that’s both carefree and romantic. It’s an unapologetic expression of love and passion, perfect for those who wear their hearts on their sleeves.
For this look, you’ll need:
White gel polish for the base coat
Red gel polish for the tips and heart details
A detailing brush to precision-paint the hearts
Topcoat to seal the design and add a glossy finish.
To achieve symmetrical hearts, professional tip: sketch out the design lightly with a pencil before applying polish. Then, bring your vision to life using the detail brush.
To recreate this look at home:
Apply a white base coat and let it cure.
Paint the tips with a bold red polish, defining the classic French manicure line.
Use the detailing brush to add delicate heart details on the tips.
Finish the look with a topcoat for added protection and shine.
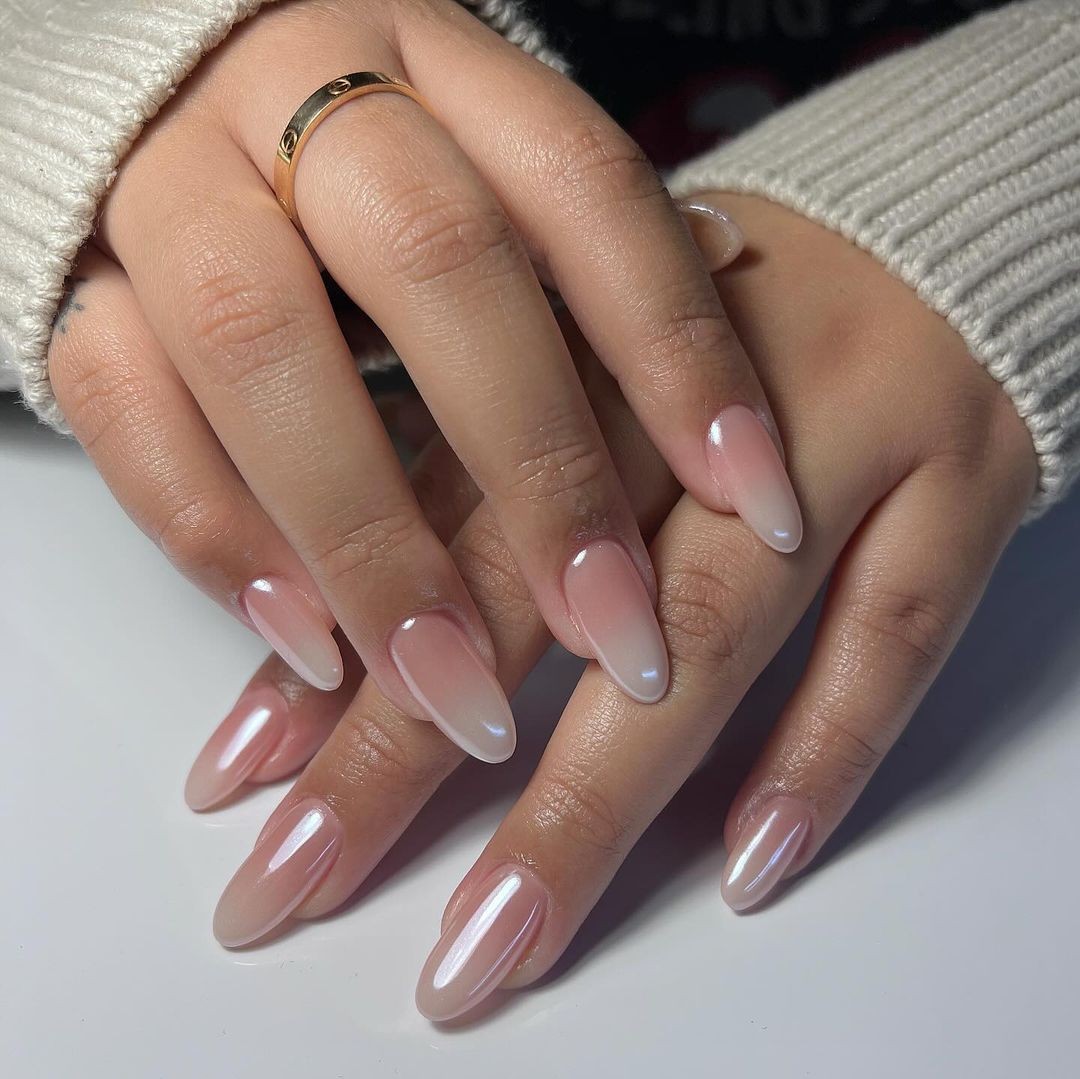
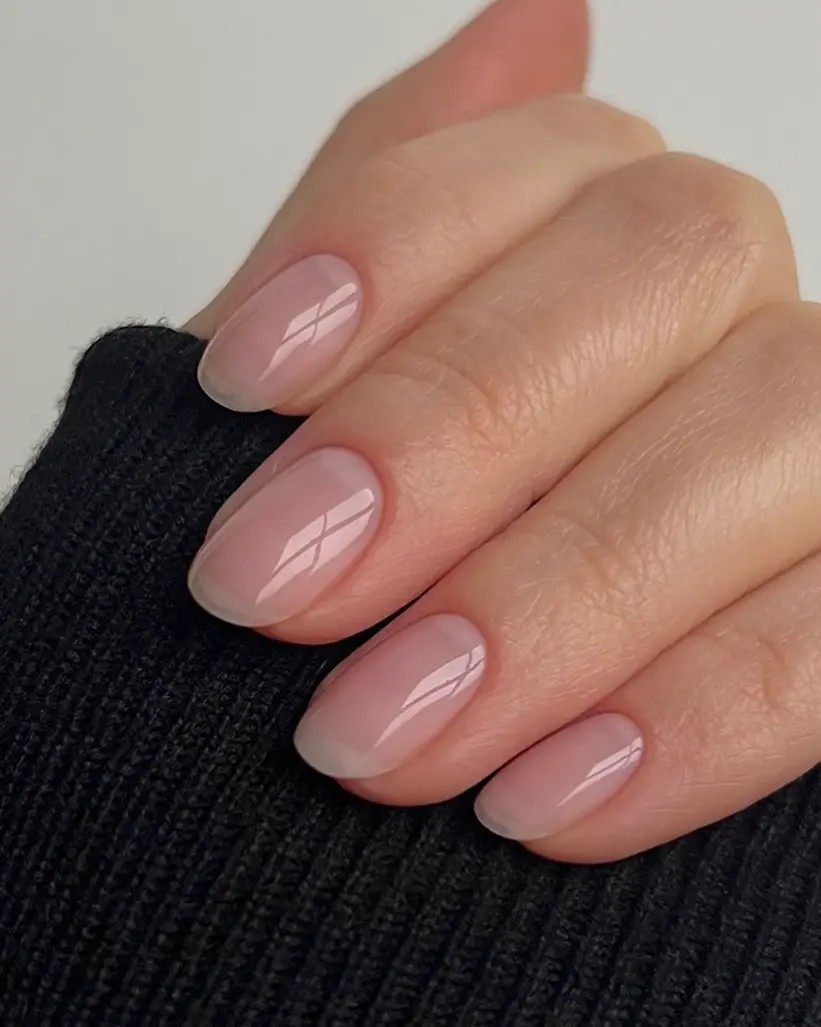
The Sheer Almond: Simplicity Meets Elegance
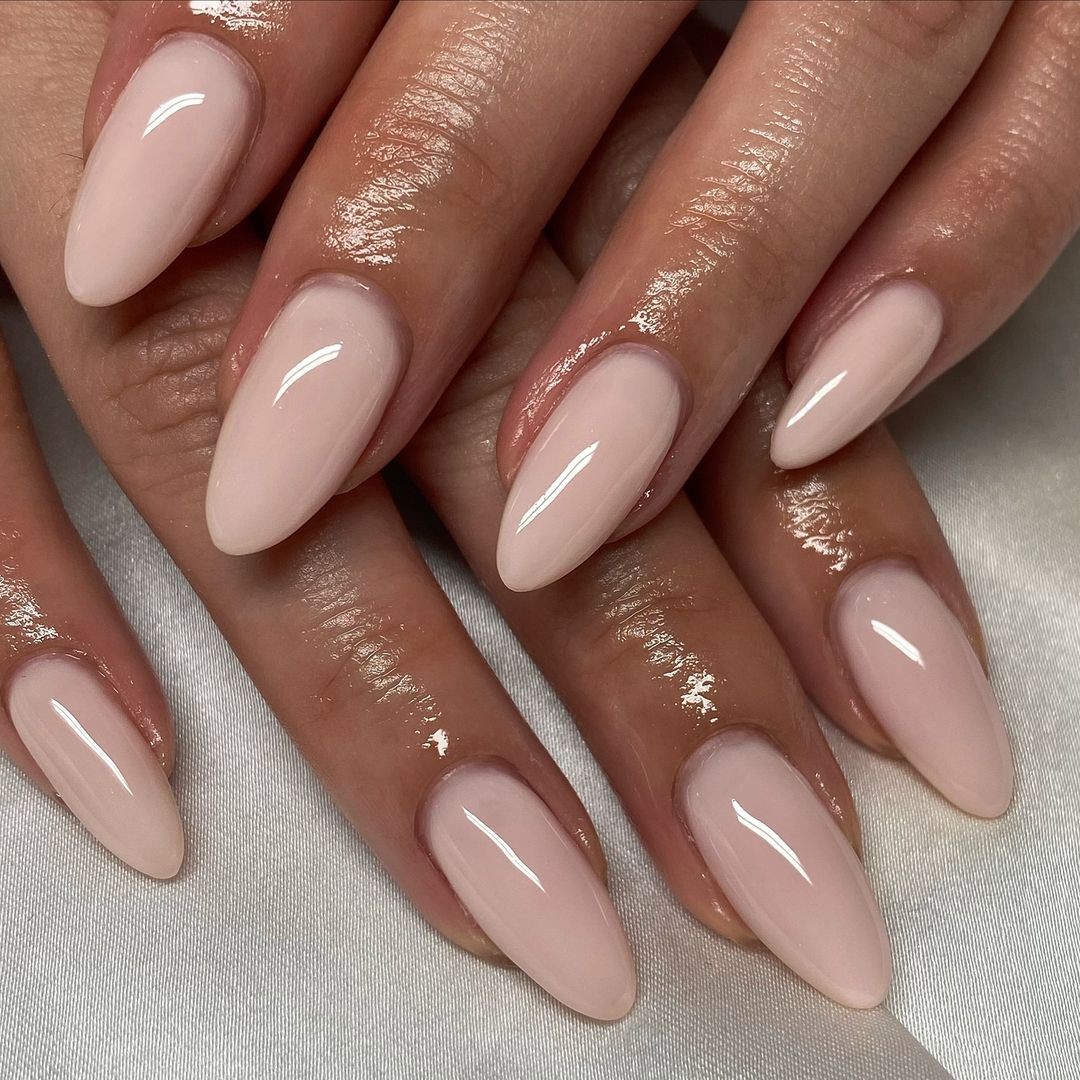
There’s a certain understated charm to a well-executed sheer almond manicure. The subtle, pale pink hue gives nails a natural, healthy appearance while maintaining a polished finish, perfect for those effortless summer days when you want your nails to look effortlessly put-together. The simplicity of this design belies its impact, allowing the beauty of the nail shape and polish color to take center stage.
Photo credit by: @elica.
nails
To achieve this look, you’ll need:
Sheer pink gel polish for a natural finish
Topcoat for added shine and extended wear time
Professional Tip: Apply the sheer polish in thin layers to prevent streaks and bubbles, allowing each layer to cure completely before moving on.
To DIY this manicure:
Start with clean, shaped nails filed into an almond contour. This will provide a solid foundation for your design.
Apply the sheer pink gel polish in two thin layers, curing after each application to ensure even coverage and prevent bubbles from forming.
Finish off the look by applying a topcoat to enhance the shine and extend the wear time of your manicure.
Pastel Panache: Soft Hues and Sharp Lines
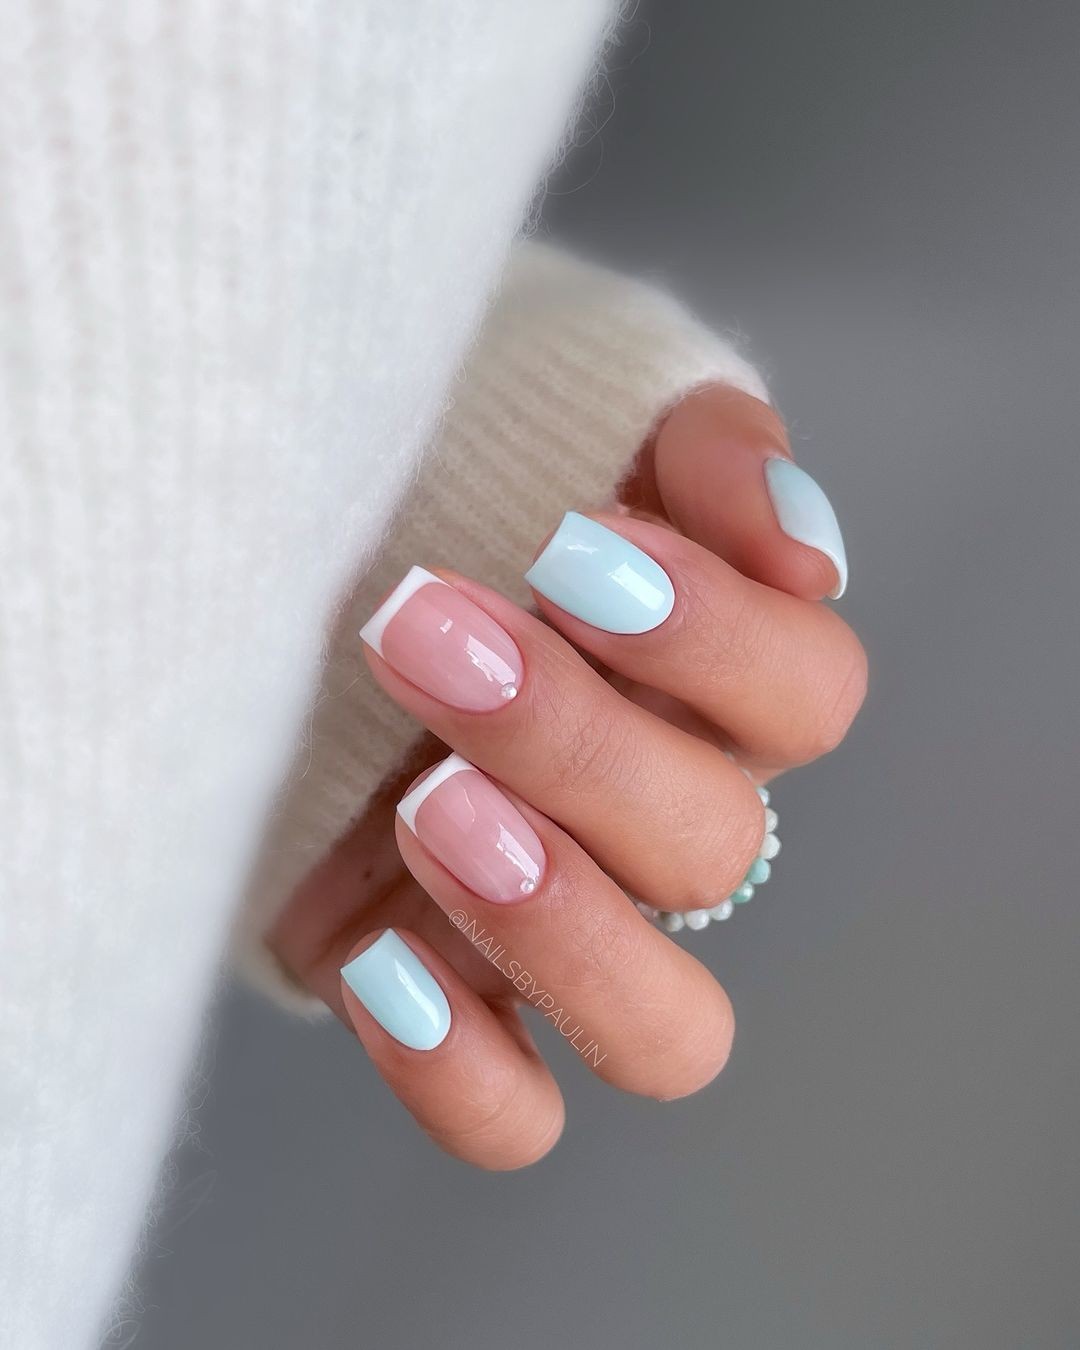
As summer’s warmth settles in, indulge in a soothing manicure that combines gentle pastels with crisp lines. This refreshing design features a soft pink paired with a calming blue in a striking color-blocking scheme that embodies modernity and on-trend style for the season.
Credit: @nailsbypaulin
To achieve this look, you’ll need:
* Soft pink and pastel blue gel polish
* Striping tape for precise lines
* Topcoat to ensure longevity and a professional finish
Pro Tip: Use stripting tape to create perfectly straight lines and remove it while the polish is still tacky to prevent smudging.
Follow these DIY steps to recreate this look:
1. Apply your base color, allowing it to cure before moving on to the next step.
2.
Strategically place striping tape for your design, ensuring crisp lines and a sharp finish.
3. Paint the alternate color, taking care not to smudge the design as you remove the tape once the polish has dried slightly.
4. Seal the look with a topcoat, adding a professional touch to your at-home manicure.
Subdued Sparkle: A Touch of Glam
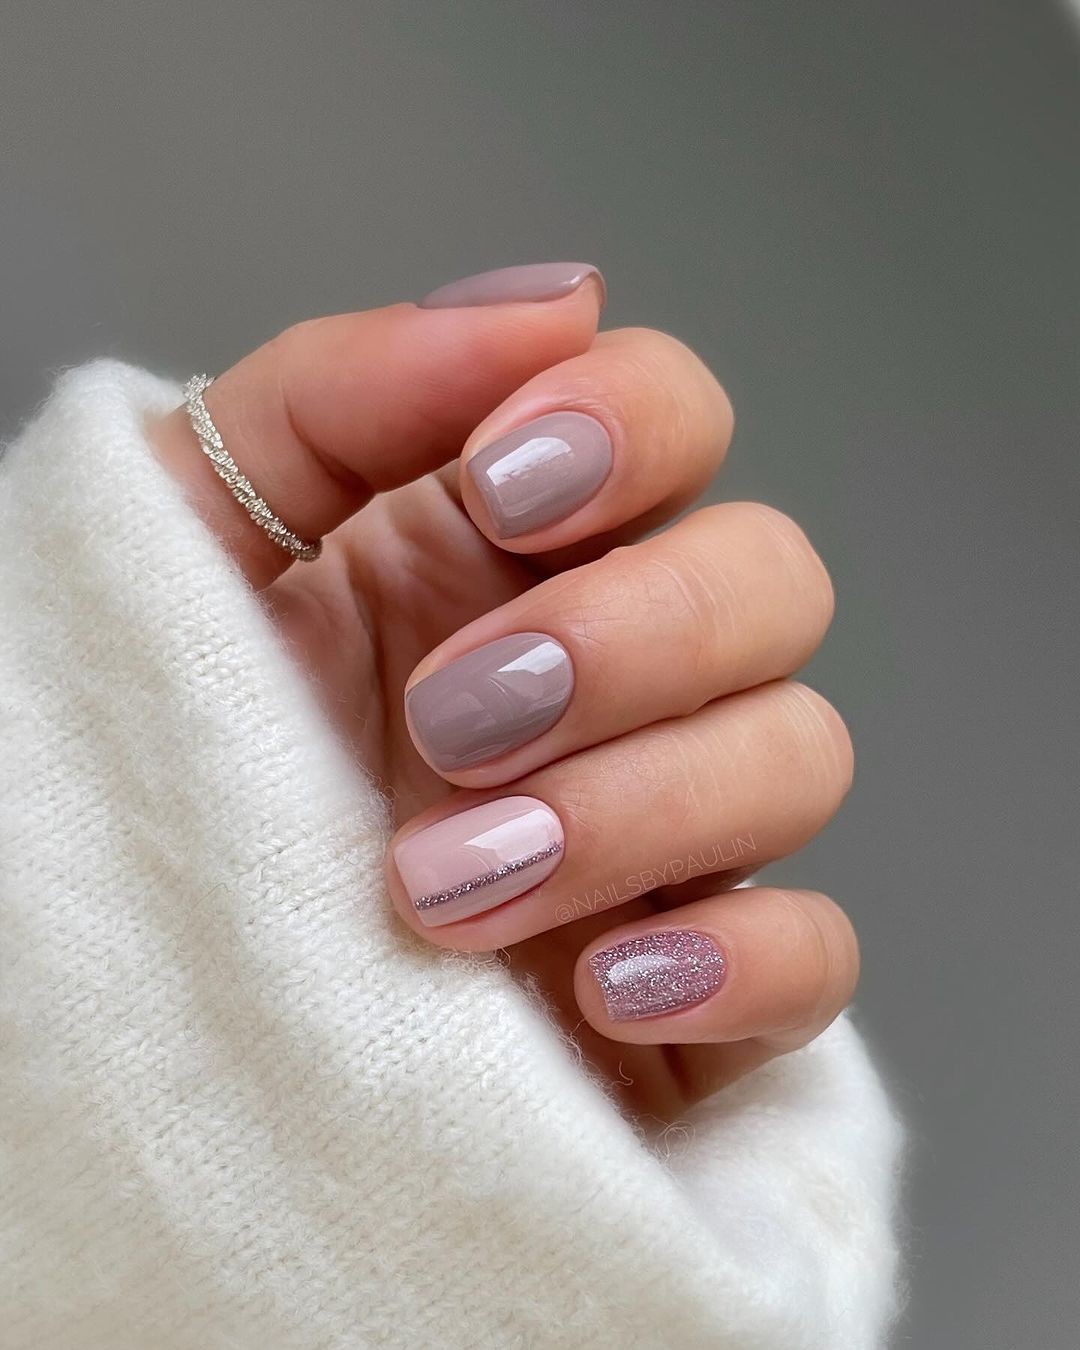
Elevate your summer look with a subtle yet striking manicure that effortlessly transitions from casual to elegant. A soothing lilac base provides the perfect canvas for a delicate dusting of glitter, imbuing your nails with a hint of sophistication. This versatile design can be worn on its own or paired with other statement pieces to create a cohesive look.
Photo credit by: @nailsbypaulinTo achieve this stylish manicure, you’ll need:* Muted lilac gel polish for the base* Silver glitter polish for an accent nail* Topcoat to encapsulate the glitter and add shineProfessional Tip: To avoid adding bulk to your design, apply the glitter polish using a sponge to pack on the sparkle. Follow these simple steps to create this stunning manicure:1. Apply a coat of lilac polish to each nail and let it cure.2.
Using a sponge, dab glitter onto the accent nail to achieve a dense, sparkling effect.3. Seal your design with a topcoat for a smooth finish and added durability.
Heartfelt French: A Romantic Rendition
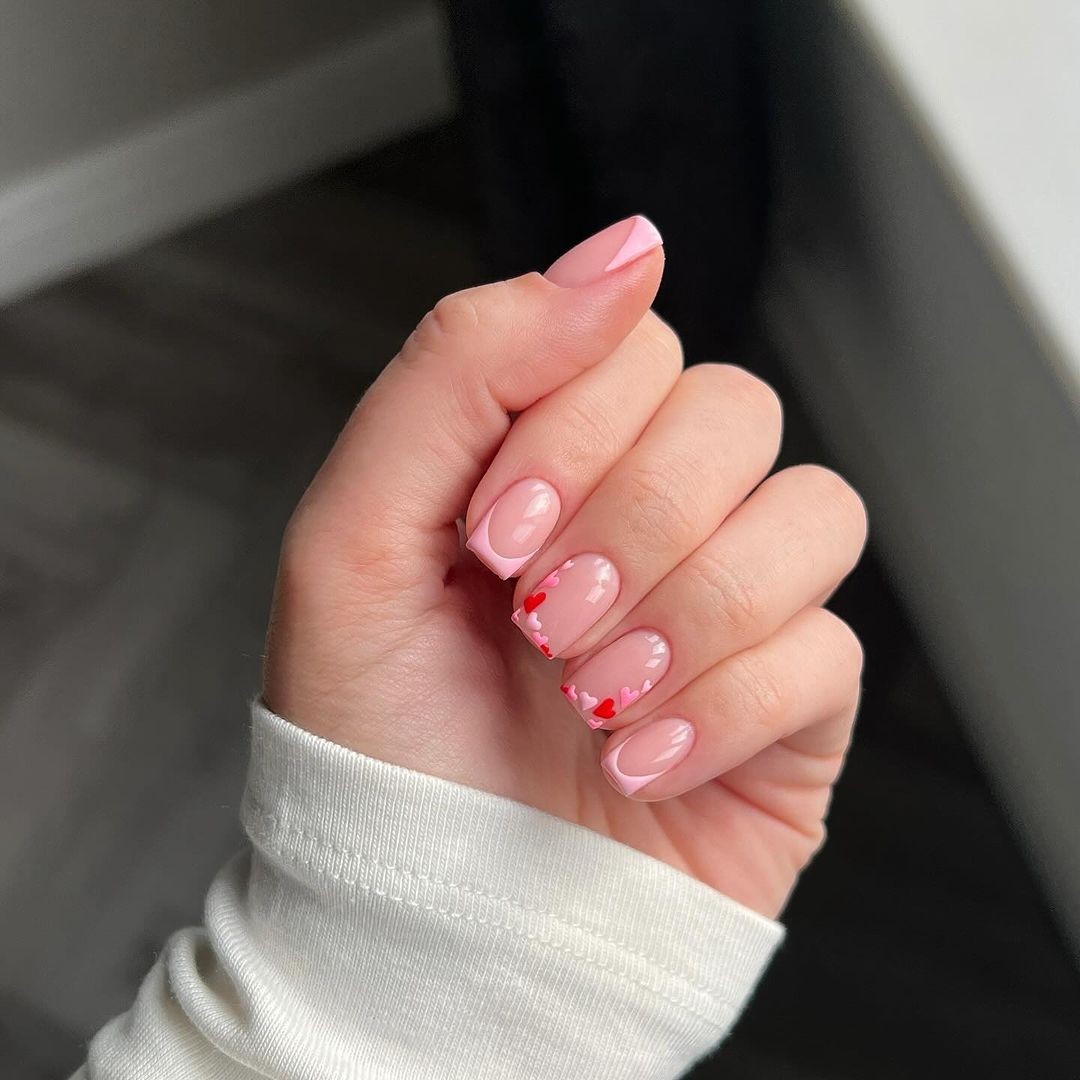
Elevate the classic French manicure with a romantic twist, perfect for summer date nights or any occasion that calls for a touch of whimsy. This design features dainty red hearts drifting across a delicate pink backdrop, creating a look that’s both playful and sophisticated. For this DIY project, you’ll need:* Translucent pink gel polish* Red gel polish for the heart accents* Topcoat for a seamless finishTo achieve this romantic look at home, follow these steps:1.
Start by applying a sheer pink polish to create a subtle base color.2. Using a toothpick or dotting tool, carefully place tiny red hearts near the tips of your nails.3. Finish the design with a topcoat for a glossy sheen and long-lasting wear.
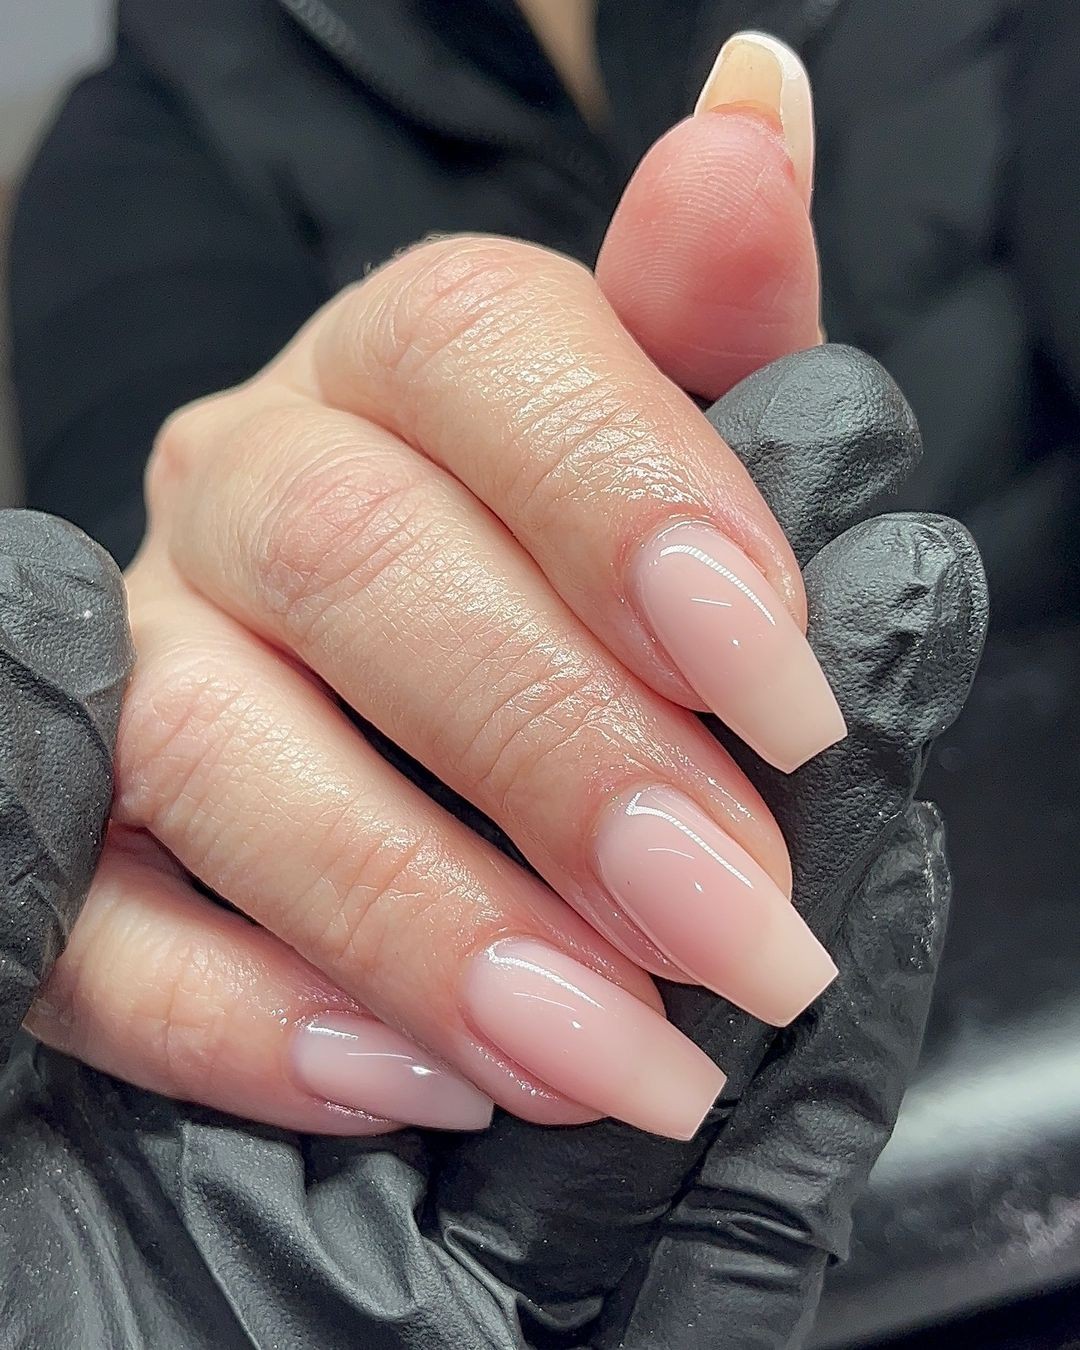
Sheer Elegance: Classic Nude with a Twist
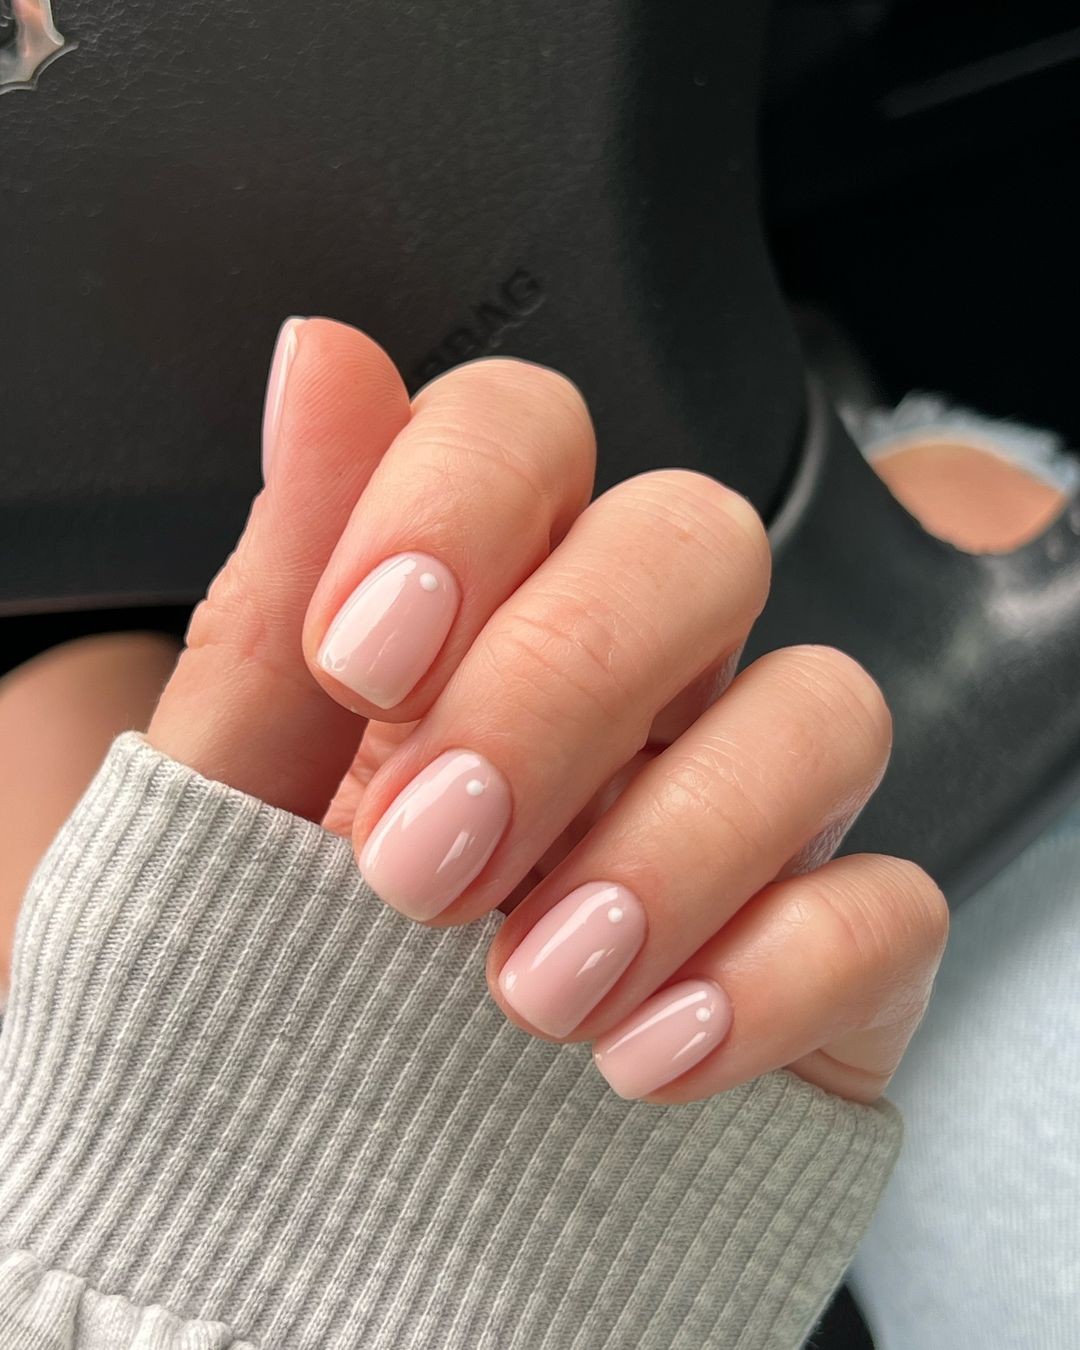
The essence of simplicity is beautifully captured in this understated nude manicure. By opting for a shade that mirrors one’s natural nail colour, the nails are left looking clean, polished, and effortlessly elegant. This timeless design is remarkably versatile, easily transitioning from a casual day at the beach to a refined evening gathering. The credit for capturing this serene scene goes to @bara. hoyle.
To replicate this look, you’ll need:* A nude gel polish that harmonises with your skin tone* Topcoat to add shine and durabilityA professional’s insider advice is to select a nude polish that closely matches your skin tone, thereby creating an illusion of longer nails. To achieve this elegant manicure at home, follow these steps:1. Apply two coats of the selected nude gel polish, allowing each coat to cure before moving on to the next.2.
Seal the look with a topcoat, amplifying the natural beauty of the colour and ensuring your manicure remains looking its best for an extended period.
Pastel Petals: Whisper of Summer
As spring’s charm begins to fade, you can still capture its essence in your nail art this summer. A soft pastel palette paired with delicate floral accents creates a whimsical and feminine design perfect for garden parties or picnics under the sun. The combination of gentle hues evokes the feeling of walking through a lush meadow on a warm summer morning.
To recreate this look, you’ll need:
Pastel gel polishes in various shades for the base color;
White gel polish for delicate petal details;
Topcoat to seal and protect your design.
For a professional finish, use the brush’s tip to gently sweep the white polish into petal shapes, mimicking the natural curves of real flowers. This adds depth and dimension to the design. Alternatively, you can also use nail art brushes to create more intricate details.
To achieve this look at home, follow these simple steps:
1. Apply a pastel base color and cure it under the lamp;
2. Use a fine brush to paint white petals on top of the base color,
3. Add a topcoat for a smooth, durable finish that will withstand the rigors of daily wear.
Polar Bear Play: Adorable and Artistic
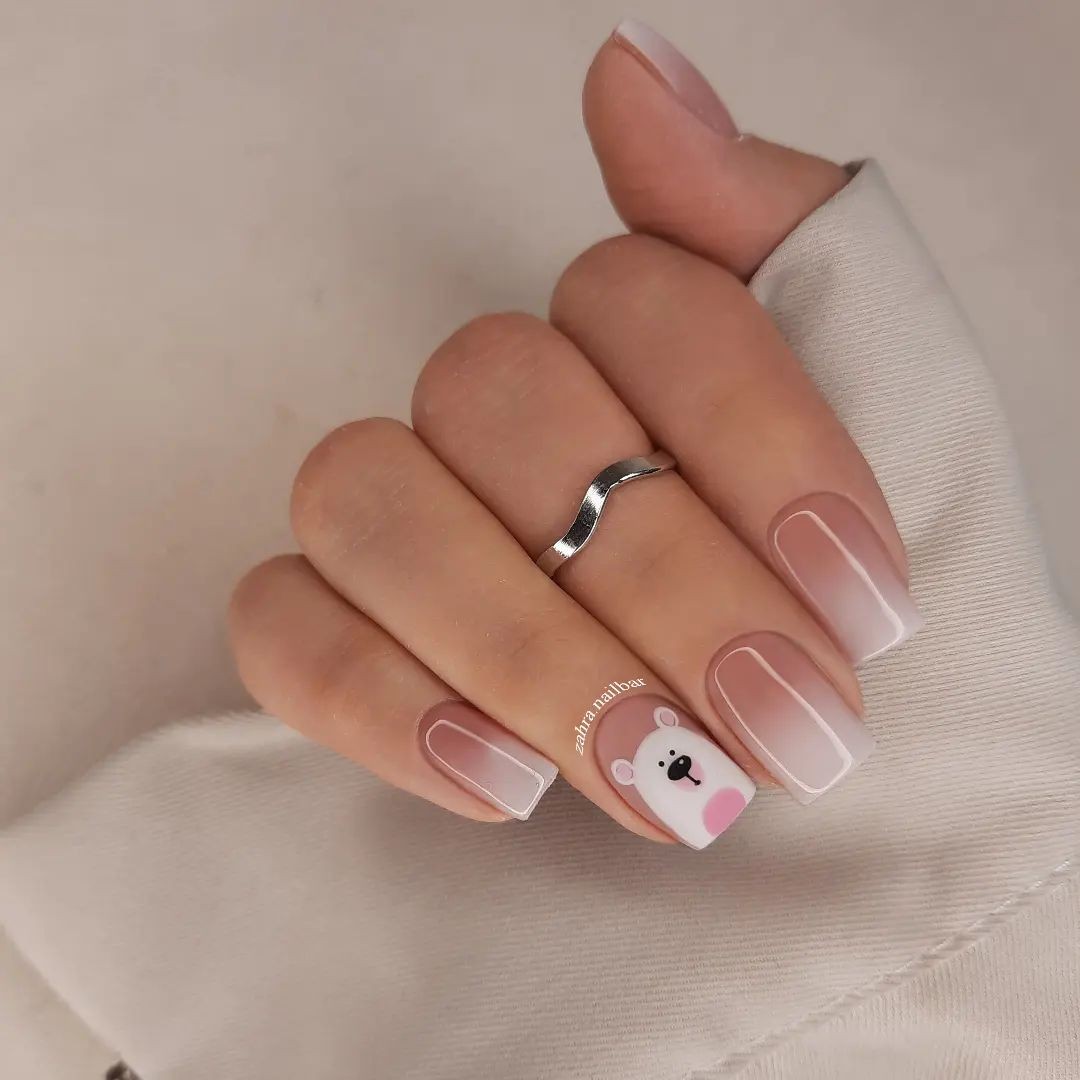
For those who crave whimsy in their beauty routine, incorporating a playful touch into their manicure can be a game-changer. One adorable way to do this is by adding a polar bear accent nail to an otherwise classic nude manicure. The end result is a look that’s equal parts charming and sophisticated.
To achieve this design, you’ll need:
– A high-quality nude gel polish as the base color;
– White and black gel polishes for creating the polar bear details;
– A topcoat to ensure your artistic masterpiece remains intact.
As a professional tip, when painting the bear’s features, use a fine-tipped brush and maintain a steady hand to achieve precise results. With these simple steps, you can bring this delightful design to life:
1.
Start by coating your nails with the nude polish and allowing them to cure.
2. On the accent nail, create a polar bear face using white polish for the shape and black for the details.
3. Finish off the look by applying a topcoat to protect your artistic design.
Modern Waves: Abstract Art at Your Fingertips
Step into the world of abstract art-inspired nail designs by embracing modern wavy patterns that add an artistic flair to your nails. The harmonious blend of black swirls against a pale pink base is reminiscent of contemporary masterpieces, making a statement that’s both bold and refined. For this unique design, we’ll delve into the materials needed to create this striking look.
To achieve this abstract art-inspired look, you’ll need:- Pale pink gel polish for the base- Black gel polish for the waves- Gold foil or gold gel polish for the accents- Topcoat for a smooth, glossy finishProfessional Tip: To add precision and detail to your design, use a fine brush to paint the wavy lines and apply the gold accents with tweezers or a dotting tool. Follow these DIY manicure steps to recreate this look:Start by applying a pale pink base coat and curing it under a lamp.
Next, freehand black waves onto each nail, being sure to cure after each application to avoid smudging. Finally, add gold accents for a touch of luxury and finish with a topcoat to seal in the artwork and enhance the shine.
Marble Elegance: Refined Fluidity
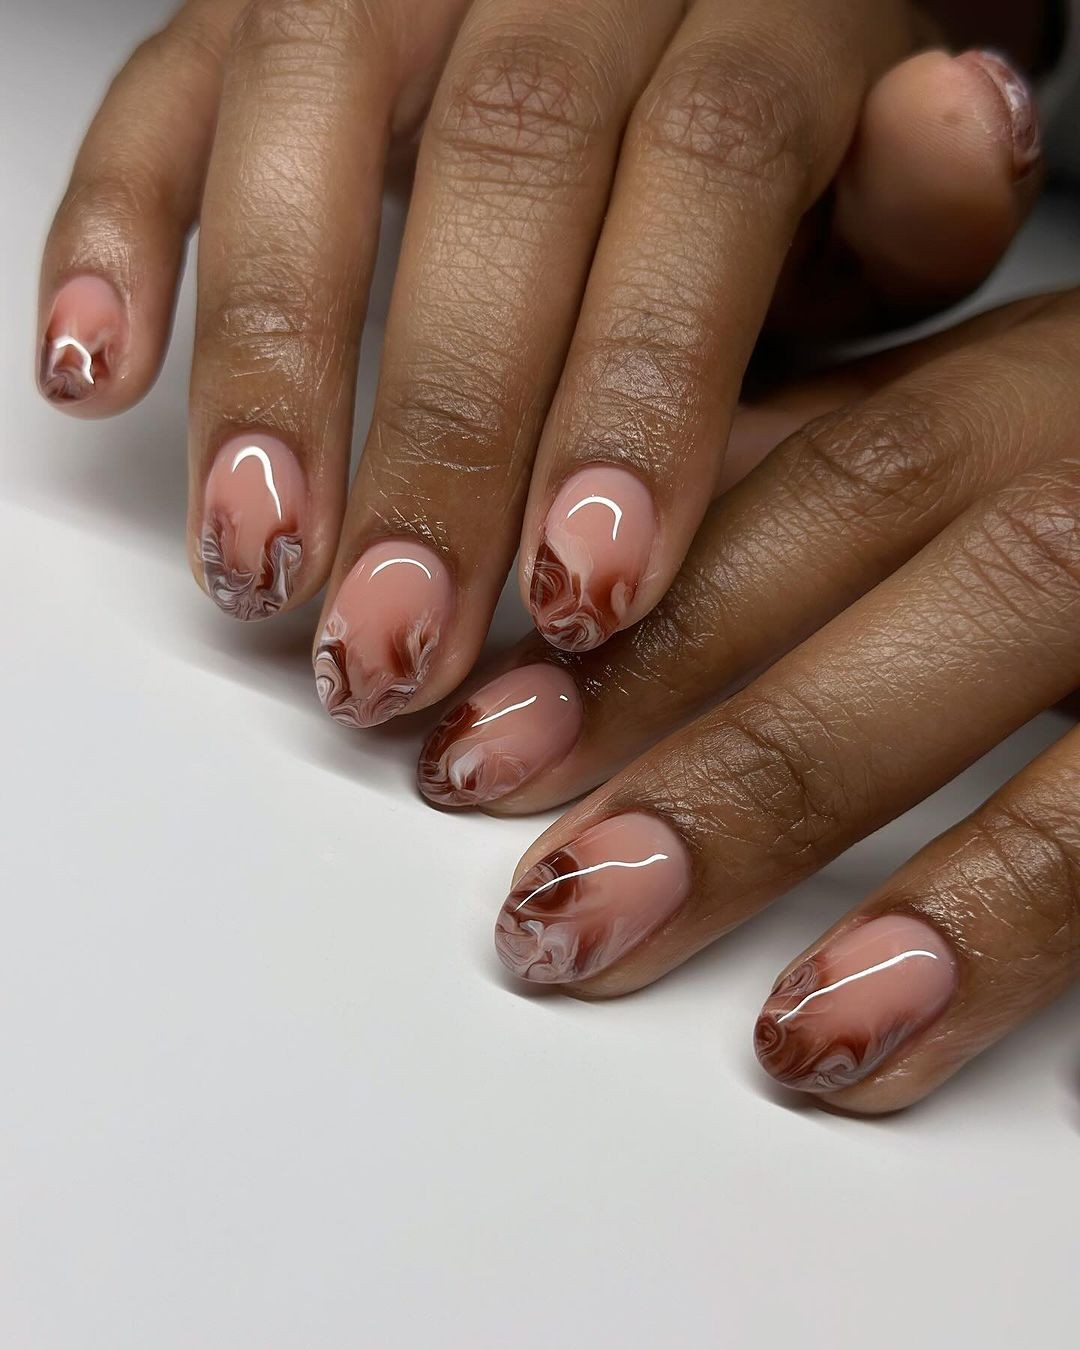
The timeless charm of a marble finish gets a fresh twist with this swirling pattern, reminiscent of natural stone veining. This understated yet sophisticated look is perfect for those who appreciate subtle beauty.
[Photo credit: @dovenailsbysharon]
To achieve this elegant design, you’ll need:
* Nude gel polish as the base coat
* White and brown gel polish for the marbling effect
* A small brush or toothpick to swirl the colors together
* Topcoat for added durability and shine
Professional Tip: Use a toothpick to gently drag through the wet polish, creating natural-looking marble swirls.
To recreate this manicure at home:
1.
Apply a nude gel polish as the base coat and let it dry slightly.
2. Dot on white and brown polish while the base is still tacky.
3. Use a toothpick to gently swirl the colors together for a marble effect.
4. Cure under a lamp and finish with a topcoat to protect the design.
Pastel Contour: Subtle and Chic
The French manicure gets a fresh spin with the combination of soft pastel contours and creamy nude base. This understated yet chic look is perfect for summer, requiring precision and subtlety to achieve. The photo credit goes to @polishedbymei.
To recreate this design, you’ll need:* Creamy nude gel polish for the base* Pastel gel polishes for the contours* A fine brush for precise detail work* Topcoat to seal in the finishFor a professional touch, remember to clean your brush between colors to maintain crisp lines and distinct color transitions. Follow these DIY steps:1. Apply a creamy nude base coat and allow it to cure.2. Paint delicate pastel lines along the nail edges.3. Cure again, then seal with topcoat for long-lasting results.
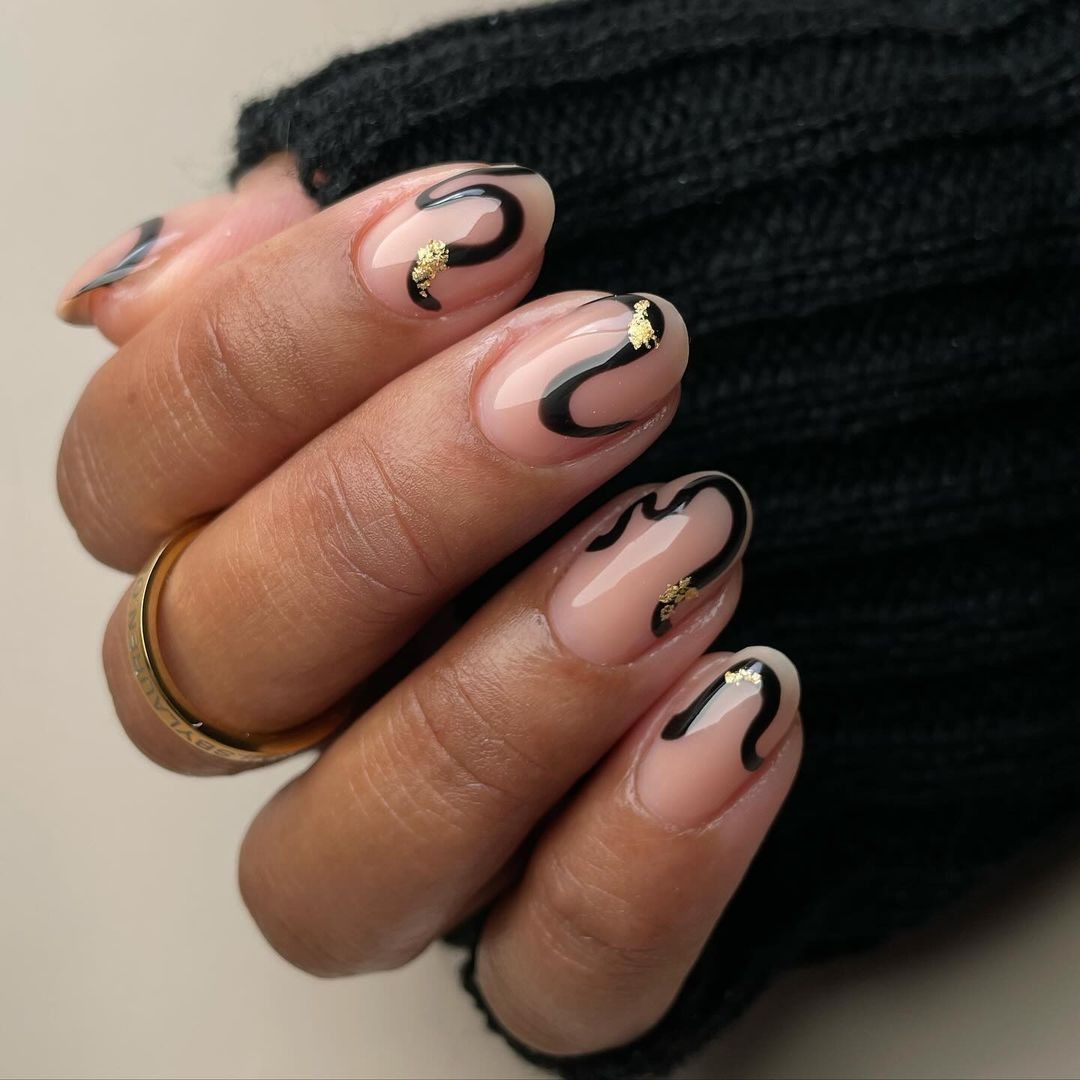
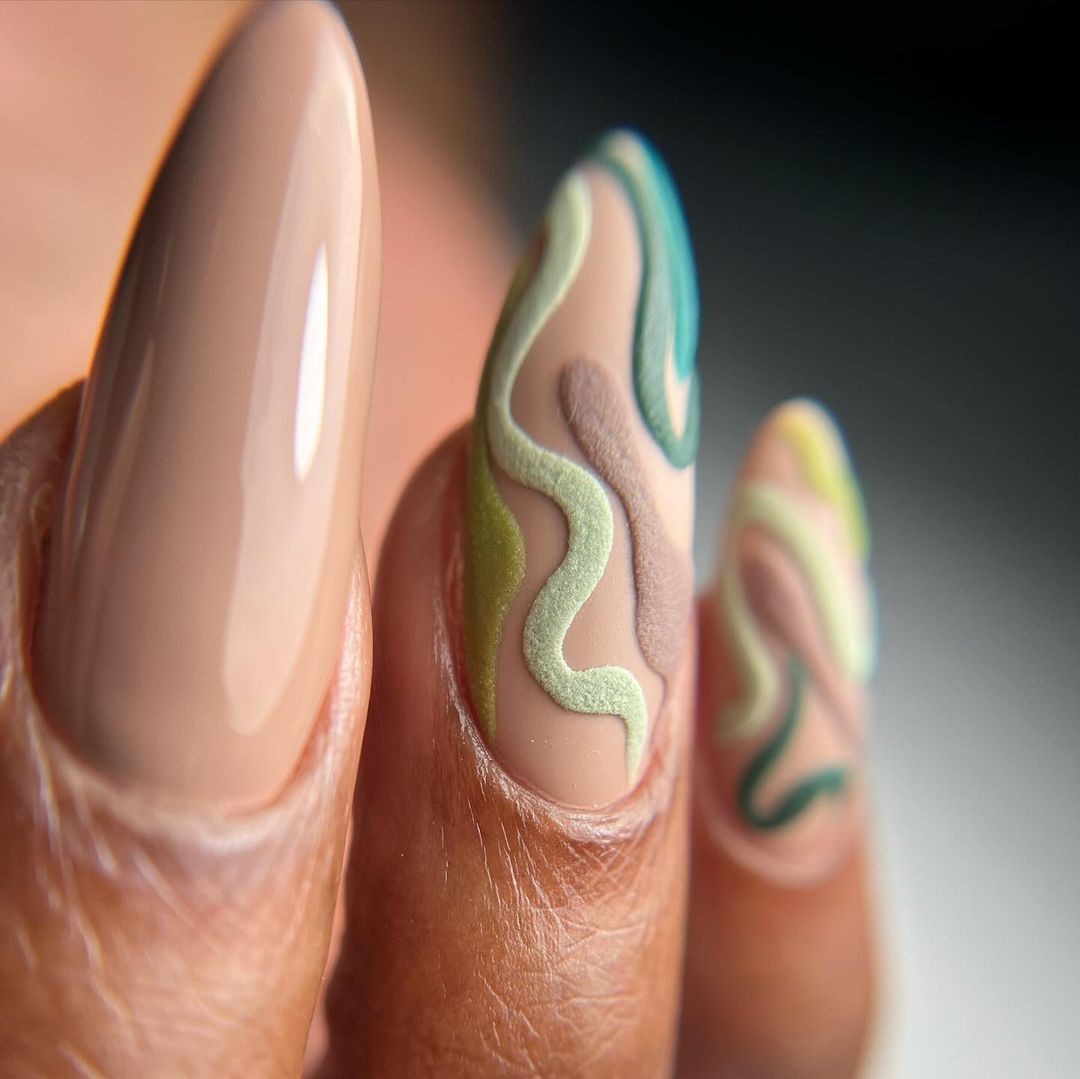
Serpentine Sophistication: A Luxurious Twist
For those seeking to merge extravagance with whimsy, this nail art design is the perfect blend. The sinuous pattern evokes opulence, while the soft pastel hues keep it relatable and suitable for daily wear. This unexpected fusion of luxury and playfulness adds a touch of drama to your look.
[Photo credit: @the_ys_studio]
Materials Needed:
* Nude gel polish as the base
* Black and white gel polish for the serpentine pattern
* Gold leaf or polish for added detail
* Topcoat for a protective gloss
Professional Tip: Master the serpentine design on paper before applying it to your nail for a flawless execution.
DIY Manicure Steps:
1. Apply your nude base color and cure it.
2. Using a fine brush, create the serpentine pattern with black and white polishes.
3.
Add gold detailing for an extra touch of glamour.
4. Seal your masterpiece with a topcoat to preserve your wearable art.
Gilded Pink: Elegance with a Sparkle
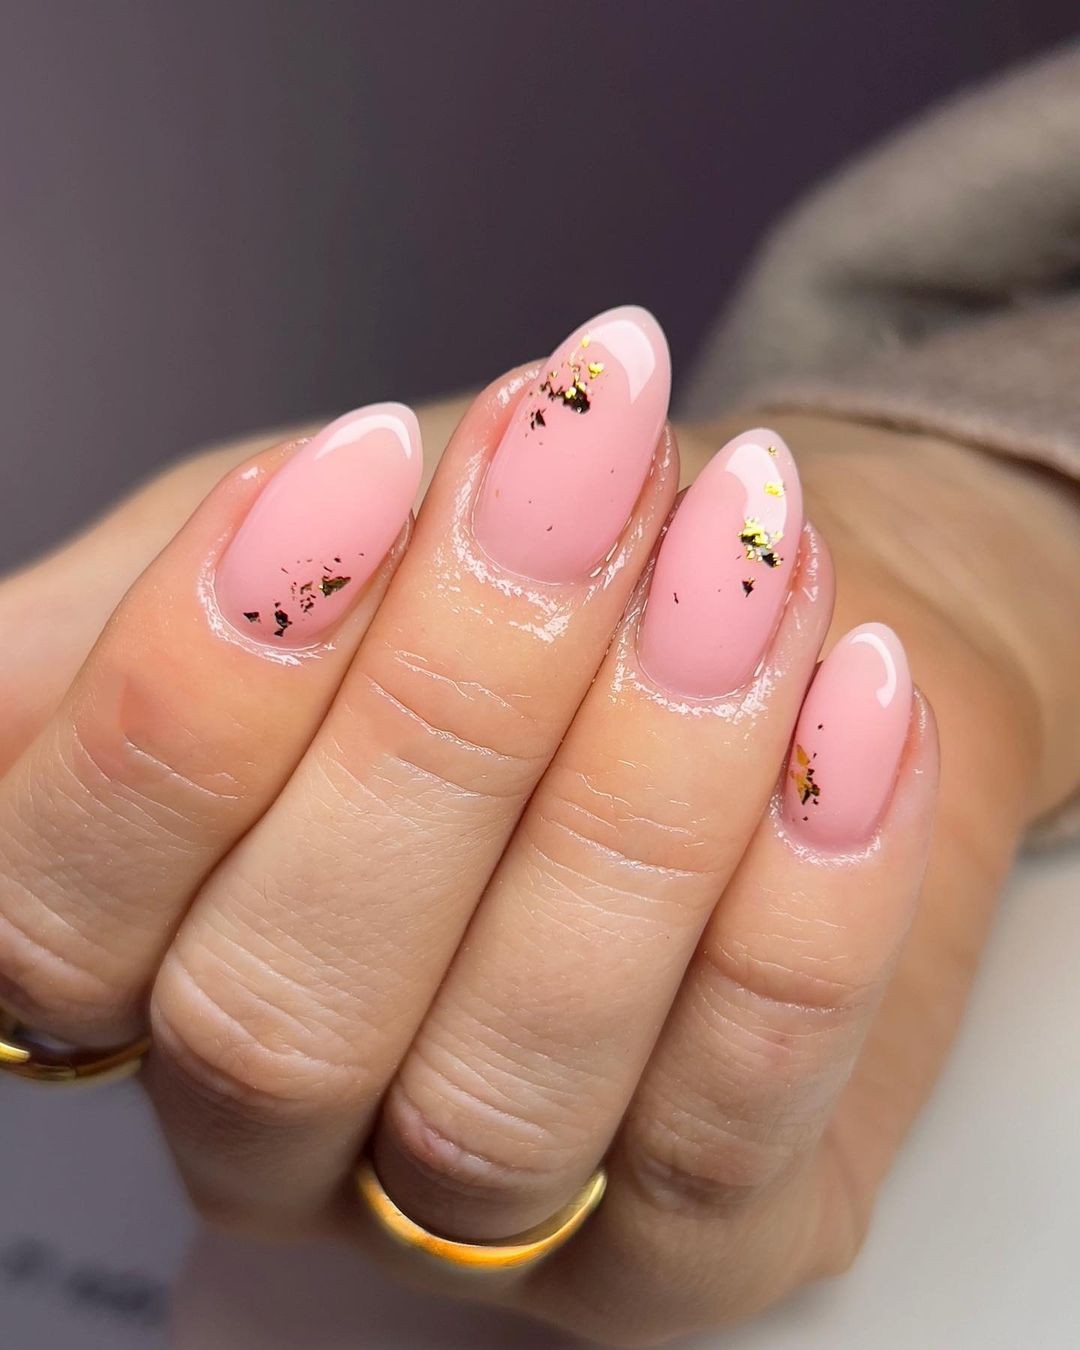
Elevate your nail game with a luxurious manicure that exudes femininity and sophistication. This elegant design features a soft pink base coat, topped with delicate flecks of gold leaf or polish for an added touch of glamour.
To achieve this look, you’ll need:Soft pink gel polish for the baseGold leaf or gold polish for the accentsTopcoat for a durable, high-gloss finishTo apply the gold detailing with precision, use a pair of fine tweezers to place small pieces of gold leaf or dab on gold polish. Always pat gently to set it into the polish before it dries. Follow these simple steps to recreate this stunning manicure:Paint your nails with a soft pink base coat and cure under the lamp.
Add delicate touches of gold leaf or gold polish to each nail, using fine tweezers for precision. Finish off the look by applying a topcoat to secure the gold detailing and add a beautiful shine.
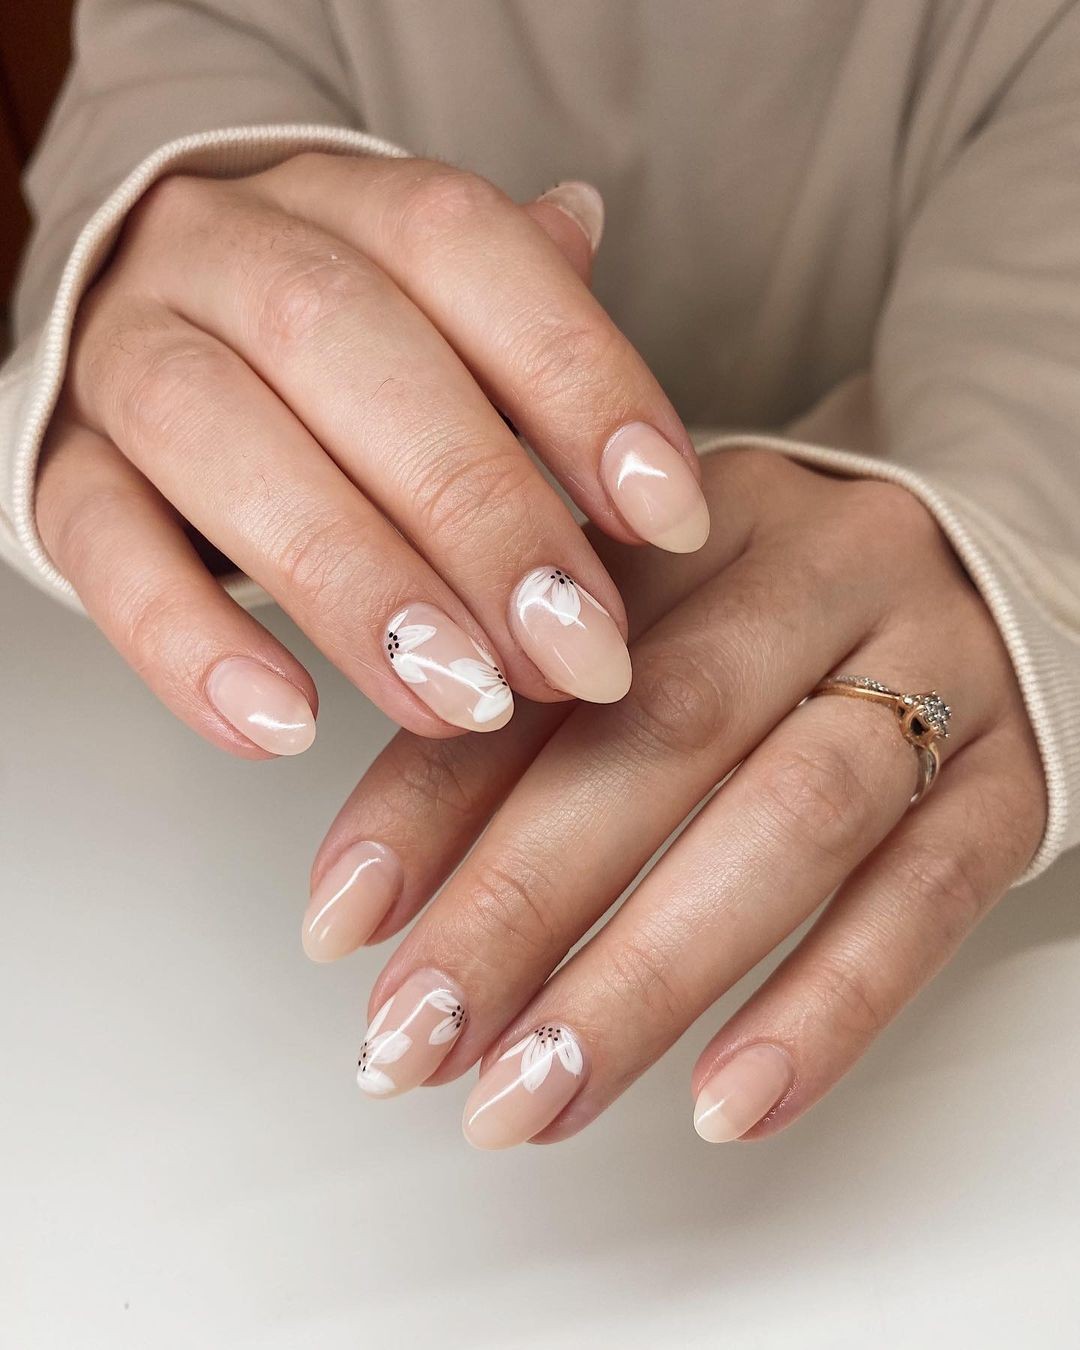
Flowery Whispers: Delicate and Dreamy
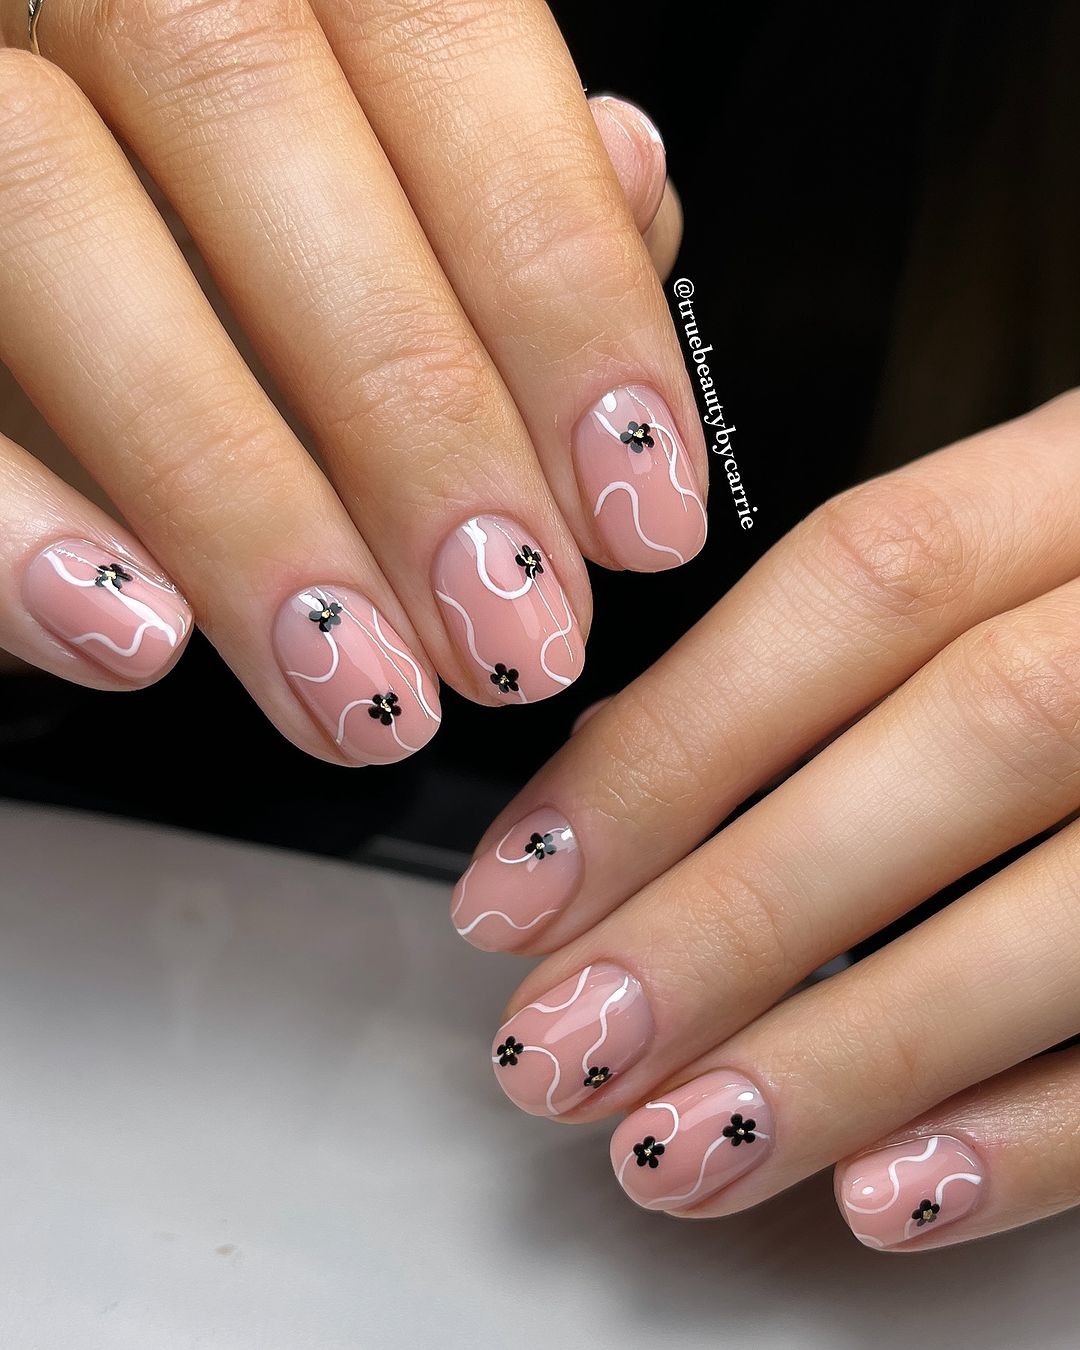
Envision a manicure that whispers sweet nothings in the language of flowers, with delicate, petal-like patterns dancing across a soft blush canvas. This understated design is as gentle as a summer day, perfect for days when the sun shines bright and the breeze carries the scent of blooming flowers.
To recreate this ethereal look, you’ll need:* Blush gel polish for the base* Black and white polish to create the floral patterns* Topcoat to protect the dainty artworkA professional trick: Utilize a dotting tool to craft the flower centers and a fine brush to draw the petals. With these simple tools and a bit of creativity, you can transform your manicure into a whimsical work of art.
To bring this vision to life, follow these steps:* Apply a blush polish as your base color, allowing it to cure completely.* Once the base is set, use black polish to add small flowers and white polish to draw intricate stems and leaves.* Seal everything with a topcoat for a manicure that’s both beautiful and long-lasting.
Animal Instincts: Unleash Your Wild Side
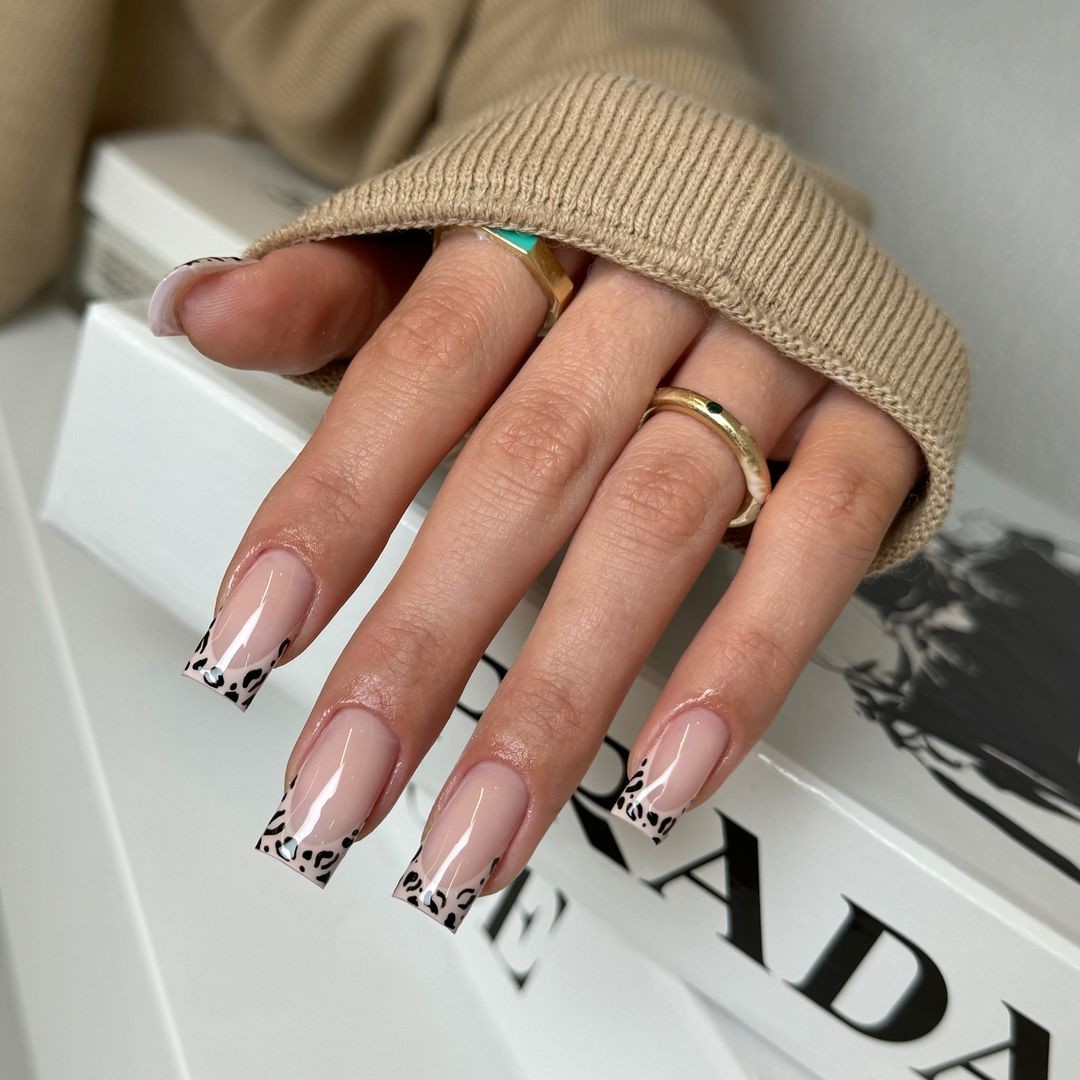
Add a touch of savage sophistication to your look with this leopard print manicure, featuring imperfect circles and splotches that come together in a mesmerizing pattern. The combination of nude and black and white polish creates a striking contrast that’s sure to turn heads. For this design, you’ll need:* Nude gel polish for the base* Black and white polish for the leopard print* Topcoat for a long-lasting, glossy finishTo achieve the signature leopard spots, follow these steps:1.
Start by applying a nude polish as the base coat and curing it.2. Next, use black and white polish to paint imperfect circles and splotches on the tips of your nails, building up the pattern with layers if needed.3. Finally, apply a topcoat to seal in the design and add a high-gloss finish that’s sure to draw attention.
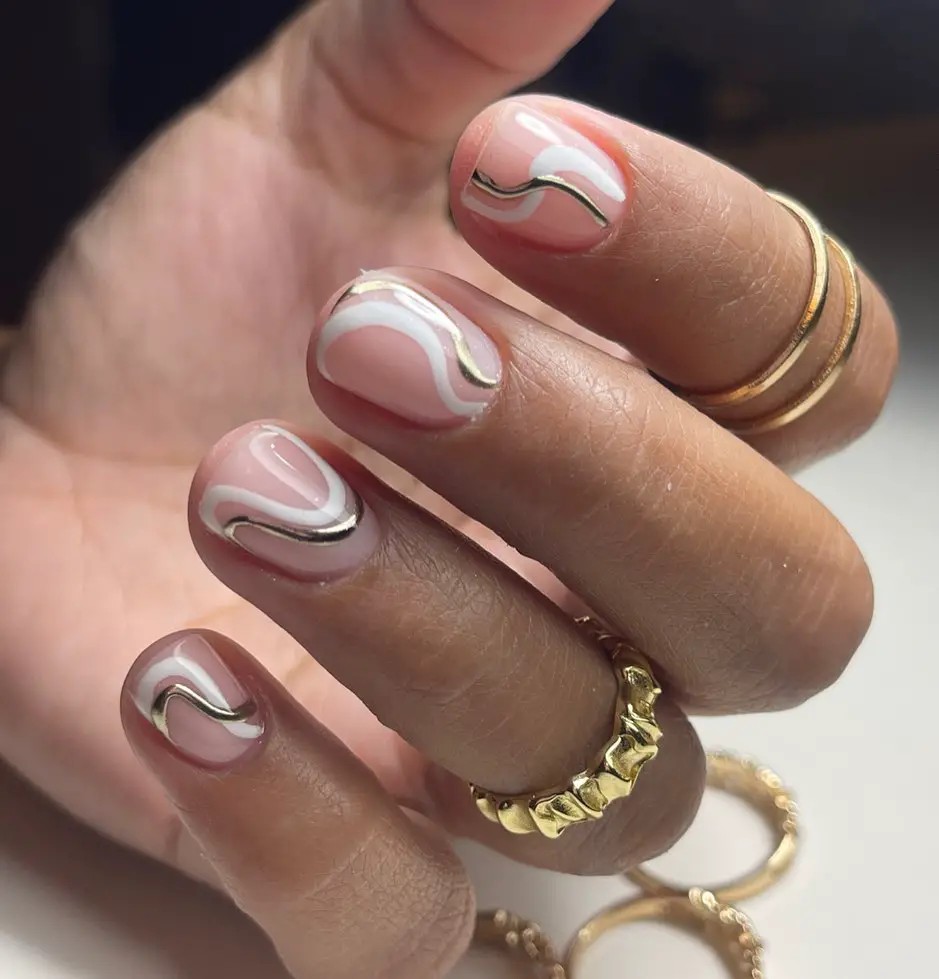
Golden Outline: A Luxurious Frame
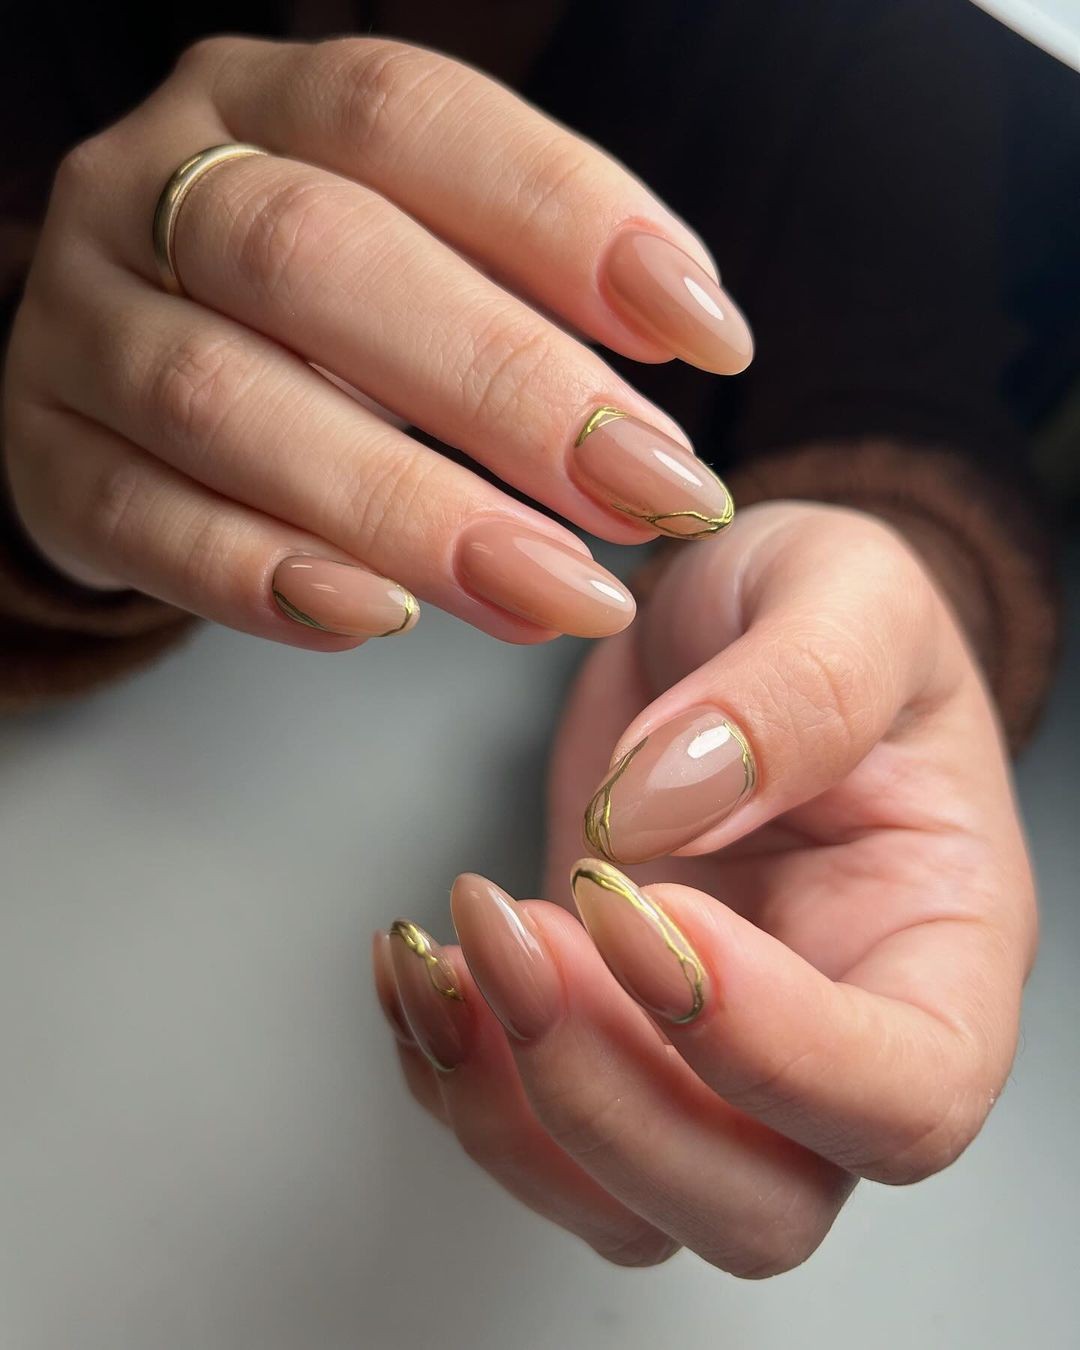
Transform your manicure into a majestic affair by framing your natural nail color with a golden outline, evoking the opulence of royalty with every hand gesture. The subtle nuance of this design makes it perfect for everyday wear while still exuding sophistication.
To achieve this look, you’ll need:A nude gel polish to serve as the foundationGold striping polish or adhesive strips to create the regal outlineA topcoat to seal in the majesty and add a touch of shinePro Tip: When using striping polish, take your time and apply the polish in one smooth motion to ensure a crisp, clean line. To recreate this DIY manicure:Start by painting your nails with a nude polish for a neutral base.
Next, carefully outline the edges of your nails with gold polish or adhesive strips. Finish the look with a topcoat to add longevity and a touch of shine to your regal nails.
FAQ
While many may assume that certain summer nail styles can only be achieved in a salon, rest assured that with the right techniques and quality products, you too can recreate these looks from the comfort of your own home. To ensure your gel polish withstands the wear and tear of summer, it’s crucial to start with a solid base coat and topcoat, and take extra care when exposing your manicure to water and heat.
As for the trending nail shapes this summer, the gel almond and gel short square styles are gaining popularity, offering a chic and practical solution perfect for those warm weather adventures. Ultimately, the key to a great summer manicure is one that makes you feel confident and radiant. Whether it’s through a bold accent, playful pattern, or serene solid color, your nails should be an extension of your personal style, reflecting the joy and freedom of the season.