Get ready to ignite the summer season with fiery nails! The perfect way to express the vibrant energy of the season is through a bold and statement-making nail design. From laid-back beach vibes to sophisticated city streets, a pop of color on your fingertips can instantly elevate your look. Whether you’re after something understated yet elegant or bold and artistic, this guide has got you covered. But what are the hottest colors and shapes currently trending in 2024?
Let’s dive into the latest inspo and get those creative juices flowing for your next nail appointment.
Embracing the French Tip with a Twist

The allure of short gel nails never fails to captivate me, especially when paired with the classic French tip design in subtle pink and white hues. As a professional nail technician, I find this style to be timeless and perfect for the summer season.
For this look, you’ll need high-quality consumables like light pink gel polish, pure white gel polish, and a UV top coat to add a radiant finishing touch.
In my expert opinion, brands like Gelish and OPI are ideal choices due to their strength and vibrant color options.
To achieve this look at home, precision is key. Begin with a clean, buffed nail surface and apply the pink base coat before curing it gently. Next, paint the white tip and cure again for a flawless finish. The result is a refreshing summer-inspired nail design that exudes coolness and understated elegance.
Bright Colors and Summer Designs
Transforming your toes into a coastal masterpiece requires more than just a dash of flair – it demands a bold and vibrant color palette that captures the essence of a summer day by the beach. The latest collection of marine blue and sandy beige polishes is all about making a statement with hues reminiscent of the sky and sea. To get started, gather your essentials: these limited-edition shades and a reliable topcoat for added longevity.
For a pro-approved finish, start with a base coat, build up two layers of your chosen polish, and seal it all off with a glossy topcoat from a reputable brand like Sally Hansen. With this winning combination, your toes will shine as brightly as the sun on a warm summer day – perfect for beach outings or just lounging by the pool.
Bold Patterns and Shapes
Innovative acrylic art designs are a testament to boldness and creativity, showcasing a harmonious blend of colors, patterns, and shapes on statement nails. The striking contrast between vibrant and pastel hues creates an allure that’s hard to resist for the fearless fashionistas. As seen in this stunning photo by @anya_shokurova.
To recreate this look at home, you’ll need an acrylic nail set, a variety of polish colors that fit your unique style, and precision brushes with accurate tips for intricate details. For exceptional results, opt for high-quality acrylics from brands like Mia Secret, which ensure long-lasting wear and a flawless appearance. Achieving this at-home masterpiece requires some artistic flair.
Begin by shaping the acrylic into the desired form and allowing it to settle before unleashing your creativity with layered designs, ensuring each pattern dries thoroughly to achieve a seamless finish.
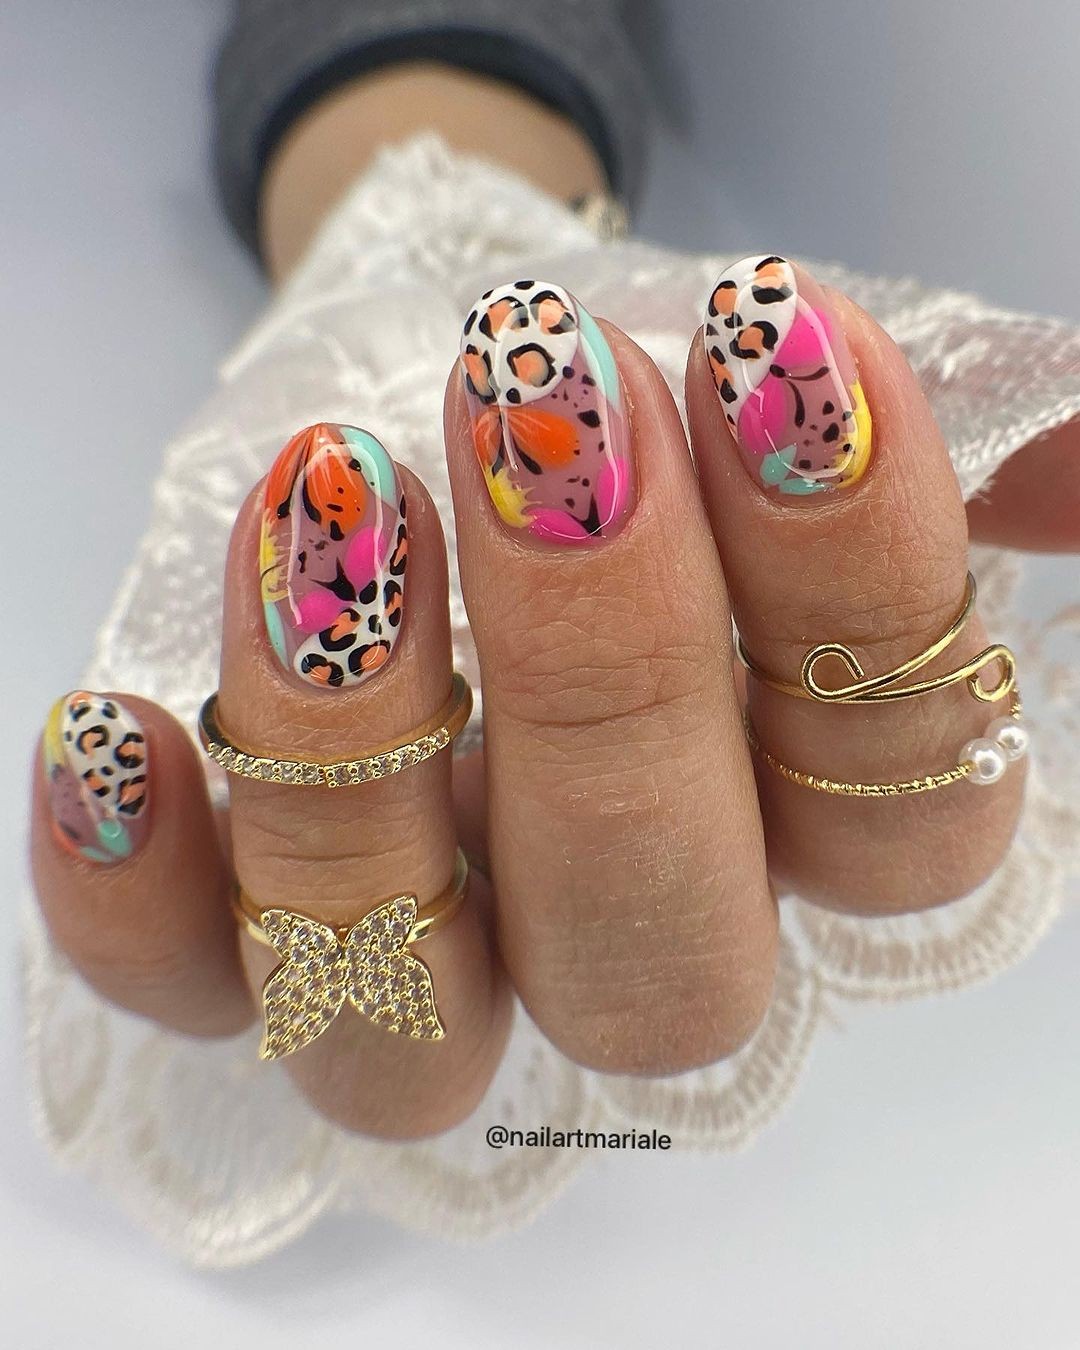
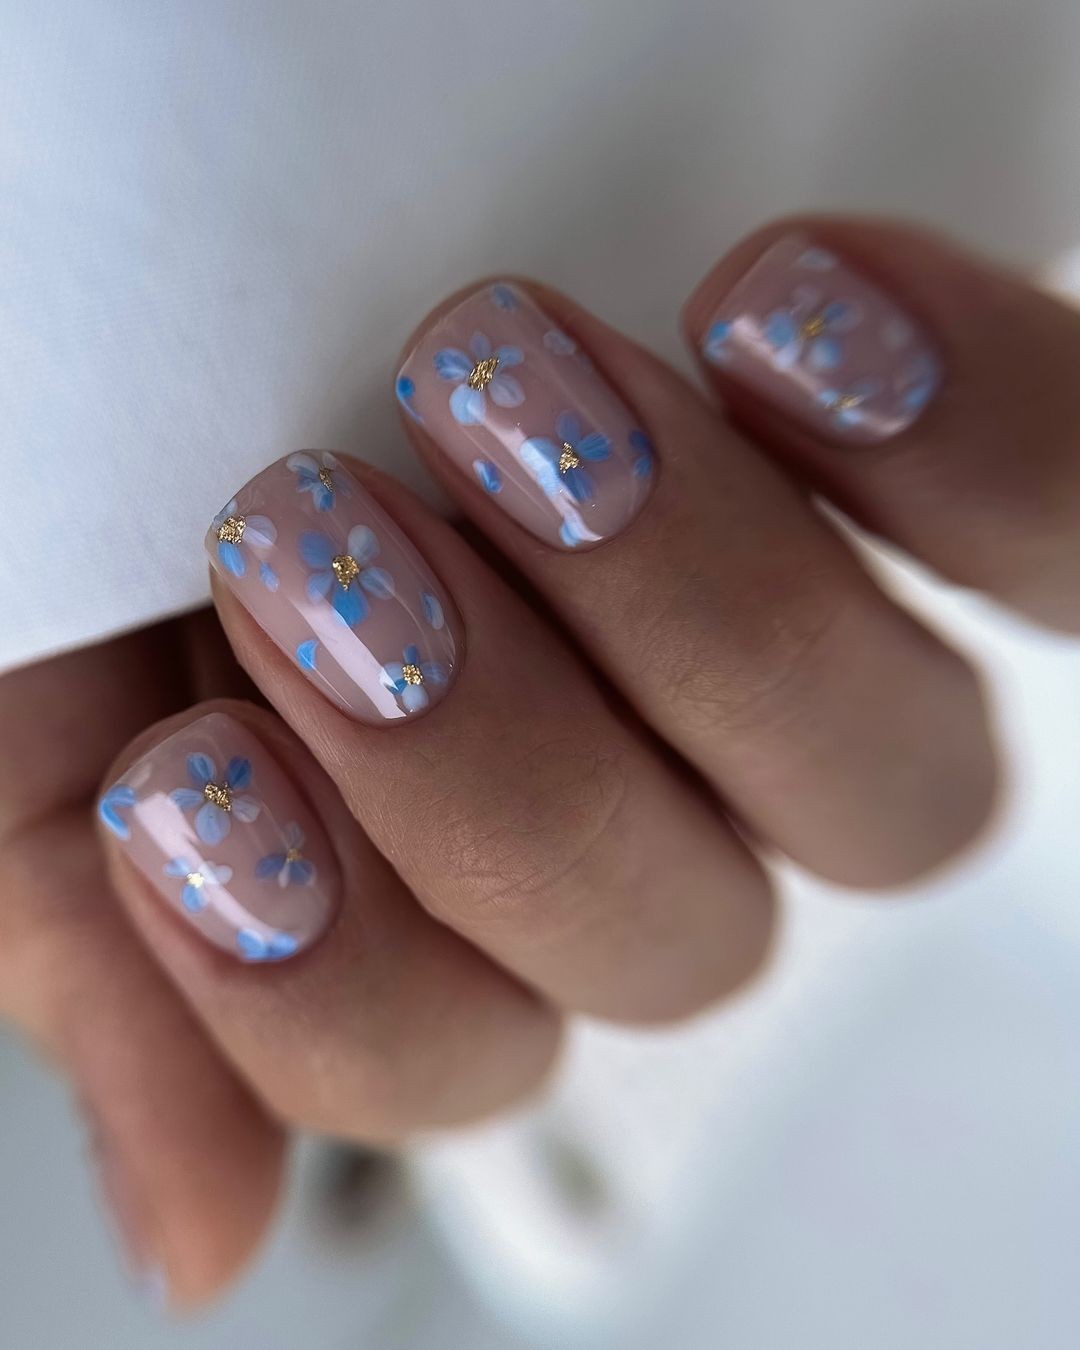
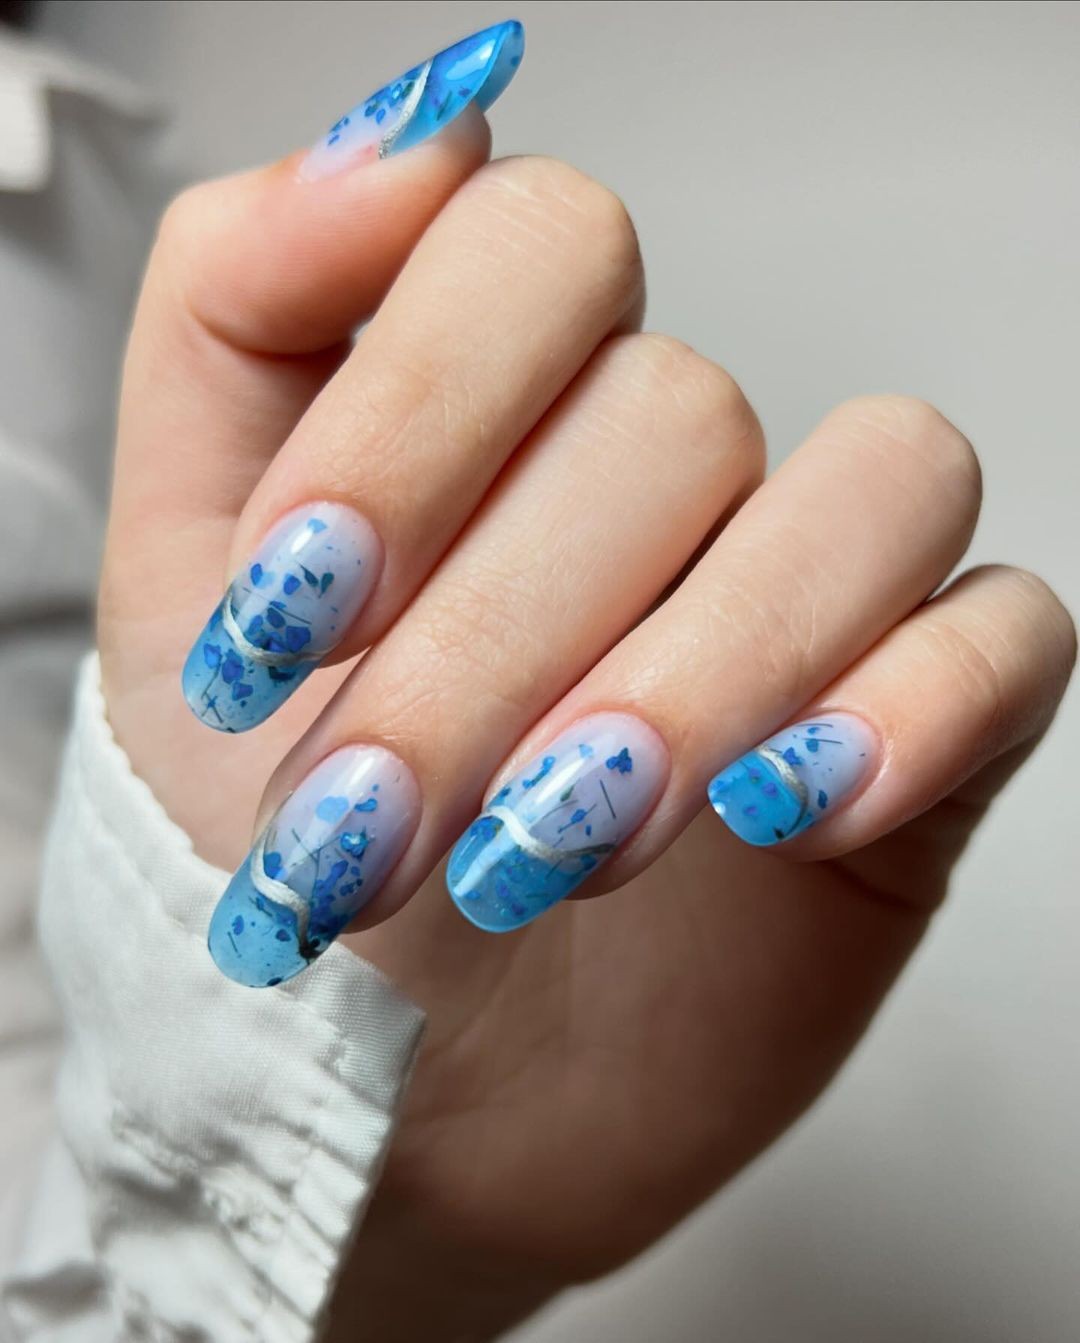
Floral Fantasy: A Blossom of Blues
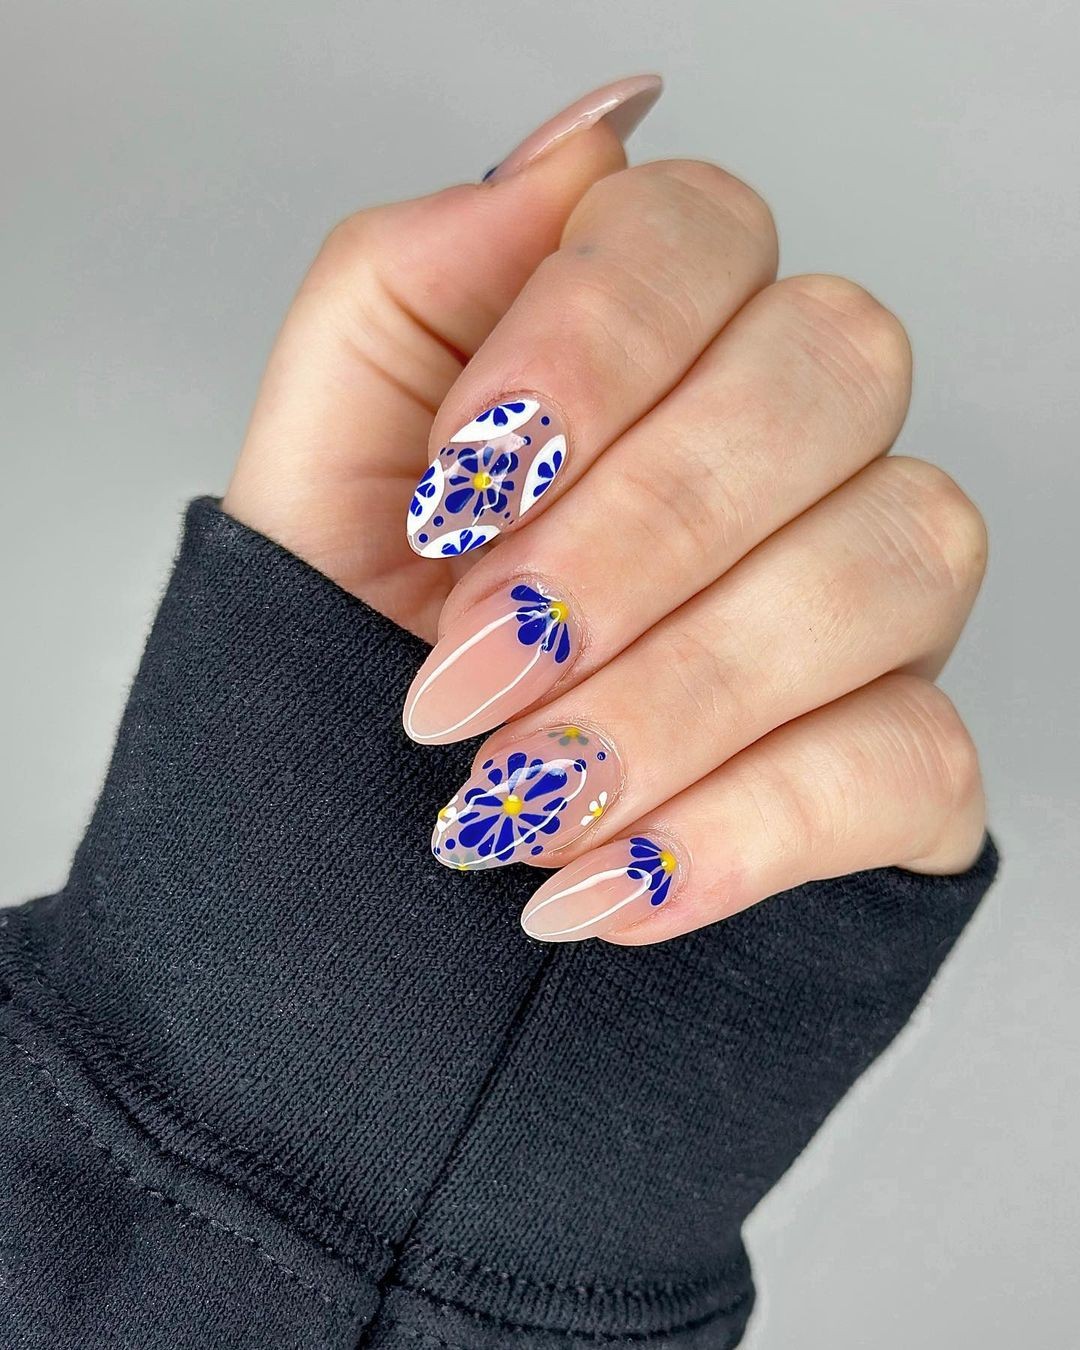
Step into a whimsical world of floral fantasy, where the classic charm of nail art meets the carefree essence of summer. A natural canvas is transformed with delicate petals in cobalt blue and white hues, evoking the feeling of a sun-kissed day by the ocean’s edge.
Credit: @nailsbyrobinandnicky
To create this masterpiece, you’ll need:
Sheer nude polish as your base coat,
Cobalt blue and white colors for the flowers,
A dotting tool and small brush for precise details.
For a long-lasting finish, opt for professional-grade products like OPI Infinite Shine. If you’re feeling adventurous, start by applying a sheer nude base coat, allowing it to dry before outlining petals with a thin brush and filling them in with blue. Add subtle highlights with white, then seal the deal with a glossy top coat that not only protects your design but also adds a radiant sheen reminiscent of summer’s warmth.
Garden of Serenity: Soft Pastel Blossoms
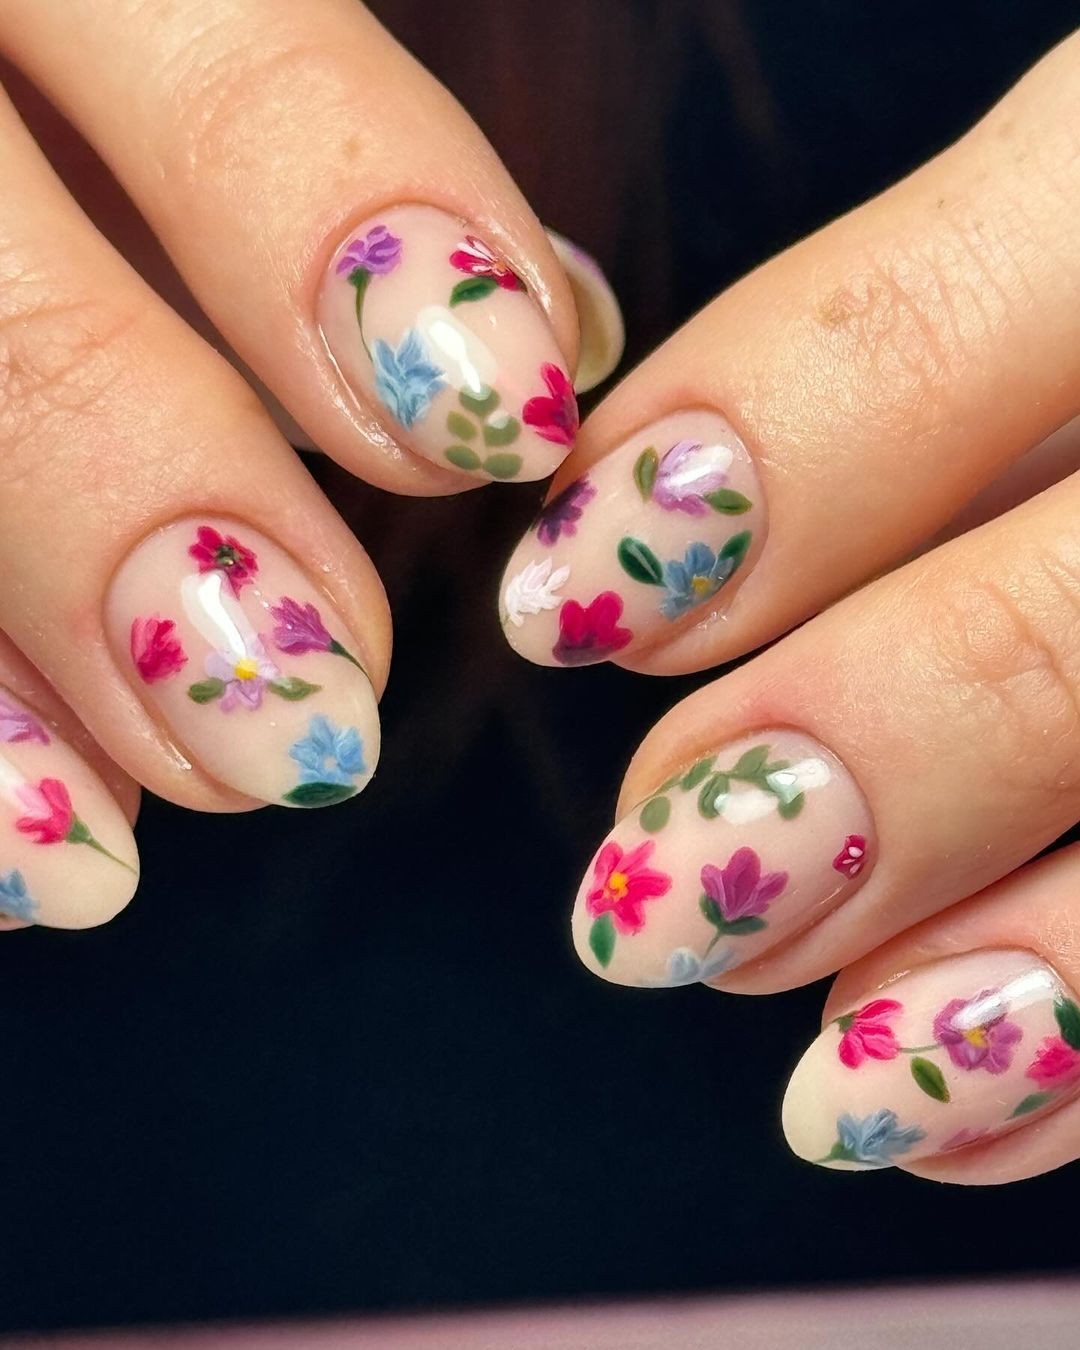
This vibrant nail art design is reminiscent of a colorful garden, where soft watercolor-like hues come together to create a visually stunning look. The beauty lies in its simplicity, with pastel pinks, lavenders, and greens blending harmoniously to evoke the essence of beauty. To achieve this at home, start by applying a clear base coat. Then, use a small sponge or dabber to stipple on the soft gel polish shades, building up the colors to form delicate flower shapes.
For added details, grab a super fine brush and get creative! Finish off your masterpiece with a matte top coat for an elegant, understated effect. With CND Shellac’s pastel offerings being particularly well-suited for this design due to their creamy consistency, you’ll be on your way to creating a show-stopping look that’s sure to turn heads.
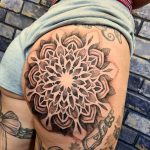
Turquoise Tranquility: Calm Waters and Leopard Spots

Envision the serene beauty of cerulean waters and the unbridled energy of a cheetah’s coat coming together in perfect harmony. The fusion of tropical hues and animal print creates a design that exudes warmth and vitality, making it perfect for a Hawaiian getaway or any sunny day. And to achieve this stunning look, we recommend combining the soothing tones of blue-green with the bold pops of peach and black.
To get started, apply a turquoise base coat, allowing it to dry completely before moving on to the next step. Using a dotting tool, create small, irregular dots in peach and partially outline them in black for added depth. Finally, seal your masterpiece with a topcoat to give it a luminous finish.
Zebra Chic: Monochrome Elegance

Embracing boldness, the traditional black and white palette takes a daring turn with fearless zebra prints that exude confidence. Perfect for those who crave making a statement with their nail art. A striking reinterpretation of the monotonic trend, this design is sure to turn heads.
Credit: @nailsoftheday
To achieve this look at home, start by applying a base coat of white gel polish and cure it before using a striping brush for precise lines. Seal the look with a strong glossy topcoat.
For optimal results, professionals recommend utilizing a gel system like Bio Seaweed Gel to prevent bleeding and ensure crisp lines.
Remember to have fun while creating this look – and don’t be afraid to get creative with those zebra stripes! Jagged edges can add an extra touch of flair.
Sparkling Simplicity: Glitter French Tips
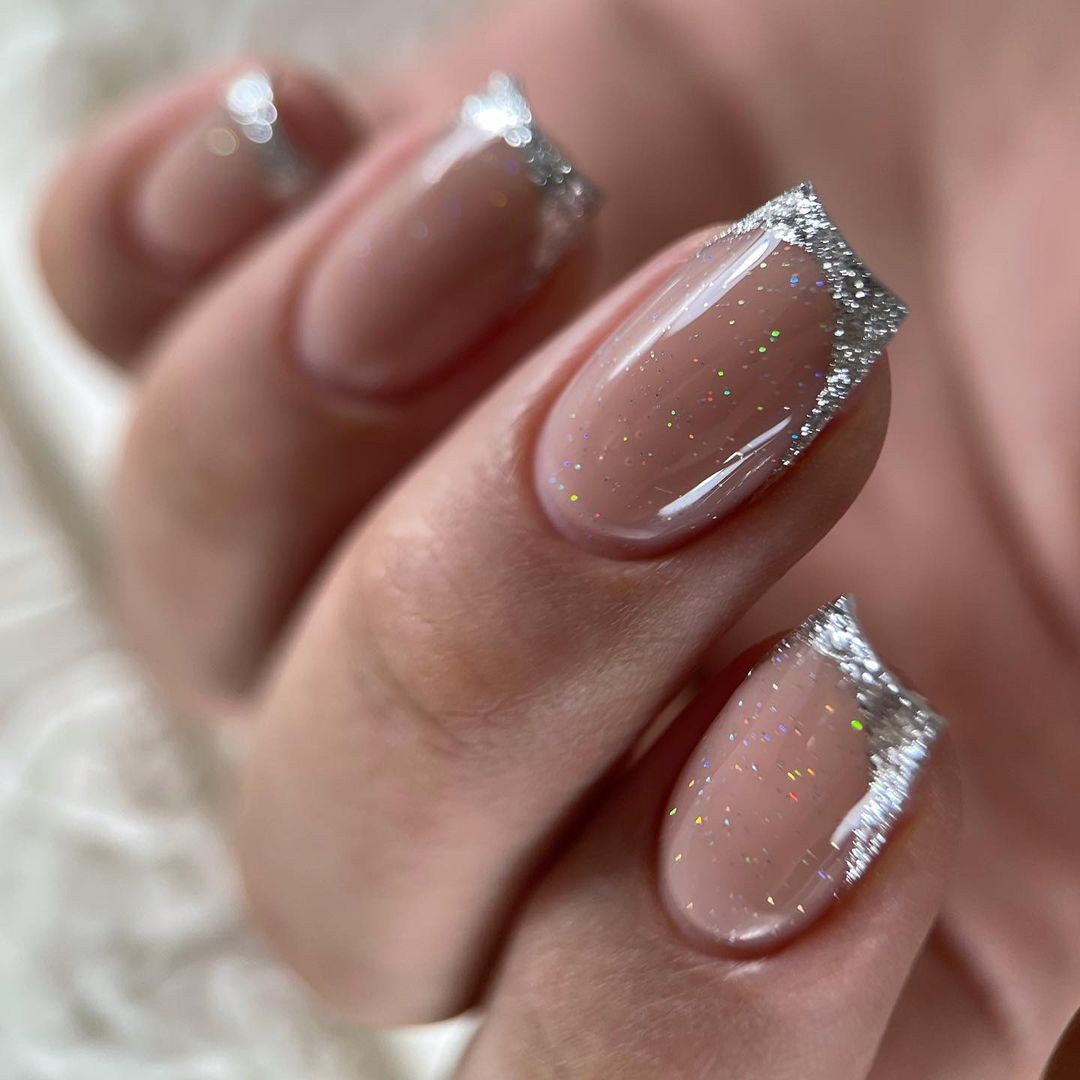
Give your traditional manicure a radiant twist by adding a touch of sparkle to your French tips. This beachy look is perfect for making a statement, thanks to its eye-catching glittery border.
To achieve this stunning style at home, start by applying a nude base polish and allowing it to dry completely. Next, mix fine silver glitter with clear nail polish, following professional recommendations to use Martha Stewart Crafts’ fine glitter mixed with Seche Vite clear polish for an even sparkle.
Carefully apply the glittery mixture along your nail tips, and you’ll be left with a beautiful set of sandy nails that are sure to turn heads. With its simple yet striking design, this French tip look is perfect for any occasion.
Olive Elegance: Nature-Inspired Accents
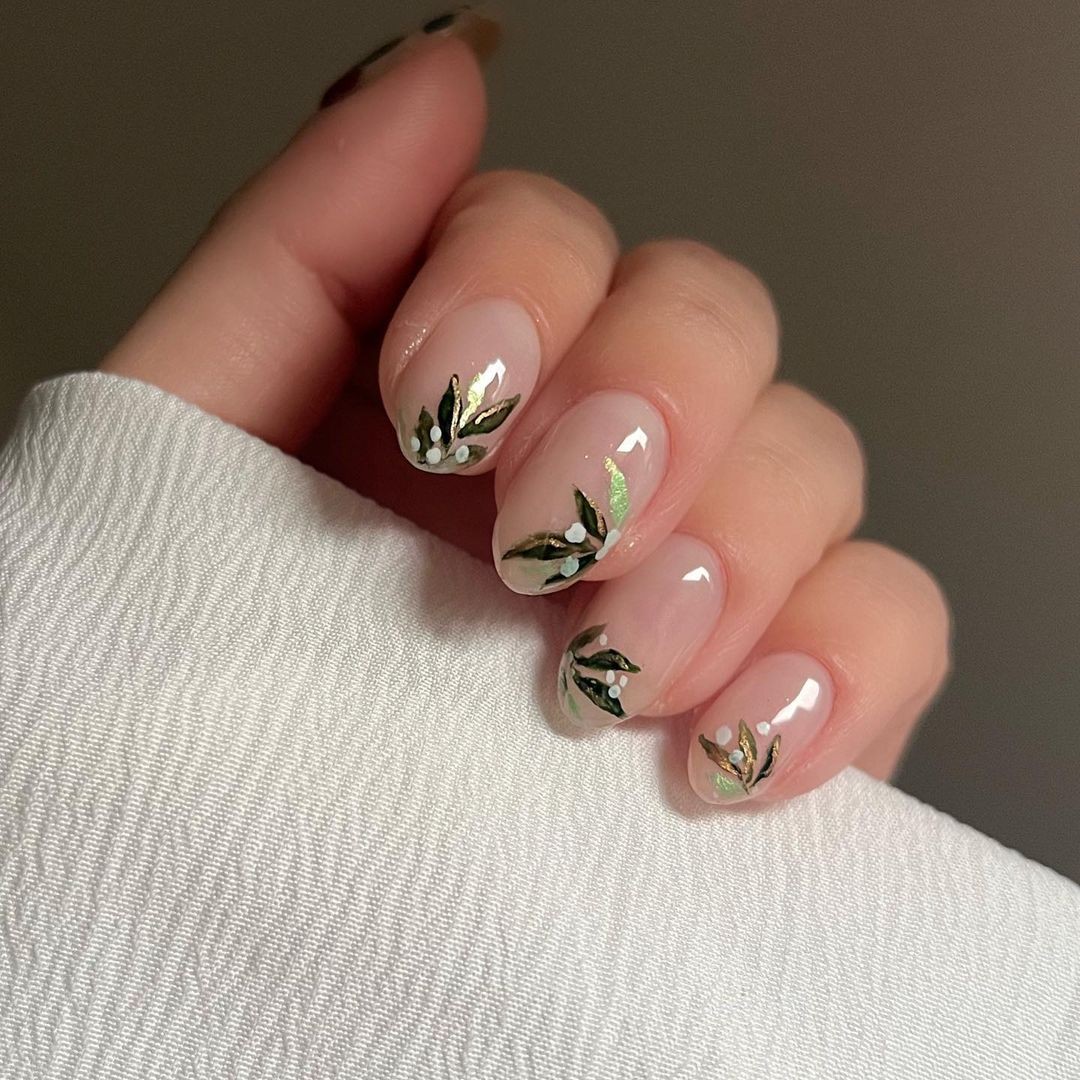
The intricate details in this olive-inspired nail art design elevate its sophistication and evoke a sense of summer freshness. The subtle metallic sheen adds a touch of luxury, while the earthy tones bring warmth to the overall look.
To achieve this look at home, start by applying a nude polish base. Then, use a fine brush to create intricate designs with olive green polish. For added dimension and sophistication, add small gold dots in strategic places.
The result is a simple yet striking design that’s sure to inspire envy.
Dazzling Dimensions: Glitter and Vivid Hues
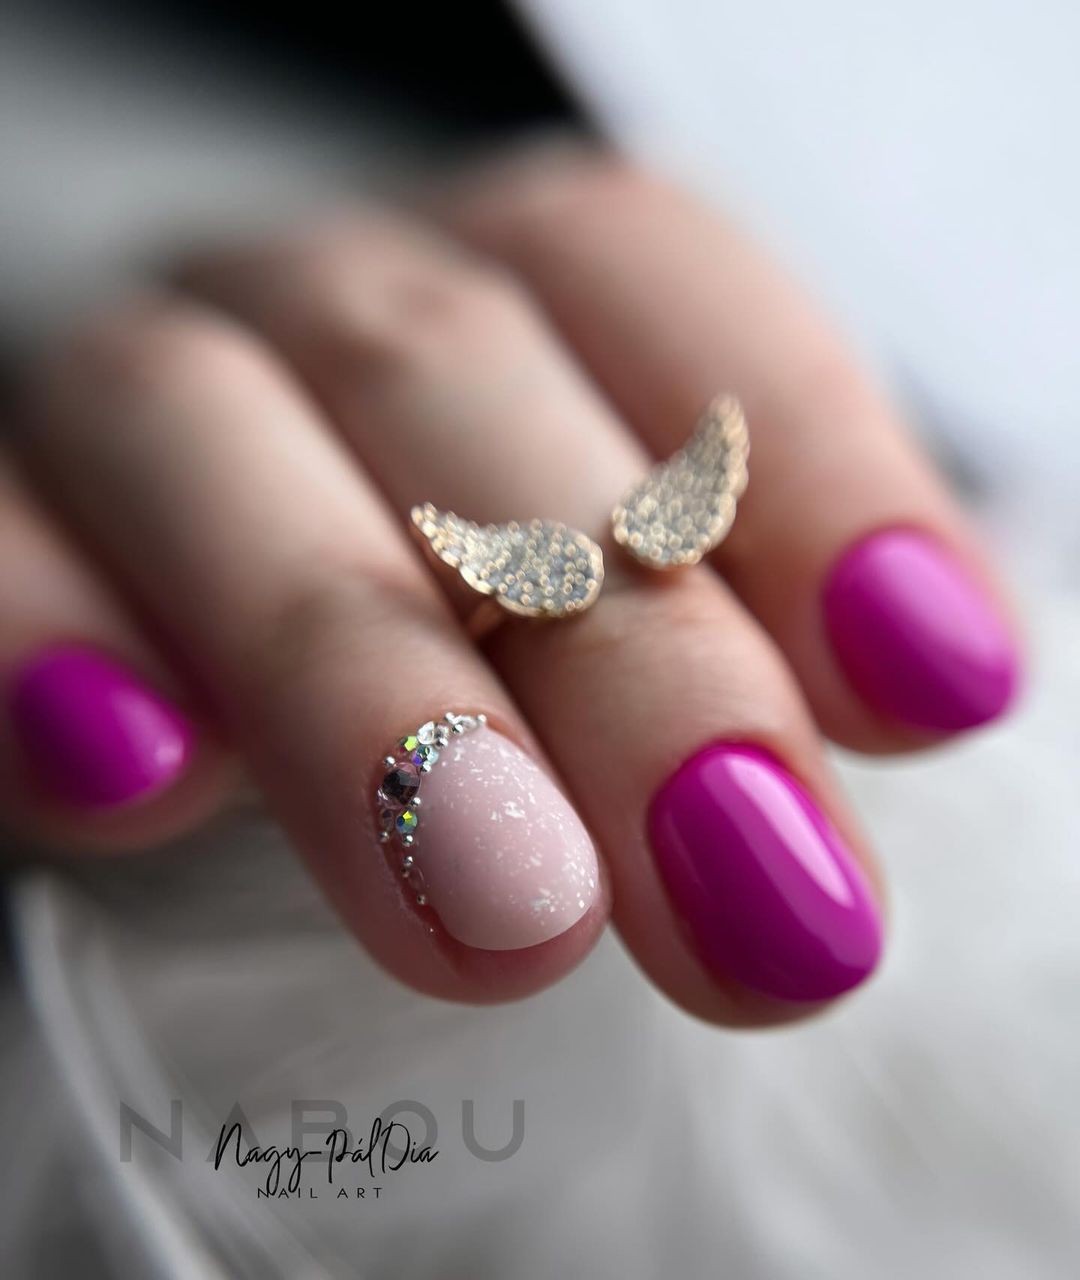
Combining the understated elegance of matte finishes with the radiant allure of shimmering accents creates a captivating design. This modern nail art style, featuring gold glitter pieces applied against a vibrant magenta backdrop, embodies the essence of trendy European flair.
For this look, you’ll need: matte magenta polish, gold glitter accents, and adhesive to secure the glitter elements in place.
To achieve professional-grade results at home, start by applying two coats of the matte polish as your base color.
Once the polish is fully dry, strategically place the gold glitter pieces where you want them to shine. This bold yet simple statement makes a lasting impression, echoing the carefree spirit of Europe’s most stylish hotspots.
Starry Sophistication: Purple Glitter Tips
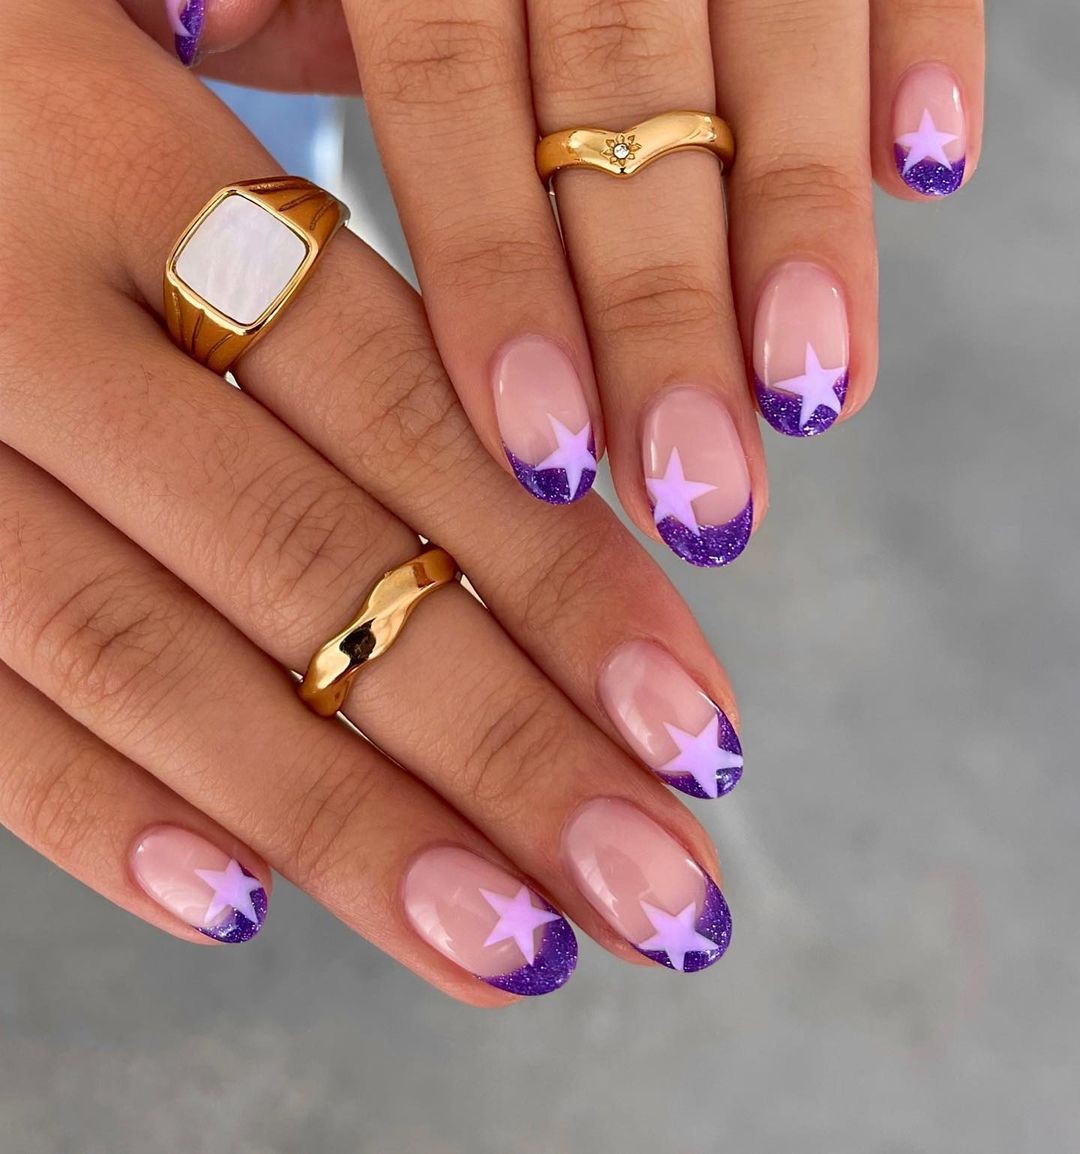
The Peach Nails’ latest creation combines sophisticated elegance with playful whimsy. The transparent base allows the natural beauty of the nail to shine through, while the vibrant purple glitter tips add a pop of color perfect for daydreaming under the sun or dancing the night away at the beach. To achieve this look, start by applying a clear base coat, followed by a layer of purple glitter that’s carefully applied just to the tip of the nail.
Allow the glitter to set before adding star-shaped decals for an extra touch of charm. Finally, seal everything in place with a durable top coat and you’re ready to take on any summer soiree or vacation.
Candy Clouds: Pastel Pops and Gemstone Clusters

Imagine an airy, whimsical world where pastel clouds and gemstone clusters come together in perfect harmony. This distinctive nail art style defies conventions by combining trendy and timeless elements to create an extraordinary result. The use of pastel polishes, various gemstones, and a shiny top coat allows for endless creative possibilities.
For this look, we recommend using consumables such as quick-drying pastel polishes from Sally Hansen’s Insta-Dri line, flat-backed gemstones that make application easier, and a glossy top coat to seal it all in. To achieve the desired effect, start with a pastel base coat, allowing it to dry but still retaining some stickiness.
Next, use tweezers to carefully arrange the gemstones into cloud-like shapes.
Once your design is complete, apply a final touch by sealing everything in place with a glossy top coat. This will not only preserve your artwork but also add an extra layer of summer magic.
Ocean’s Whisper: Sea-Inspired Elegance

This ocean-inspired nail art design combines creativity and craftsmanship, featuring long stiletto nails that showcase style and expertise. The set boasts diverse designs, including ocean prints and metallic finishes reminiscent of treasures found deep beneath the sea’s surface. For those who crave bold, statement-making accessories, this is a must-have.
Photo credit: @_nailsmade To achieve this look, you’ll need an assortment of blue polishes, chrome powder, glue-on tabs for nail tips, and patterns for precise designs. For added professionalism, consider using specially designed chrome powders and marine stencils to create intricate details. Start by applying a base coat to each nail, then switch between your blue polishes as desired.
Use stencils for detailed patterns and add a metallic sheen by gently rubbing chrome powder onto the design with a sponge applicator.
Soft Geometry: Pastel Tones and Gold Flakes
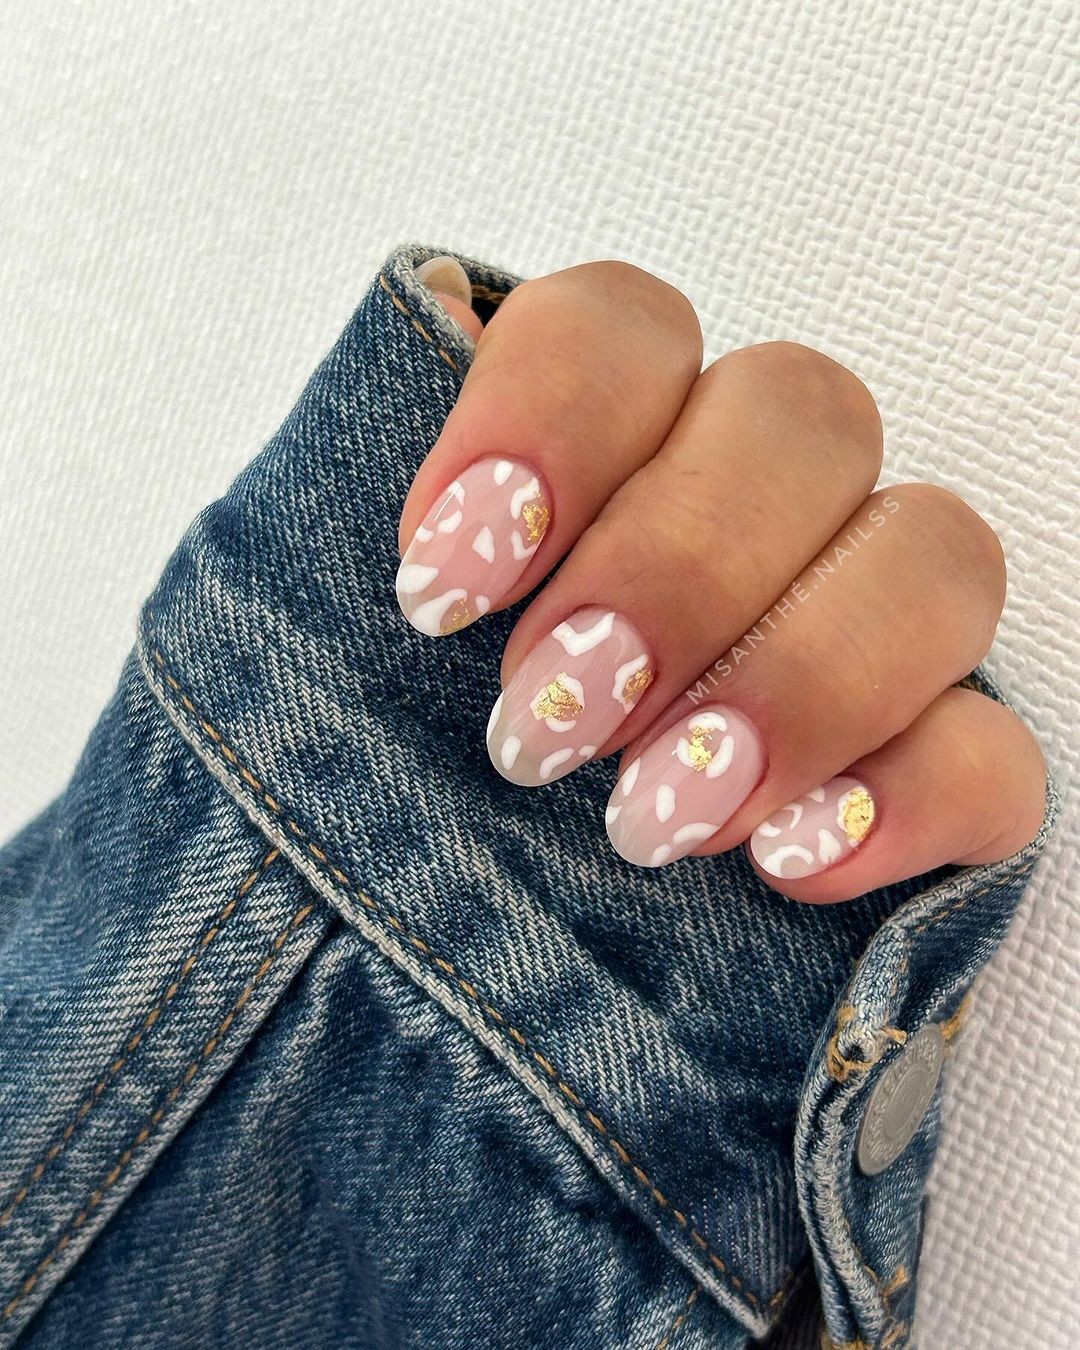
Experience the soothing essence of summer styles with this harmonious blend of soft pastels and luxurious gold accents. The result is a refined yet relaxed look that’s perfect for everyday wear or beachy getaways. To achieve this aesthetic, you’ll need dull pink polish, white polish for geometric designs, and gold leaf flakes. According to experts, it’s crucial to select a pastel with good opacity to prevent streaking and use thin gold leaves that can lie flat on the nail surface.
Begin by applying a light pink base coat, followed by the creation of geometric patterns using white polish. Next, add random or structured designs featuring the gold leaf flakes and finish with a topcoat for a smooth, high-gloss finish.
Tortoiseshell Tips: Modern Take on a Classic

The modern twist on the classic tortoiseshell pattern brings a fresh and vibrant vibe to the nail art scene. This design combines bold orange and black hues, finished with a glossy sheen that screams summer fun. The secret to achieving this look lies in the clever combination of amber and black polishes, blended seamlessly together using a clear polish and topped off with a high-gloss top coat.
For an authentic tortoise shell effect, experts recommend using semi-transparent amber polish or applying black polish using a wet sponge for a blurred, organic look. To get started, apply a base layer of amber polish to your nails, followed by a dab of black polish applied using a wet sponge. Finish the look with a glossy top coat to make the colors pop and leave your nails looking radiant.
Summer Sorbet: Fruity Flair and Floral Whimsy
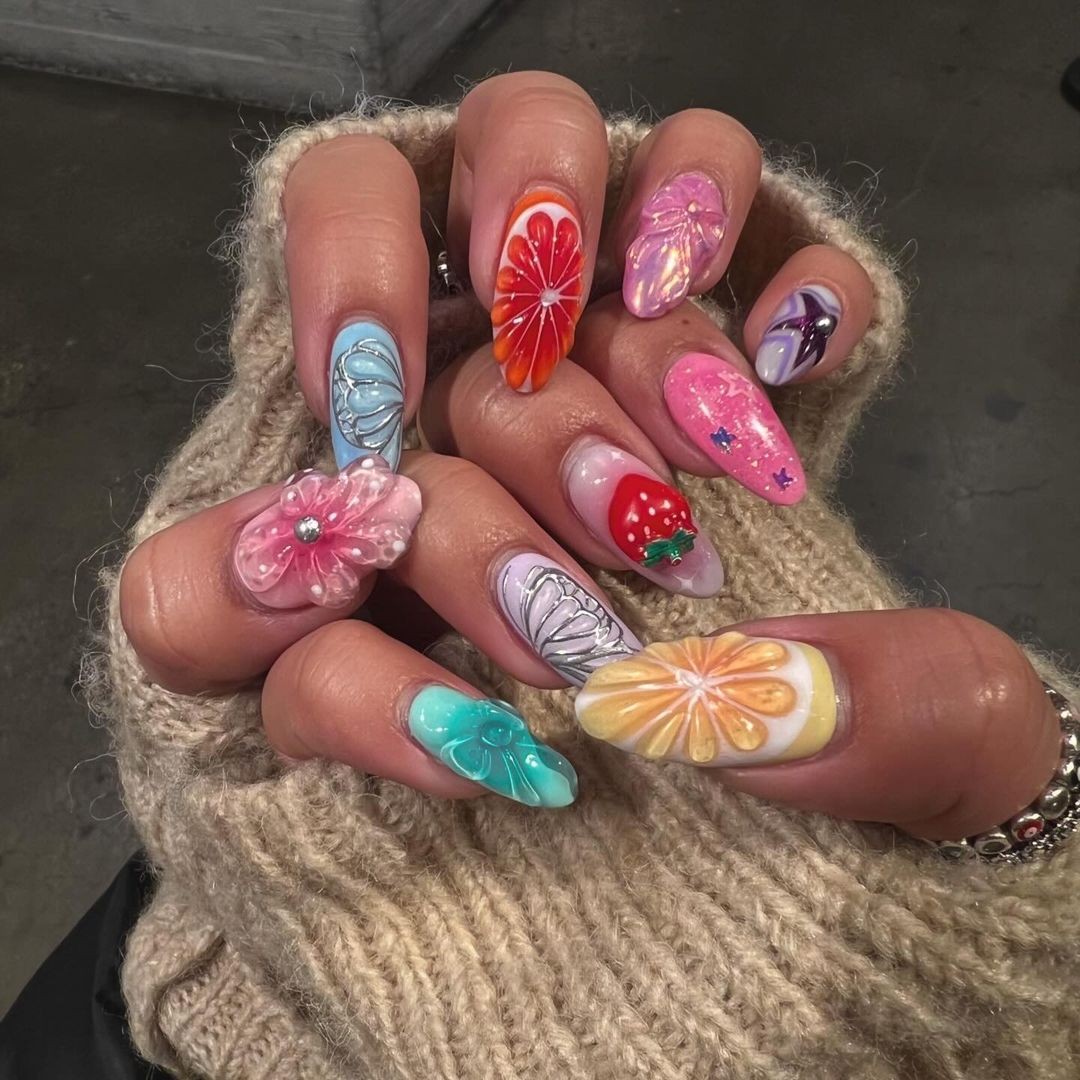
This summer-inspired nail design is a masterful blend of playful and sophisticated elements. The floral and fruit motifs pay homage to the season’s carefree spirit, infusing the design with a lively charm. The artist’s creative choices are particularly noteworthy, striking a perfect balance between whimsy and glamour. For this look, @nailedbynaoo drew inspiration from diverse pastel lacquers, fine-tip brushes, and decorative stones or rhinestones.
To achieve an added layer of sophistication, professionals recommend combining Essie pastels with Swarovski crystals. For those who prefer to get creative at home, start by applying a coat of pastel shade as a base and allowing it to dry. Next, use nail art brushes to draw on your desired design or apply decals for a quicker approach. Finally, add three-dimensional effects and seal the look with a top coat for a long-lasting, vibrant finish.
Olive and Botanics: Earthy Elegance

Step into the world of earthy tones, where the subtle nuances of olive green blend seamlessly with the softness of nude shades. As you adorn your nails with these muted hues, the botanical whispers of nature’s palette guide your creative journey. This understated yet alluring look is perfect for fashion enthusiasts who appreciate the simplicity and elegance of the great outdoors. Photo credit by: @dagmara.
zajac_To achieve this look, begin by building a foundation layer on each nail using alternating shades of olive green and nude polish. Then, armed with fine-detail brushes, delicately apply the intricate botanical designs that bring this natural beauty to life. Finally, seal your masterpiece with a matte top coat to preserve the subtle charm of this effortlessly chic result.
Celestial Seas: Mystical Depths and Golden Shores
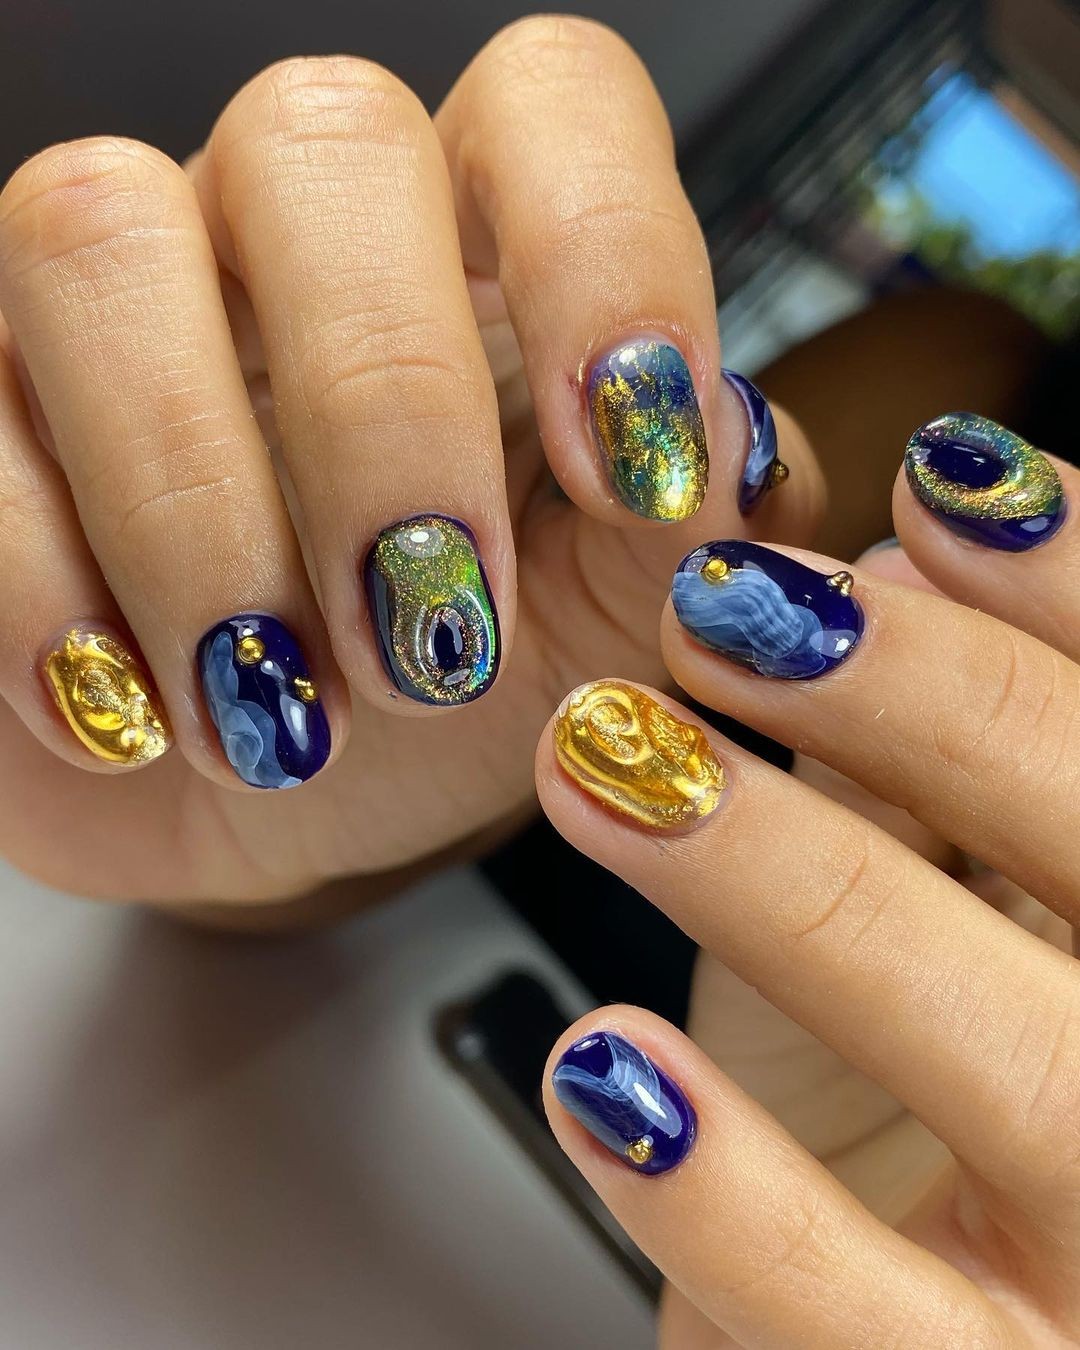
Inspired by the allure of the secret sea and the golden beaches that sparkle under the stars, this nail art design embodies the essence of summer nights. A harmonious blend of deep blue, shimmering iridescent greens, and gold accents comes together to create a mystical and luxurious look reminiscent of the ocean’s mystique. The combination is brought to life with Deep Blue Polish, Iridescent Green, Gold Foil, and Glossy Top Coat for a radiant finish.
To achieve this mesmerizing design, begin by applying a base coat of Deep Blue Polish. While the polish is still wet but tacky to the touch, swiftly add small pieces of gold foil to create a moonlit ocean effect. Finally, seal in your masterpiece with an iridescent polish, allowing the colors to blend seamlessly together. For a more permanent and vibrant result, professional advice suggests using gel polishes for foiled nails that will last.
Pink Serenity: Minimalism Meets Sparkle
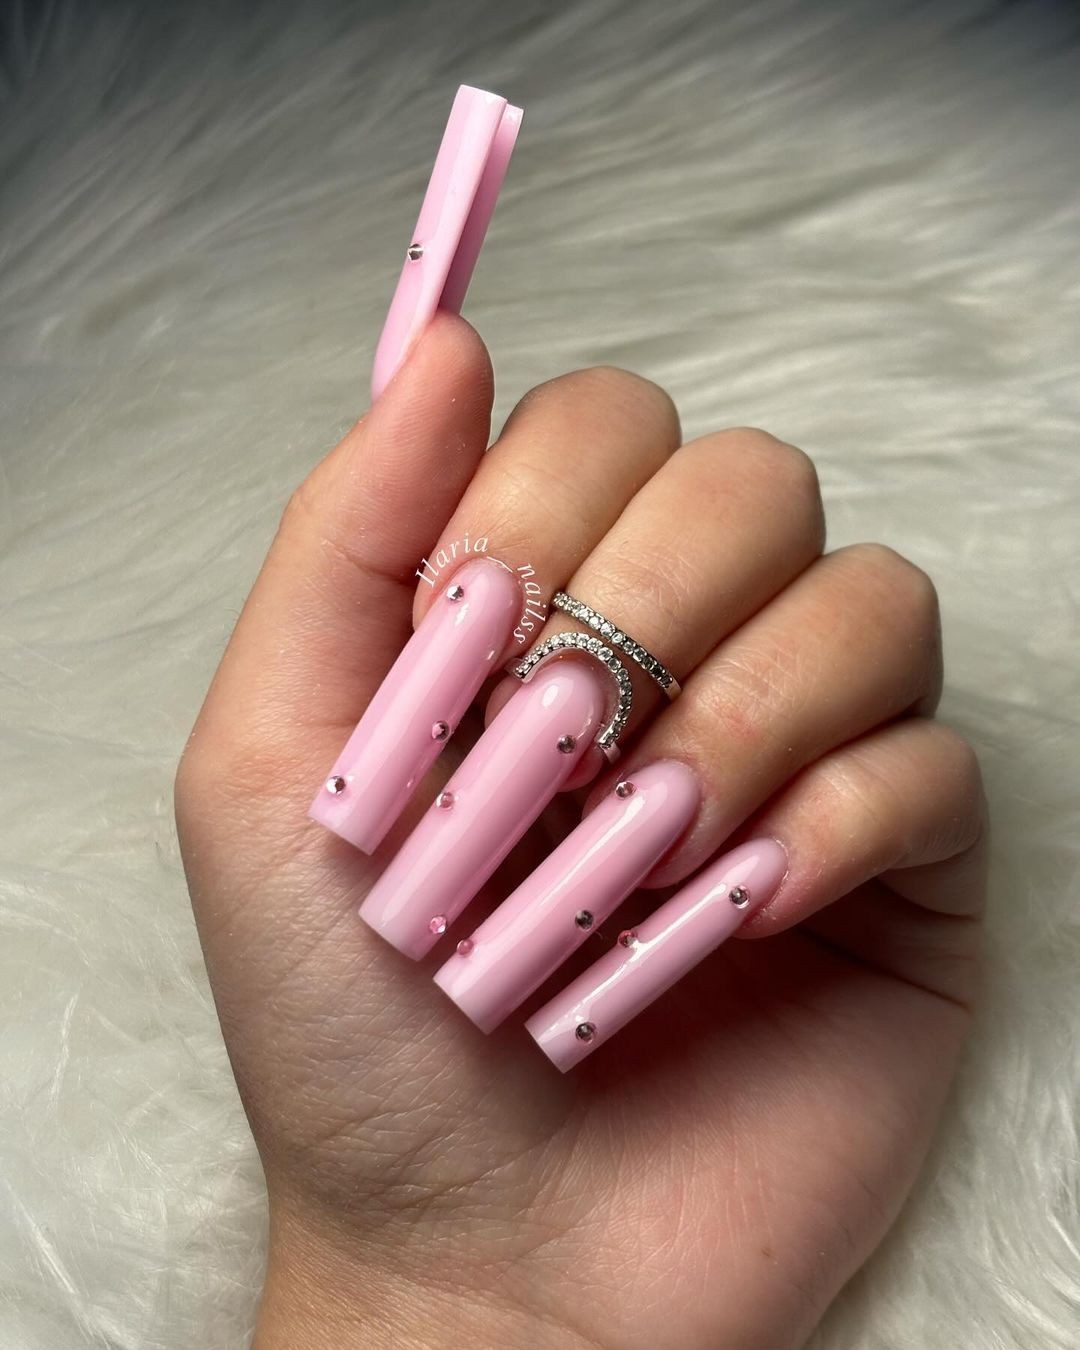
A delicate blend of baby pink gel polish and subtle embellishments creates a charming, understated design. The minimalistic approach is elevated by the judicious use of tiny rhinestones or crystals, which add a touch of luxury without overpowering the overall aesthetic. This look proves that sometimes, less really can be more, as the diminutive gems merely punctuate the simplicity of the pink base.
To achieve this look, you’ll need some basic materials: baby pink gel polish, tiny rhinestones or crystals, and an adhesive that ensures a strong bond. For added expertise, consider starting with a chip-resistant undercoat like Essie’s Gel Couture in soft pink. This will provide a long-lasting foundation for your design. To apply the look, begin by painting on your base pink color and allowing it to cure. Once set, use tweezers to carefully place each small gemstone or crystal onto the nail.
Secure them with glue, taking care not to smudge or displace any of the rhinestones. Finally, topcoat the design with clear polish to seal everything in place and add a glossy finish.
Crimson Edge: Boldness with a Touch of Sparkle
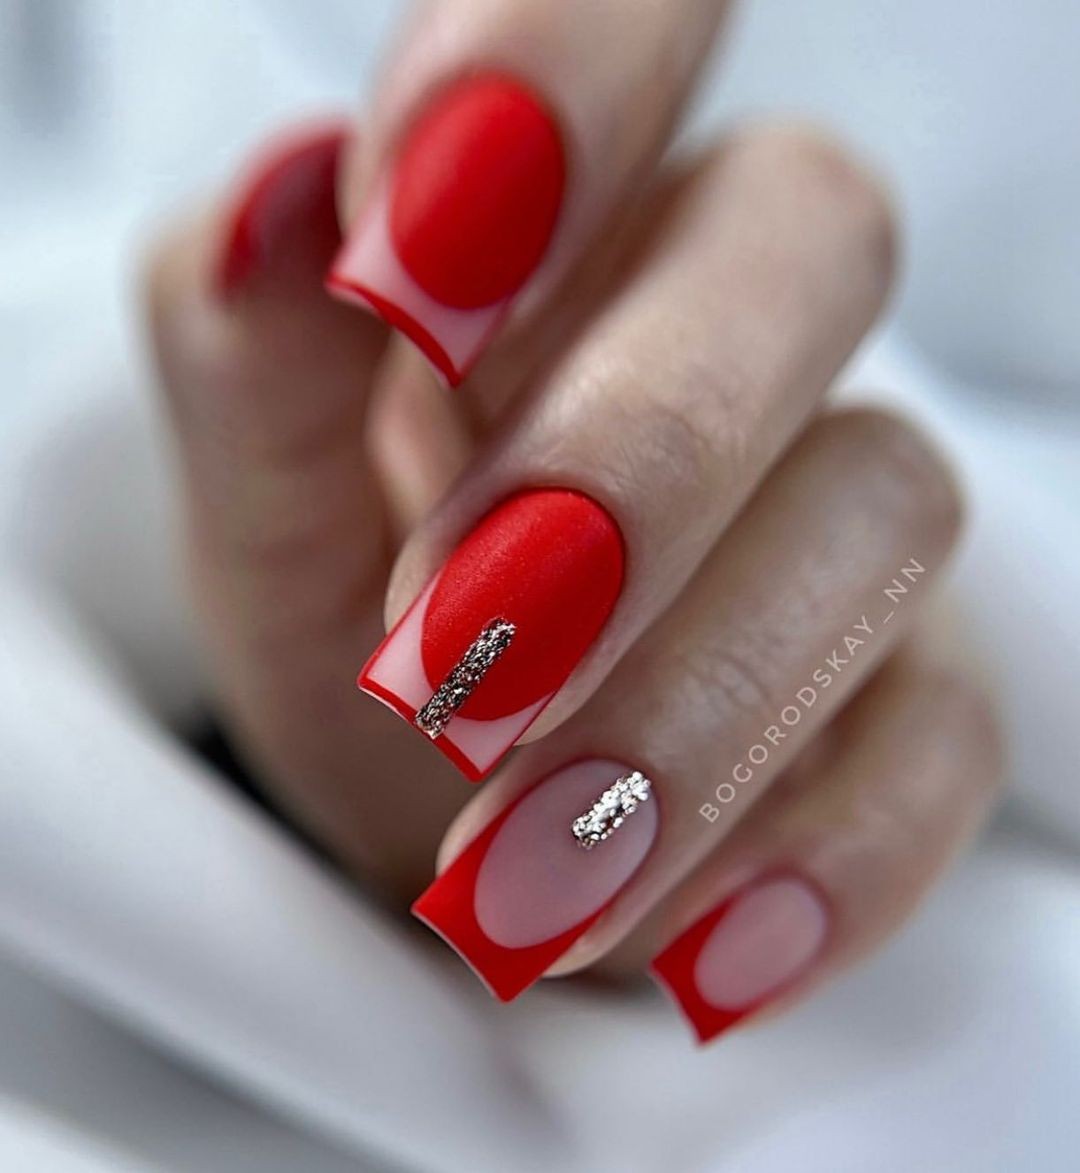
Make a bold statement with this fiery manicure, featuring a deep crimson hue accented with vibrant silver sparkles. This look is perfect for those who aren’t afraid to turn heads.
To achieve this look, start by painting your nails with a matte red polish. Once dry, use striping tape or detail brushes to section off the area where you want to apply the glitter. Apply a small amount of adhesive to this area and then sprinkle on the silver glitter for a precise, striking line.
Pro tip: Use OPI’s Matte Top Coat to transform any glossy polish into a velvety finish, giving your manicure an extra layer of sophistication.
Supplies needed: one bottle of matte red nail polish, some silver glitter, and striping tape or detail brushes.
Wild Accents: Unleash Your Inner Predator

To unleash the wild within, this sophisticated animal print design brings a timeless touch of wearable art to any look. The classic leopard spots on a nude base exude an exotic flair, making it a must-have for those who dare to be bold.
The creative process requires a few essential tools: nude polish, black and brown polishes for the spots, and a fine-tip brush. With these consumables at hand, you’re ready to unleash your inner beast.
For a professional finish, start with OPI’s Bubble Bath as the base color, followed by a fine-tip brush for creating intricate brown spots and ‘C’ shapes. Add black accents around them, then seal it all off with top coat. With this technique, you’ll be roaring to show off your new look.
Lustrous Frost: Sleek and Chic
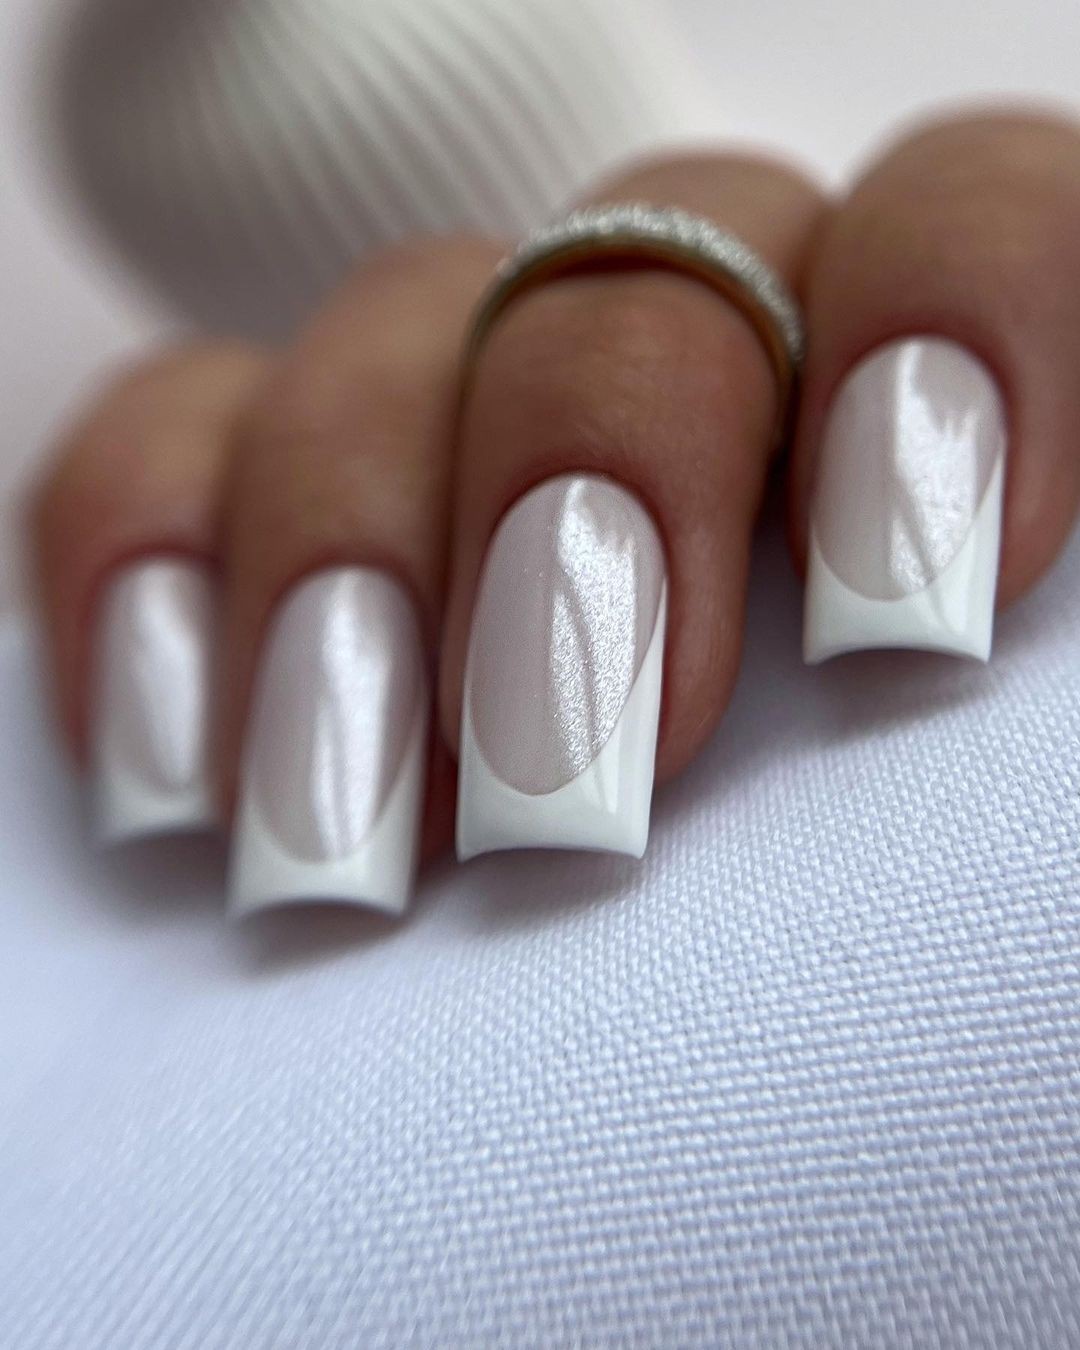
These nails exemplify refined sophistication with a timeless fusion of classic and modern elements. The striking white French tip is elevated by a unique frosted finish that lends an air of understated glamour. The overall effect is both elegant and alluring, making it perfect for any occasion. To achieve this look, you’ll need a few key ingredients: frosted white polish, glossy nude base coat, and fine striping tape.
According to professional recommendations, applying Essie’s matte top coat over a glossy nude polish will help create the desired frosted effect while maintaining its sophisticated appearance and durability. Begin by applying the glossy nude base coat and allowing it to dry completely. Next, use the striping tape to create your perfect French tip shape. Once this is in place, apply the frosted white polish, carefully removing the tape to reveal a stunning finish that’s sure to turn heads.
Oceanic Dreams: Under the Sea Adventure
Immerse yourself in the underwater world with this stunning blue nail design. The varying shades and aquatic plant life accents evoke the mesmerizing movement of the sea. To achieve this look, you’ll need a range of blue polishes, sheer polish for overlay, nail art brushes, and white polish for added details. For a professional touch, OPI’s collection offers a palette of blues that will provide the desired depth. Their sheer top coat can also help create an underwater effect.
To recreate this design, start by layering different shades of blue to mimic the gradients found in water. Use a fine brush to add plant designs and then overlay them with sheer polish. Finish off the look with a glossy top coat for added shine.
Flaming Passion: Ignite Your Look

The fiery nail design is a scorching hot statement piece that’s reminiscent of a blazing inferno. The vibrant red, orange, and yellow hues seem to flicker with an inner flame, drawing the eye in like a moth to fire. This bold look requires some expert technique, but the payoff is well worth it.
To achieve this fiery effect, you’ll need the following materials: gel polishes in shades of red, orange, and yellow, as well as black polish for accenting and a detail brush to bring out the flame design. For the best results, I recommend using high-pigment gel polishes from brands like Gelish or CND, which offer a wide range of colors and long-lasting formulas.
Start by painting a base coat of black to create contrast, then use hand-painted layers to build up a gradient effect that gives the illusion of flames dancing across your nails. Finally, top it all off with a glossy topcoat to give your design a sizzling shine.
Tortoiseshell Elegance: A Walk on the Wild Side
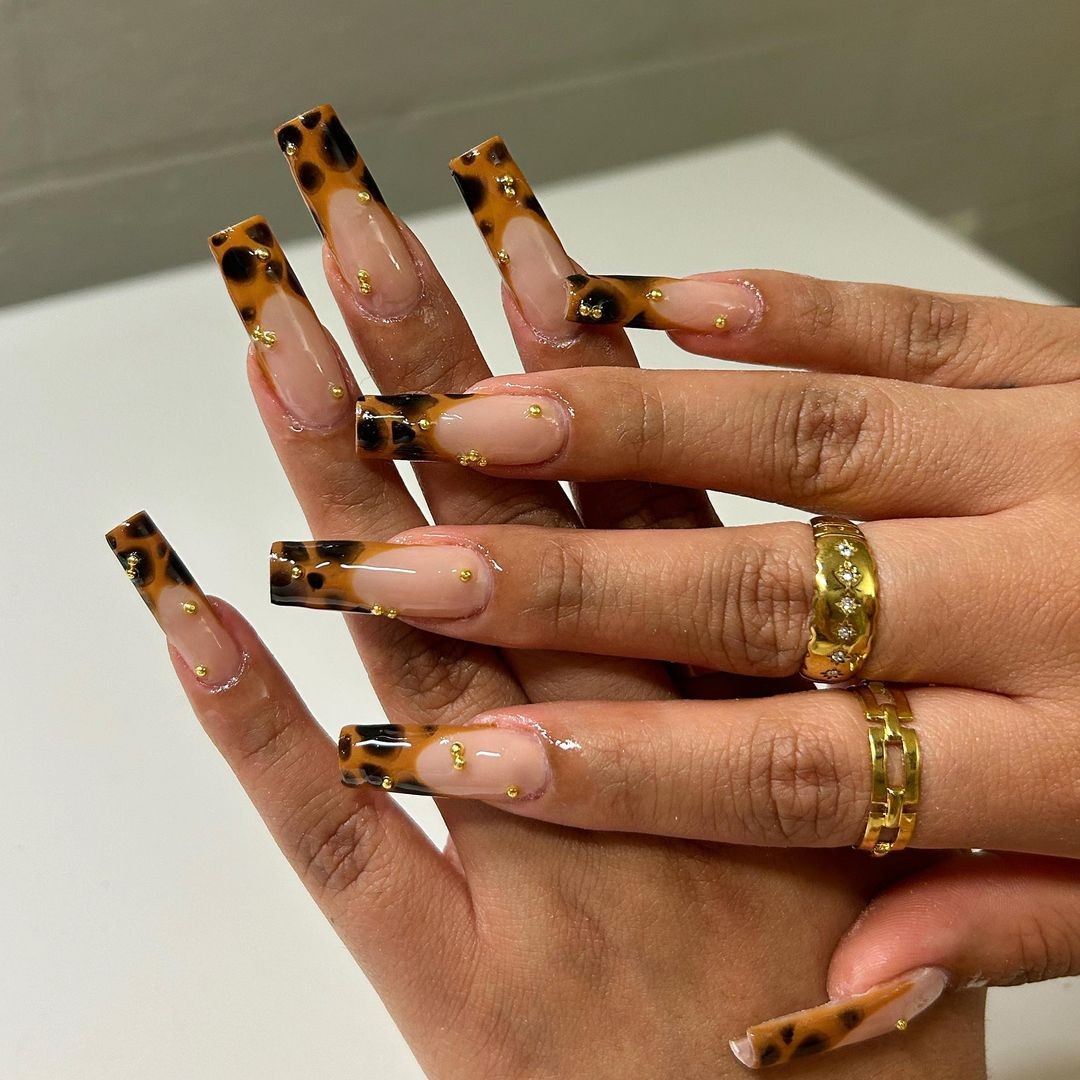
These elegant tortoiseshell patterned nails seamlessly blend traditional charm with modern flair. The luxurious accents of gold leaf add a touch of sophistication to your manicure. To achieve this timeless look, you can use brown and black polishes, gold foil, and a high-gloss finish. Start by layering the brown and black polishes on your nail using a sponge for an ombre effect. Add golden accents randomly with gold foil and seal it all off with a clear top coat.
For added depth, consider adding layers of translucent amber shades as a base coat. Use a thin brush to paint uneven black spots, allowing each layer to dry before applying the next. Finish it off with multiple coats of topcoat for a glossy finish. In terms of tips and tricks, one key to achieving a smooth blend in flame nail art is to dab and smear the colors onto the nail with a sponge for a perfect gradient.
Start with the lightest color and work your way up to the darkest, allowing each layer to dry before adding the next. As for maintaining nail art on natural nails, keeping them hydrated with cuticle oil or similar products can help moisturize and strengthen them. Avoid harsh chemicals without gloves, wear gloves when doing dishes or cleaning, and file your nails in one direction only to prevent splitting. Gel polish isn’t necessary for nail art, but it will certainly make things last longer.
If you do choose to use gel, be sure to let each layer dry before moving on to the next. And if you need to remove gel polish without damaging your own nails, start by lightly buffing out any shine from the top coat layer. Then, soak cotton balls in acetone, place them on your nails, and wrap with foil for 15 minutes. Be gentle when removing the polish, as it should easily slide off from there.